Showing posts with label plaid. Show all posts

Friday, May 25, 2012

You did ask...

Thank you for all your lovely compliments on my latest projects.  Like about 100% of bloggers, The Sewing Lawyer loves comments, so keep them coming!

DIGS slyly asked me how my dress is coming along.  Well, as you can probably guess, my dress is still in flat folds on my sewing table!  However, I've been doing some mental sewing which is all part of the project prep, don't you agree?  

In this case, part of the mental prep is coming to terms with the fact that if the evidence is confronted, by the time I can finish the dress, the just-finished bouclé jacket will be far too heavy to actually wear with it.  So I dug into stash to see if I had a lighter-weight jackety fabric to go with the turquoise wool crepe, and I do.  Surprise!   It's a nubbly, multicolour raw silk tweed.  Not only that, the china silk fabric I had earmarked for lining the bodice of the dress looks kind of nice with the tweed.  So the dress could be next in the sewing line-up.  I'll let you know. 


But in the meantime I started another pair of socks, toe up this time.  One down, one to go.  

Ahem.  I'll take another sewing question.  In response to the post about ripping out sleeves and matching plaid, Lena Merrin asked: "Just curious, your sleeve still has ease even though the fabric stripes are matching, right?"   I suspect you asked because of Kathleen Fasanella's famous post, Sleeve Cap Ease is Bogus.  It's a very thought provoking article but you can match the plaid in a sleeve cap to the jacket body, front and back, even if the sleeve cap seam line is longer than the seam line of the armscye (i.e. even if there is some ease in the sleeve cap).  My jacket is the living proof, but here's my take on the geometry.

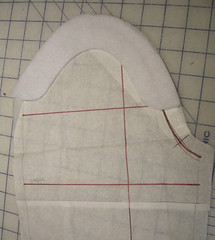
This is a quick and dirty draft from PMB with some pretend plaid drawn on top.  The program drafted a total of 2cm of ease in the front of the sleeve cap.  Because the armscye seam is more vertical than the sleeve cap seams, the distance between the plaid lines where they hit the seam line on the sleeve cap is greater than the distance between the same lines where they hit the seam line of the armscye.  When you ease in that extra distance the plaid lines can be made to match (more or less).

Clear as mud?

Monday, March 5, 2012

OCD?

The Sewing Lawyer is a tad on the perfectionist side.  She has a seam ripper.  And she's not afraid to use it.


Before.


After.

It's a good thing this wool is very thick and forgiving!

Friday, March 2, 2012

Jacket progress

It has been so long since The Sewing Lawyer made a jacket, she thought she had forgotten. But she hadn't.

A forgiving, cushy wool fabric helps.

Remembering to cut it out single layer to (more or less) match the  plaid is also a good idea.  Although this guarantees that the seams practically disappear.

So far so good.

I adapted the pattern to add extra fabric around the edges of the upper collar and lapel facings, since the outer layer of this thick fabric has to travel farther than the under-layer. In this photo, I have pinned the upper collar/facing layer to the under collar/jacket layer, matching the neckline seams exactly.  When the upper collar is folded over, the raw edges are quite even at the back.

I'm going to have to fiddle with the under collar at the leading edge.  As you can see here, it seems longer than the upper collar.  I think I'll trim the curved edge to exactly match the upper collar before sewing the two layers together.  This will avoid any risk of the collar flipping up after it's constructed.


Monday, February 8, 2010

F - I - N - A - L - L - Y! Orange Plaid

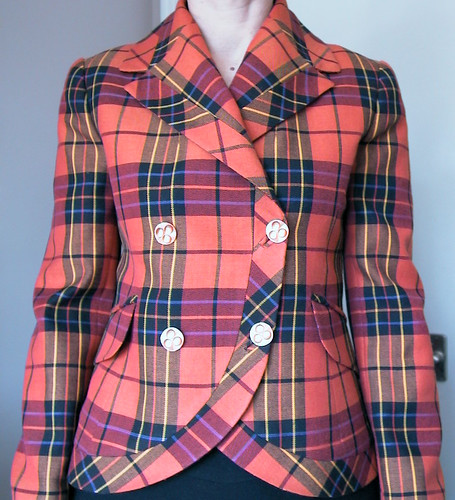
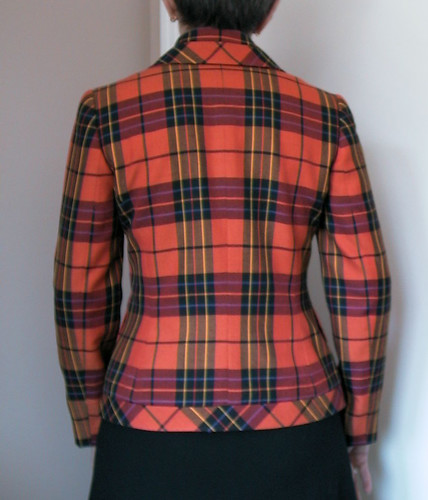
Guess what I'll be wearing to work tomorrow?  Fresh from its photo shoot, I present to you my orange plaid jacket.

To recap, this is pattern #114 from the January, 2009 issue of Burda World of Fashion, as it was then still known.  It has taken an indecent length of time to complete this project but I have several reasons to be pleased, nonetheless.  First, it is a smashing success following a crushing failure, the likes of which had not afflicted The Sewing Lawyer for a very long time.  Second, it's such a sweet little jacket pattern, all curvy and quirky.  Finally, it's such a determinedly cheerful colour!  I've been saving this orange plaid for a few years for just such an outing.

Without further ado, here are some more pictures:

First, those sleeves - a round of applause please!  They match pretty well at the armscye, if I do say so myself!

The lapels are slightly chaotic, but that's to be expected. I just did not have enough fabric to do more than make the bias bands on the lapels symmetrical.  

To ensure the front bands were the same width throughout, I basted a line of stitching at precisely the right width and then sewed the facing to that line, ignoring the fact that the cut edge seam allowances were quite uneven. 

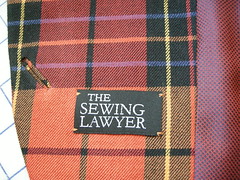
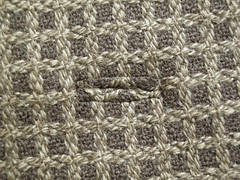
My new label!  In this photo you can also see the inside of the bound buttonhole.  I made a rectangular opening in the facing using 1mm stitches and a small square of silk organza, then invisibly hand-sewed the opening to the back of the buttonhole.

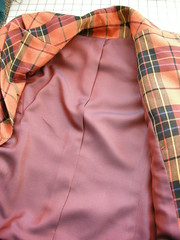
Oh, and check out the orange/blue silk I used for lining the body of the jacket.  Here's another shot of the lining.
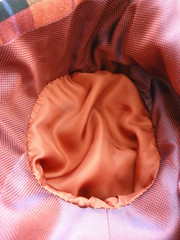


I used orange bemberg to line the sleeves though.  It's slipperier.  I hand-stitched the sleeve lining at the armscye. 
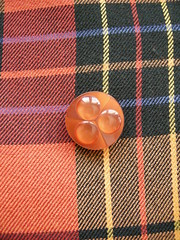

What do you think of these cute buttons?  They are vintage plastic, purchased them from my favorite local purveyor, Micheline Gravel.  Micheline is a fabulous resource and her button basement is UNBELIEVABLE.  We had an international button convention in Ottawa, thanks in part to her, in 2008. 

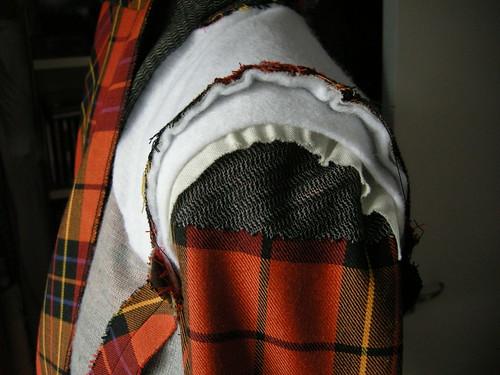
I built shaping into the shoulders and sleeve caps of this jacket.  First, I eased the sleeves using a bias strip of fairly sproingy wool (similar to the interfacing used in men's ties).  The strip should be long enough when stretched to go from the front notch to the back notch (or in Burda's case to wherever the easing should stop, since they only give you the front notch).  Pin it at the top of the cap and then sew just inside the seam line, stretching the strip like mad.  When you have finished doing this, it will look like so:

Amazing - no ease stitching is required.  
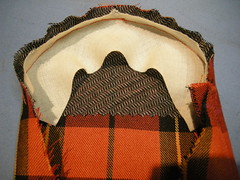
Then, I cut a sleeve head using the sleeve cap pattern, out of some kind of needle punch polyester fleece (cheap quilt batting?).  I am sorry not to be able to supply a brand name.  Maybe you can figure out what it is by these photos.

Some of you may use store-bought sleeve heads.  My question is ... why?  Using the jacket's own sleeve pattern produces a perfect-fitting sleeve head that won't ripple inside the cap.  I hand-sew it just inside the seam line to the sleeve after it has been set into the jacket.  The seam allowance folds inside to provide a little extra soft lift at the sleeve cap. 

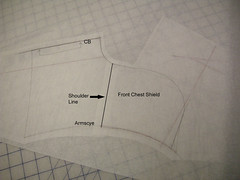
I also made a back/shoulder/chest padding layer out of the same fleece.  Here you see my pattern development.  I've superimposed the back and front pieces at the shoulder seam and the fleece pattern is traced over this.  It hugs the back of the neck and is cut to end at the armscye seam. 

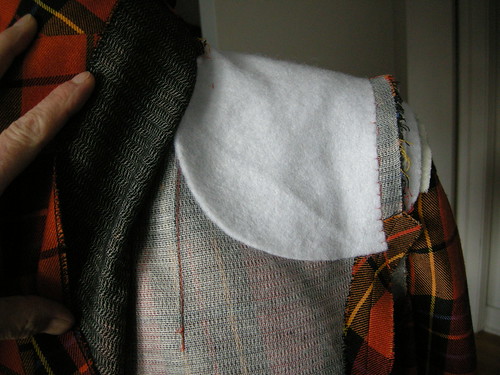
This acts like a very thin shoulder pad.  The pattern called for shoulder pads and I was prepared to add extra layers of fleece cut in the more standard shoulder pad shape, but found it unnecessary.  It isn't bulky but it prevents my bony shoulders from poking up through the jacket.  It makes the jacket more substantial and luxurious, somehow.

Here is the padding from the front.  As you can see I have hand sewed it along the armscye.  I did the same at the neck edge. 

Notice that the front is fully interfaced with a weft insertion fusible. 

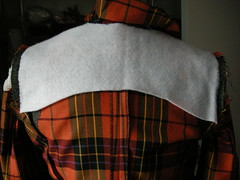
And from the back.  There's no interfacing in the back except at the neck and armscye edges, as instructed by Burda. 

Here's the side view of all the fleecy padding.  In the sleeve cap, notice the bias cut fusible interfacing.  Then the bias-cut wool I used to ease the cap.  Then the fleece sleeve head.  Finally, on top, the single layer shoulder pad.

And finally, some more photos of me wearing it. 

Here's my last plaid-matching observation.  I cut the bias strips for collar and lower back bands to have a centred dominant plaid element.  They can't match because the plaid is not perfectly square.  But they are GOOD ENOUGH!

On to my next project - a black wool crepe high-waisted pencil skirt to wear with my cheery jacket.  Can you believe that The Sewing Lawyer does not already own such a skirt?

Sunday, January 31, 2010

Matching the plaid - sleeves

I'm pleased to report that I have tamed the plaid at the sleeve ... phew!  I did it by the most plodding approach possible.  If any one of you reading this has a better and more elegant method I would love to hear about it.  In the hopes of giving those of you who are better at this than I am a good laugh I will now illustrate my half-witted approach.  In its defence, it did work...

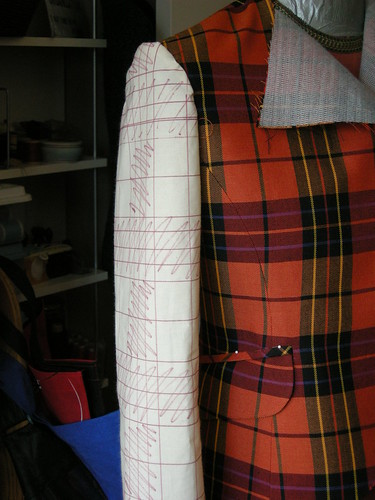
Once I had the jacket body assembled I went back to my muslin sleeve (for once, my muslin was actually cut in plain muslin fabric) and took it apart.  I went back to the traced sleeve pattern which, as you may recall from this post has plaid matching lines on it as supplied by Burda.  Using the sleeve cap matching line I placed the muslin sleeve cap piece on the plaid fabric.  With a Sharpie marker and a ruler, I drew the main elements of the plaid fabric right on the muslin.  I then basted the muslin sleeve into the jacket body. 

As you can see, the plaid decidedly does not match.  Thankfully I was right not to quite trust those apparently-handy plaid-matching lines! 

What to do?  At first I thought I'd just measure the difference by which the sleeve needed to be shifted on the plaid.  You can see that the plaid on the sleeve is consistently lower than the plaid on the jacket body - it was about 1.5cm (5/8") off.  Then I thought it might be a bit tricky to transfer my knowledge onto the flat fabric for cutting - does the pattern piece need to be shifted up or down??  It is a bit confusing, that, even with this photo to remind me. 


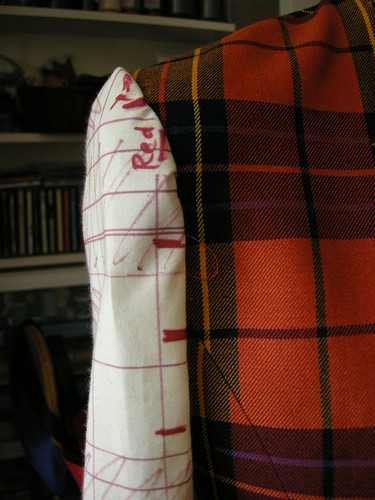
My solution was dead simple.  Once again out came the Sharpie which I used to mark where the lines should be, right onto the muslin sleeve, like so.

I drew marks at the main horizontal elements, but also the vertical ones on the cap.  I've tagged one of these lines "Red" so I would remember which part of the dark plaid box it was.

Once I had done that it was a simple matter to take the muslin sleeve out and transfer the knowledge I had gained through this exercise to the fabric. 

The resulting sleeve, once set in, is pretty good, although not perfect at the vertical elements.  I've read Kathleen Fasanella's posts on sleeve cap ease (she says it's bogus and uses a perfectly matched cap to illustrate - see part 1 and part 2).  She says horizontal matching is impossible with sleeve cap ease, but I had no problem with the horizontal matching even though my sleeve pattern does have ease built in. 

However, I'm still puzzling over how the tailors make a vertical line travel from the shoulder and directly down the front of the sleeve.  In addition to the amazingly-matched sleeve cap in Kathleen's first sleeve cap ease post, check out the striped jacket in the first picture on this post from Made by Hand - the great Sartorial Debate - his right sleeve cap is flawless; the left one appears less so but I suspect this is only because of the angle of the photograph. 

Maybe some day I will be able to manage this but for now, I have to settle with "good enough".  Pictures will follow once I have the jacket a little further along.

Monday, January 25, 2010

Answering a couple of questions

There were a couple of questions in the comments to my last post (plaid pockets & flaps). 

Ann's Fashion Studio asked about my basting thread.  It is a Cansew product but I can't find it on their website.  The label states "silk bonfil" and 40/3.  It is a very smooth and strong thread.  A little research on Google turned up the information that 40/3 is a common weight of glazed cotton thread for handsewing.  It's heavier than regular sewing thread.  Unlike the short staple cotton basting thread, which is designed to break easily for removal, this one doesn't shred.  The cone holds 6,000 yards - I did say it was a lifetime supply!

Lisette M wanted to know if I had ever tried making a flapped pocket which has the flap sewn in overtop a single welt.  I had never seen this type of pocket (but then I don't get out much).  I checked on my favorite tailoring blog, Made by Hand - the Great Sartorial Debate and found out that while the "typical" pocket is the one I made, which is technically known as a "double jetted" pocket with flap, the single welt with flap may be substituted.  There is a picture of one in this post.  If I had done this type of pocket, the pocket flap would have been practically invisible since there would not have been the bias-cut jet to disturb the transition from jacket to matched flap.  Oh well.  In theory, one can tuck the flap to the inside of the double-jetted pocket to change up the look. 
Saturday, January 23, 2010

Plaid pockets & flaps

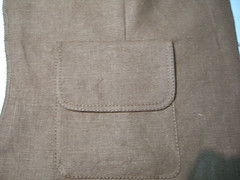
Continuing with my saga of the orange plaid jacket, I am pleased to report that progress IS being made.  I have completed the pockets (double welt, with flaps) and thought I'd check in to show you how I made the welt pockets and flaps.  BTW the flaps match.  I'm pleased. 


To sew the seams so the plaid would match, I used (more or less) the hand basting technique Mary Beth recently posted on her blog - "plaid matching by slip basting".  It worked.  I'm using my lifetime supply of basting thread, purchased on one of my recent trips to Montreal to suss out fabric stores for PR Weekend Canada (weekend of June 18-20, 2010).  The lady in the store told me there were two types of basting thread - the kind that breaks and the kind that doesn't.  She told me the Montreal tailors mostly favored the kind that does not break.  You can give it a good pull, and it all comes out.  I thought, if it is good enough for the Montreal tailors it is good enough for me, and bought this gigantic cone.  Even though I say I hate hand sewing, I'm growing to like my basting thread. 


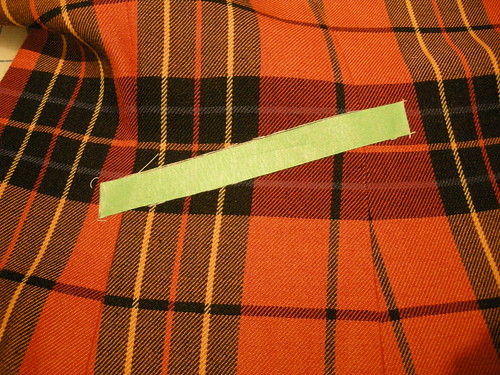
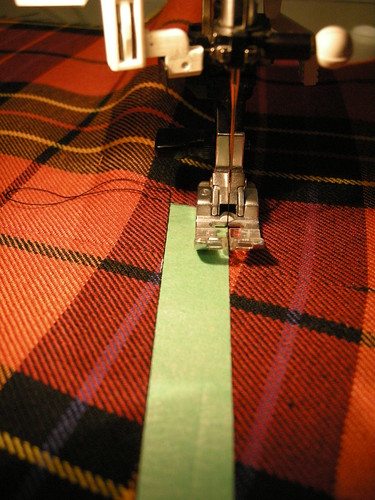
I originally tried to mark the pocket openings using the basting thread - just a running stitch - but I am really not a very good hand sewer and I wasn't satisfied that my markings were precise enough.  Then I had another idea, which I think was inspired by the thread on the Stitcher's Guild about stuff you use in the sewing room that isn't intended for sewing.  We had some painter's masking tape in the house.  I measured the exact size/shape of the pocket opening, cut two (mirror image) in tape, and applied them to the outside of the jacket fronts as shown here. 


This created a highly visible and perfectly straight-edge guide for my machine basting to mark the pocket openings - once machine basted, the markings are visible on both sides. 

At this point, I cut a generously sized bias patch of fabric to serve as the welts, and centred this over the marked box, on the right side of the jacket front. 


Then, working from the wrong side, and using a 2mm stitch length, I stitched a hair inside the basting lines to secure the bias welt piece to the jacket front. I reinforced the ends of the box by going over the stitching with an even shorter (1mm) stitch.  This helps with the next step, which is the most nerve-wracking - cutting through all layers, down the middle of the stitched box and into the corners.  It is very important to clip right to the stitching at the corners, so that when you turn the welt to the inside, the corners will not pucker.


After I clipped, I trimmed the long clipped edges by a thread or two to make them even and as straight as possible, and to create a tiny gap between the cut edges.  This is preparation for the fact that the bias welt piece is wrapped around these cut edges, as shown in the next photo.  The result is that the cut edges reinforce and "fill out" the welt, and there is no bulk around the welt area. 


I had previously trimmed out the seam allowances in the welt "box", from the wrong side, as shown here from the wrong side.  Everything is done to maintain a uniform thickness, as much as possible. 

After turning the welts to the inside and pressing them just so, the little triangles at the ends of the welt box need to be stitched down, and then it's time for the flaps.


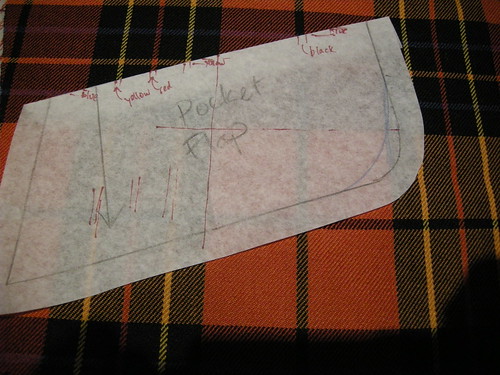
I didn't cut the fashion fabric for the flaps until after my seams were sewn and pocket openings marked.  I matched the plaid for the flaps by placing the tissue paper pattern piece over the markings on the jacket front, and literally drawing the lines of the plaid on it.  To match the plaid I had to ignore the suggested grain line, and to avoid having a prominent dark leading edge on the curved corner of the flap, I re-drew the curve as you can see in this picture. 


To sew the flaps, I used the same technique as shown in my tutorial.  I used lining fabric for the facing of the flap to reduce bulk, and before sewing the lining to the interfaced flap, I trimmed all the seam edges of the flap lining by approximately 3mm or 1/8".  This makes the lining layer smaller than the fashion fabric flap.  In this photo, you can see how, when I pinned the edges together, it is obvious that the two layers are not the same size.  I had to stretch the heck out of the lining layer while sewing along the seam lines. 


Then I trimmed the outer flap layer seam allowances to about 3mm.  If you do this there is absolutely no need to "clip" to the seam line.  Once the flap is turned RS out, the tiny seam allowances squooshed nicely without pleating or puckering.  And, best of all, the smaller lining layer means that the joining seam line rolls beautifully to the inside and the lining will never peek out. 

I'm  using an orange/blue silk fabric from stash for lining.  I acquired many metres of this at a yard sale a few years ago.  It pays to stash good quality fabric when you can find it for a great price!


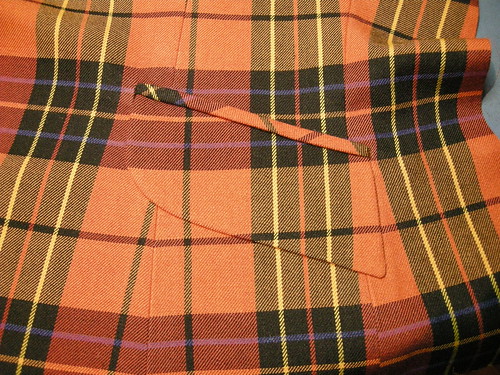
After all components were assembled, here's my almost-completed pocket.  If I had completely pandered to my matchy-matchy inclinations, I would probably have cut the welts on grain and tried to match them too, but I didn't and I think it's fine. 

I won't be able to avoid cutting the sleeves for too much longer ... wish me luck!

Friday, January 15, 2010

Sewing Tutorials

It's fantastic how the www works, really.  Until about 5 years ago I used to sew in solitary splendor although obviously I knew there were others out there.  Then I joined PatternReview and started reading blogs.  Over time, I came to realize that through communication on the internet, I had improved my sewing and been introduced to a whole lot of new sewing information and resources. 

Among which are on-line sewing tutorials.  The best collection of them that I know of can be found on Sigrid's blog. I was thrilled when Sigrid contacted me to ask if she could include a few of my own photo-tutorials on her site.  In future I'll post tutorials on this blog as they occur to me.  For now, here's a list of the ones I've prepared and links to Flickr where you can read through them.  Enjoy!  If you have any questions about these techniques, feel free to ask. 

Faced fly front zipper.  This is one of those construction methods that looks like it is impossible.  But it is not! 


Bound buttonholes.  The method I illustrated is actually overkill - you don't need to sew all those parallel basting lines because once you sew around the box and slash the opening, cutting right to the corners, the patch forms perfect "lips" when it wraps over the cut edges. 

I'm going to be making bound buttonholes in my plaid jacket and will update the tutorial then. 


Beltloops.  This method doesn't rely on remembering to sew one end of the loop into the waistband (I always forget to do this!), and it doesn't require topstitching the loop to the garment - all attaching stitches are concealed and there are no raw edges.  More magic!


Bellows patch pocket.  I made this tutorial to translate Burda's somewhat incoherent instructions into something understandable.  The bellows are decorative on my linen jacket, but this technique would work for real cargo pockets as well. 


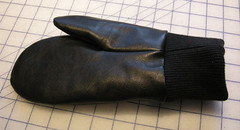
Leather mittens.  Mittens are sooo much warmer than gloves, and leather mittens are windproof and look nice too.  These are made from an old leather skirt found in a thrift shop.  The tutorial includes a birds-eye view of my pattern as well as all construction techniques.


Lined pocket flaps.  This is another technique I'll use on my plaid jacket.  To reduce bulk, use lining fabric to face the flap, and to ensure the edges are hidden, make sure the lining layer is slightly smaller than the outer flap.  The seams will roll automatically to the wrong side. 

Wednesday, January 6, 2010

Did I not promise plaid?

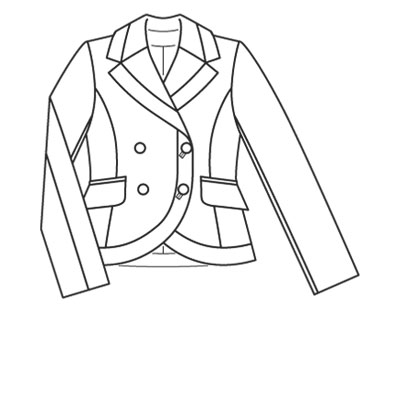
Well, they do say that if you fall off, you should get right back on ... whatever it was you fell off.  I hope I'm in the process of recovering from the fall as I work on my new latest project, the plaid Burda jacket, #114 from the January, 2009 issue.

Here's Burda's version.

I loved this as soon as I saw it and it has been lurking on my "to sew" list for a year now. Birgitte was very prompt in February with her version, also in plaid and just gorgeous in every way.  For me, new ideas (plaid double-breasted jacket, bias plaid trim, diagonal bound buttonholes, very quirky collar/lapels) need time to percolate.  So a year later, I'm finally getting around to it. 


At some point in the year a piece of fabric buried in the stash called to me.  It called LOUDLY.  It said it was a plaid ... no - it SHOUTED that it was A PLAID!  And it thought it could be this jacket.  

Matching the plaid on a princess seamed jacket with set in sleeves is not a task for the faint of heart.  I have a long history with plaid and I am firmly in the slightly manic matchmaker camp of sewers.  Another of my school home ec projects was a tailored wool coat.  The teacher instructed us to go out and find a pattern for a coat or jacket and wool fabric.  She suggested plaid might not be a good idea, but if we fell in love with a plaid, to make sure it was an even plaid.  From a document on plaid at the University of Kentucky website:


"An even (balanced) plaid has the same lines,
spaces, and colors on the left and right and the
same lines, spaces, and colors above and below
a center or dominant line. Even plaids will
match in both the lengthwise and crosswise
directions.

NOTE: For the beginner, an even plaid is the
easiest to work with and will build one’s
confidence.
"

You already know from this post that as a beginning sewer, I would sometimes pick challenging school projects.  In this case, I ended up with a plaid which was uneven in both directions ("Different from left to right and above and below a dominant line").  Just as my grade 8 teacher must have done, my grade 12 teacher sighed when she saw it, and then, bless her heart, she methodically started to show me how to plan the garment so I could match the plaid at every possible juncture.  Everything was cut single layer and as I recall, even the lips of the bound buttonholes matched the coat fronts.  Success with uneven plaid is truly a confidence-building experience. 

But I digress.  

A couple of days ago I started trying to figure out how the Burda jacket pattern would work with my plaid.  After moving some furniture around, I laid out the fabric on the floor, single layer, and tried various placements.  The crucial places to match plaid are the CF and CB (intersecting horizontal and vertical elements should meet precisely on vertical seams/edges).  The CB of the collar can usually be made to match with the CB of the jacket body.  Obviously wherever there are shaping seams, the plaid design will distort somewhat at the seams, but despite this thought has to be given to how the main elements of the plaid will interact at all vertical seams in the body of the jacket, and at the armscye-sleeve seam - the goal being to keep the general rhythm of the plaid as constant as possible, recognizing that perfection is impossible (for example, the plaid will not match at the shoulders unless you have an extraordinarily symmetrical pattern, which mine isn't).  

It probably should go without saying, but I'll say it anyhow, that the matching point is the seam line and not the cut edge of the pieces.  It's helpful to have that line drawn on your pattern pieces when laying out the pattern on the fabric. 


-- Oh, did I not mention that the plaid was orange, as well as loud? 

When this photo was taken I was toying with the idea that the CF and CB should be on the dominant dark vertical line of my more-or-less even plaid.  If you click on the photo to enlarge, you can see I had darkened the grain lines, critical seam lines, and CF line.  The CB neck point is lying so the seam line is exactly in the middle of the dominant vertical line of the plaid.  

Horizontally, I was paying attention to the built-in Burda horizontal plaid-matching lines (you can see them in the body pieces below the waist, and on the front and sleeve at the armscye near the notch).  I also thought about where the bottom of the jacket would hit on the plaid.  Because there's a bottom band which will be on the bias, I concluded this is less important - it so happened that the dominant horizontal element is just above the band which seems OK to me. 


The jacket has welt pockets with flaps and so I will also try to match the flaps to the jacket body.  Because the pocket opening lies on 3 pieces (front, side front and side back), it will be impossible to completely match the flap to the body.  The important part is obviously the front.  I therefore paid attention to matching the vertical as well as horizontal plaid lines as closely as possible at the point where the pocket markings cross from front to side-front. 


Eventually I realized that the WOF jacket was cut with the CF falling on a non-dominant vertical line and I decided that would work better.  So I shifted the pieces over and now the dark vertical in the middle of the orange lines is at the CB and CF.  It seems more subtle, that is if anything made in orange plaid could be subtle.


The real matching challenge in this jacket will be the armscye-sleeve seam which always drives me nuts, but I'm also thinking ahead to the interesting question whether (as Birgitte did, whether by accident or design) I can get at least some elements on the bias edge of the lapel to match the same elements on the jacket fronts.  (Or whether I care...)  For now, I've only cut out the body pieces and under collar.  Once the body of the jacket is constructed I can make more informed decisions about how to cut the sleeves and other pieces.  


I'll leave off with a sneak preview of how the plaid intersects at the front princess seams.  This is just pinned together, but isn't it exciting?

Tuesday, December 29, 2009

Update

In the latest sewing news chez The Sewing Lawyer ...


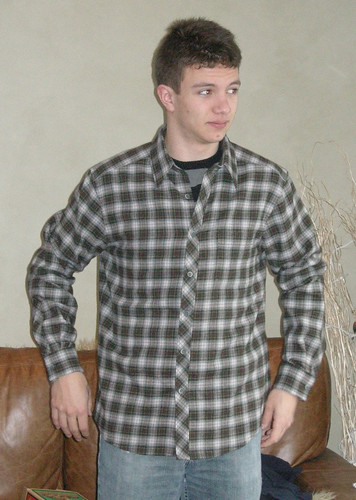
The Christmas shirts were well received.  The boy's shirt fits as intended.  I made him a 52 (Burda equivalent to US size 42) which I figured would be a size too big.  Now having measured him, it's 2 sizes too big but just the way he likes it - loose. 
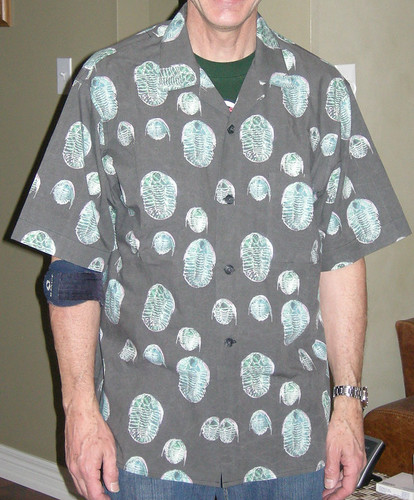
Same for the Trilobite shirt.  I knew exactly how it would fit, having made this pattern gazillions of times before.
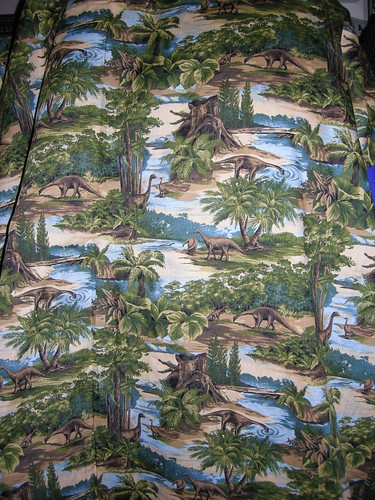
In other developments, my husband's legendary shopping skills turned up an astonishing "Hawaiian" print at one of his favorite thrift stores.  There's enough for another Aloha shirt, at least.  Look closely.  Evolution?


I am avoiding working on my coat.  Sometimes this happens.  Often it ends well.  If I persevere, and finish the project, it may defy my worst fears and become a loved and much-worn object.  I pride myself on the fact that I VERY rarely end up with UFOs in the sewing room.  However, keeping at some projects is a serious chore, and I'm afraid this is one of them. 

My last-week-of-2009 resolution is to finish it well before January 1, 2010 so I can start another more fun project.  I had better get on with it!

Next up is this jacket from the January 2009 issue of Burda, which I am going to make in a loud orange plaid.  There.  If I say I'm going to do it to a big enough audience, I'll have to, right?


Surely that will be more fun than my coat...


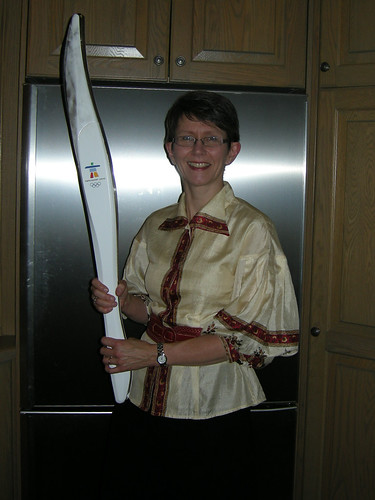
In the non-sewing-related category, this is the closest I'll get to the 2010 Winter Olympics that get underway soon in Vancouver, British Columbia.  At my brother's house, one of his guests had been selected to carry the torch in the Olympic relay.  There are 12,000 people participating in this rather strange exercise which sees the torch carried through more than 1,000 communities over 106 days.  Each participant gets a white track suit, hat, mitts and the torch he or she carried.  The runner I met brought her torch to the Boxing Day party and of course, I had to have my picture taken with it.  (I'm wearing a blouse I made from a sari - reviewed here.)