Showing posts with label tutorials. Show all posts

Monday, June 6, 2011

Unruffled

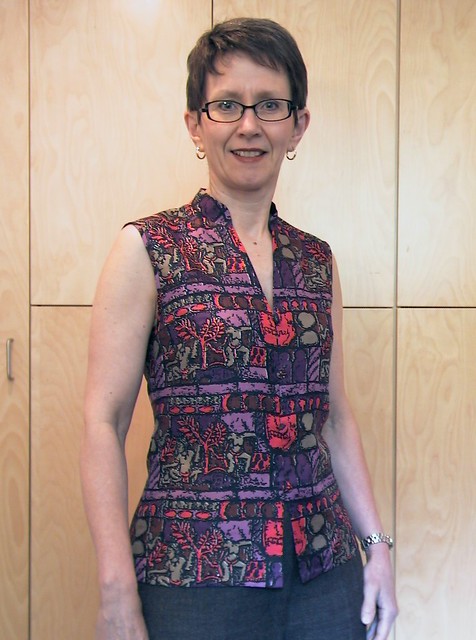
The Sewing Lawyer is not really sure what drew her to the ruffled blouse in the April 2010 edition of Burda Magazine in the first place.  Probably it was not the ruffles.  Nor could it possibly be the side zipper opening, or the deeply plunging front neck.  All of these features  have been eliminated or significantly altered in the Sewing Lawyer's version.  She did give the ruffle a try, despite knowing that it would not be satisfactory.  Forty or so years of sewing experience does sometimes enable one to predict when some feature of a garment will not be satisfactory.  The Sewing Lawyer fatalistically reacquainted herself with her trusty seam ripper.

First, she tried cutting the ruffles down, dramatically.  Remember the attack of the ruffles, take 1?  Well, take 2, while marginally better, was not enough of an improvement.  Off they came ... again.

In the end, the Sewing Lawyer's version of the (formerly) ruffled blouse is both less and more.  It's ruffle-less, zipper-less, and less plunging.  It's more buttoned up, more in keeping with the usual style around here, and will be worn more too.  It's all good!


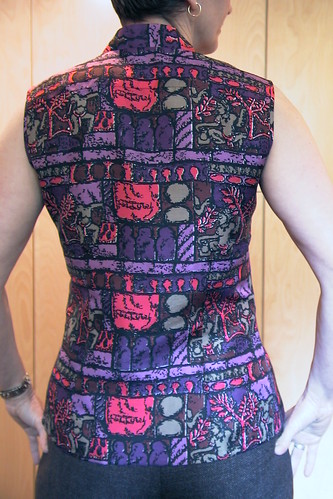
Here's a view of the back.

I'm happy with the print matching.  There is a yoke seam at the upper back...

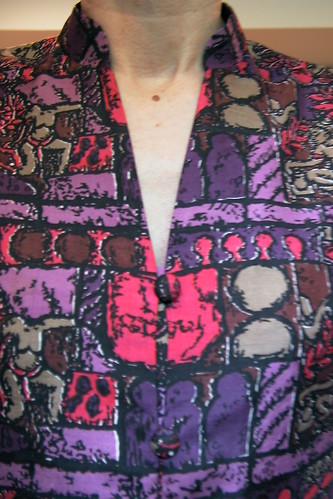
I'm also happy with the fact I was able to re-use the exquisite button loops and self-covered buttons from the plug-ugly skirt that this top was refashioned from.  (I don't think I gave details earlier.  This project started life as a thrifted floor-length skirt made from Thai silk.  A button-up dirndl, floor length, is not a great thing.  However, a dirndl will yield quite a lot of usable yardage, it had these beautiful tiny loops and self-covered buttons, the silk has a great hand, and I loved the quirky print and the colours.  Finding that the skirt was slightly musty, after taking it apart I threw the pieces into the washing machine.  It came out perfectly.)


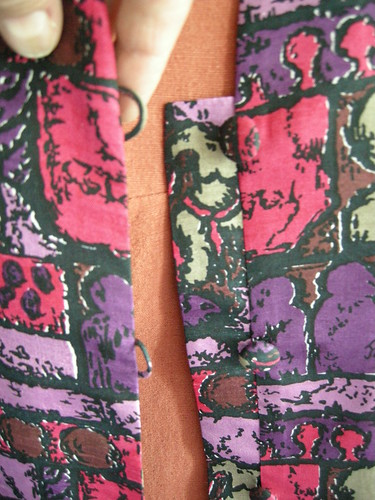
I turned the original cut-on-the-fold front into a button-up by virtue of adding a seam allowance at CF instead.  Instead of an overlapping front, I added a little shield to sit behind the loops.  It is barely visible, as you can see to the right, which means it was necessary.

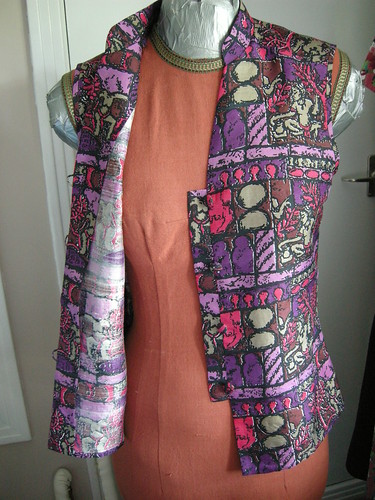
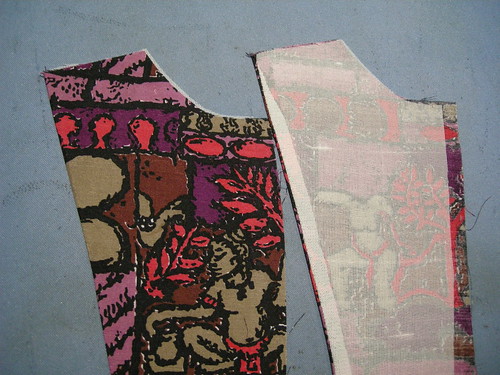
Some additional details.  First, the armhole edges are finished with a very narrow self-fabric bias strip.  I didn't initially read the magazine instructions (as usual) and thought the strip would make a little facing.  When I went to apply it I realized it was too narrow. Then I read the instructions which, as usual, are slightly incomprehensible.  If I correctly understand them, Burda wanted me to trim off the seam allowances at the armscye and encase them in a double-folded strip which I would be sewing in one pass.  Yeah right.  Instead, I cut off the seam allowances, and sewed the unfolded bias strip the desired distance from the raw edge, right sides together.  I then folded that over and, on the wrong side, pressed the raw edge up into the fold.  Finally, I stitched in the ditch from the right side, catching the wider folded edge underneath.  You can see both inside and outside in the picture to the left.

Second, like several other bloggers of late, I clean-finished the facings using fusible interfacing.  I do not know who to credit with this technique.  It's fantastic - both easy and producing an obviously superior result.  There is a tutorial over at Sigrid's site (from Lori V's blog, Girls in the Garden) but, thinking a few more details would help, I took some pictures while this was in progress.

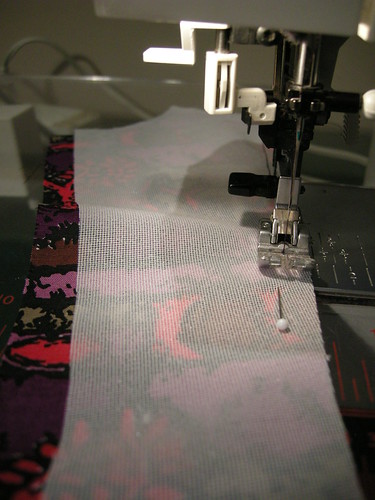
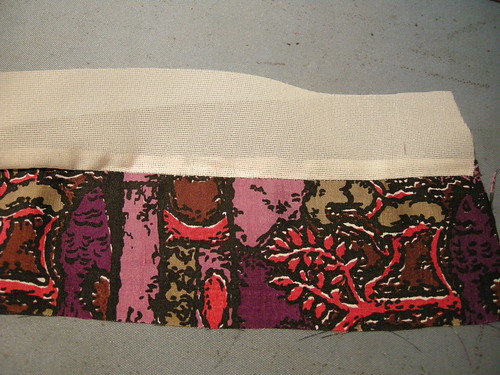
First, cut your fusible as usual using the facing pattern piece.  Lay the unfused interfacing on the facing, right sides together (that means with the glue side NOT against your fashion fabric).  Sew the 2 together along the edge(s) of the facing which will not be sewn to the garment edge.

I think my seam was about .25" which ended up being about right, because this made the fusing a little bit easier than it might have been, I think.

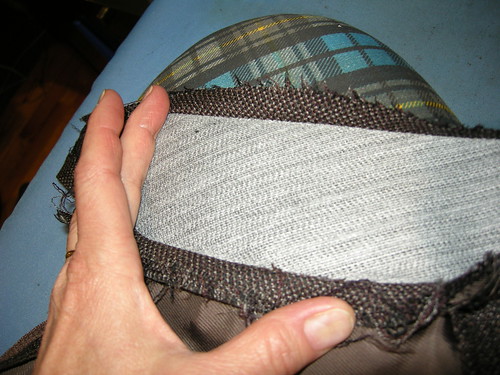
So here is the beginning of the fusing process, in which I use the seam allowance to help me open the seam completely and cleanly.

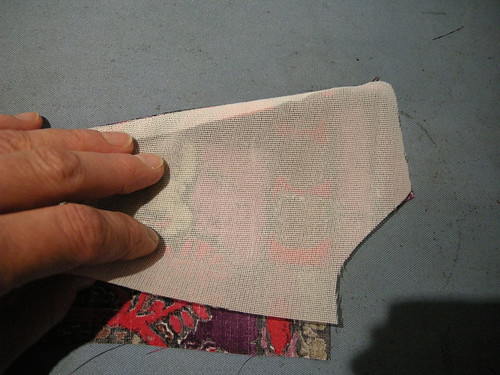
I started the fusing by opening the seamed unit, and fusing in the seam allowance only while gently holding the fusible interfacing taut and away from the facing.  In the photo to the right, the seam allowance is fused to the right, unfused at the left side.  Obviously you have to do this carefully and just with the tip of the iron, to avoid sticking your interfacing to the ironing board cover.

Then carefully fold the interfacing over so the seam is barely on the fused side and the interfacing won't show from the right side.  Fuse, starting from the seamed edge.

This fusing technique is trickier than the usual where you can take care of any misplacements by trimming away the fusible edges.  But it's worth it.  You end up with a perfectly finished edge.


My next project?  I'm planning to take Vogue 8718 out of its envelop and contemplate its mysteries.

Monday, May 2, 2011

Unseasonable


It happened again.


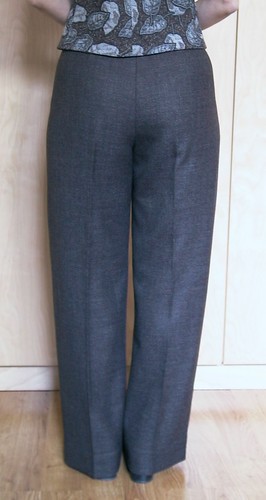
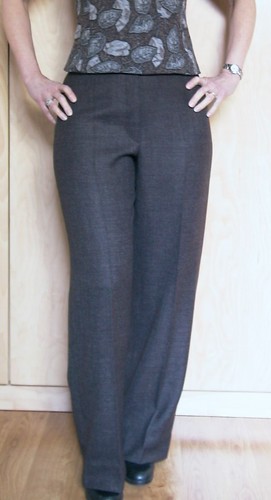
Lined wool pants just in time for ... spring.  Doh!  Oh well, maybe we will have some more unseasonable cool weather before summer hits.  Otherwise, these will wait quietly for cooler weather, and in October or so, the Sewing Lawyer will be glad to have them.

These are the same fabric as the last project: a sheath dress.  I should finish a top to wear with them before turning to summer sewing.

(I believe the legs are both the same length despite the evidence in the photo of the back.  I hemmed them quite long, so I can wear them with heels.)

These pants are at least the fourth pair in my closet made from Vogue 7881, a Claire Shaeffer pattern.

They are plain, comfortable, and versatile.  What's not to like?

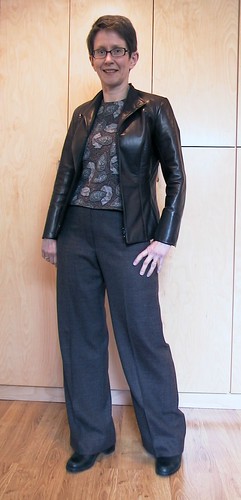
And they look pretty good with my leather jacket.


Strangely, since hand-sewing is not my favorite thing, all four pairs are from the "couture techniques" side of the instructions (which are lengthy and, like all the Claire Shaeffer patterns, very informative and helpful).  Really, the only special features of the "couture" version are that (1) the wool fabric is eased into the waistband instead of darted and (2) the zipper is sewn in by hand (yes really) and (3) the waistband is constructed mostly by hand.

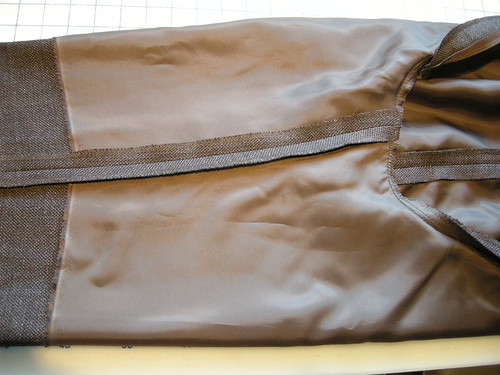
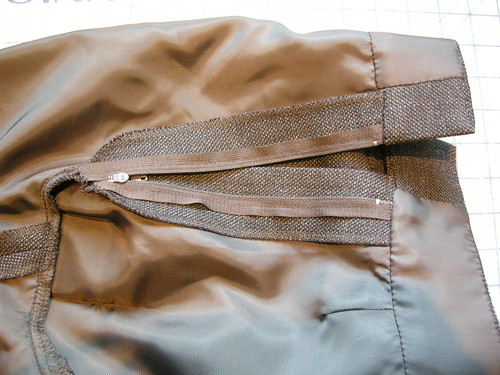
The pattern does not call for lining but I added a half-length underlining of Bemberg.  I cut it on the cross grain and use the selvedge for the lower edge of the underlining.  No bulk or show-through. I don't fuss too much about how long the half-lining should be.  I just place the pattern pieces on the cross grain to get maximum length and so they have the same leg length.   It generally turns out that the lower edge hits around my knee.

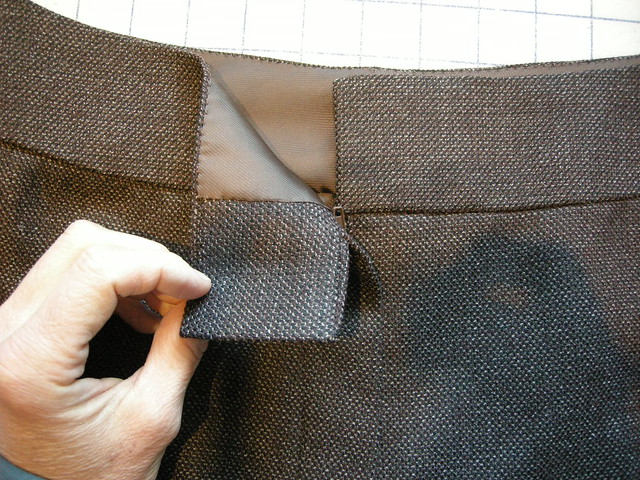
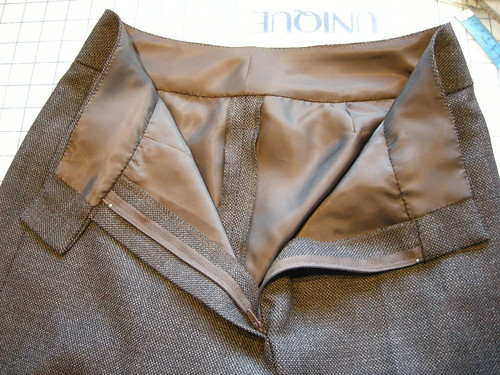
Here is what it looks like at the fly.

Notice there is a tiny dart in the underlining but the outer fabric is eased only.  I did these steps separately before basting the underlining to the pants pieces, after which I treated each piece as a single layer.

I particularly like the hand-finished waistband.  You know those blumpy corners and wavery, not-square ends that result from sewing a waistband right-sides-together, and then turning it right side out?  There's none of that.  The couture technique that Claire Shaeffer teaches produces sharp corners, right angles, and uniform width.  And it's thin, flexible, and looks great inside and out.

(Later, I added a couple of pant hook and bar closures, exactly like these.)

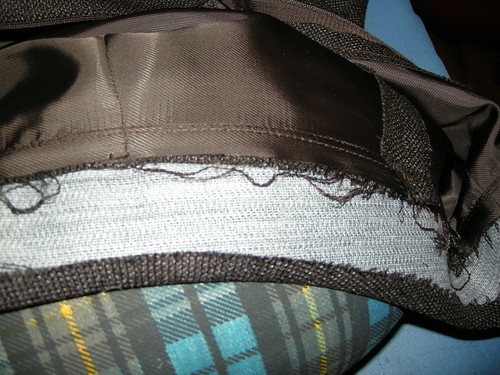
First, interface the waistband to the seam lines only.  The  pattern includes separate pieces for the waistband interfacing but you can easily remove the SAs on any waistband pattern pieces.  (NB:  To use this technique you do need a seam at the upper edge of the waistband so would have to further adapt a pattern which has a straight grain waistband with a folded upper edge.)  I used two layers of fusible interfacing to ensure stability, since this is a curved piece with the CB area on the bias.  I cut one with the straight grain at the CF and the other with the straight grain at the CB.  As a result, the whole thing is totally stable and stretch-proof.

Press the upper SA of the waistband to the inside, along the line of the top edge of the interfacing.  Then attach the waistband to the pants by machine.  Press so that all SAs at the waist seam are facing into the waistband.  To preserve the curve of the pants at the hip I've pressed this seam using my pressing ham.

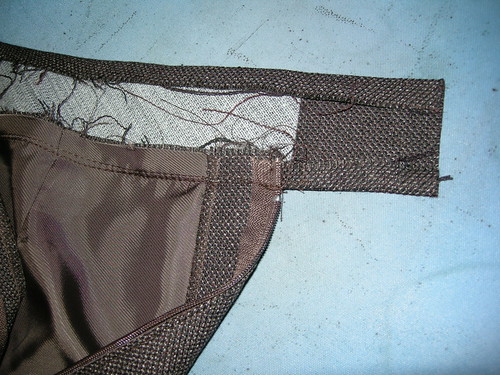
The 7881 waistband piece is extra long with about 6.5cm (2.5") extending beyond the  finished end of the waistband.  This extension is not interfaced.  Press the lower SA up on this piece as well.  Notice that the extension is very slightly tapered so that it is not as wide as the waistband itself.

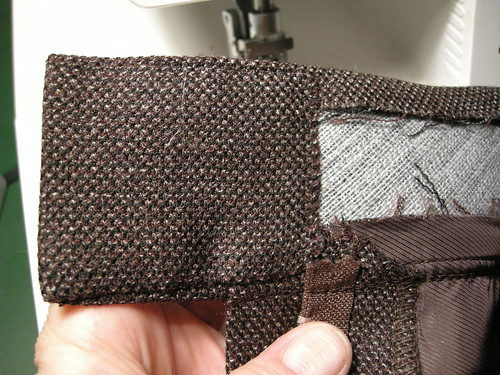
Fold this extension along the leading edge of the interfacing.  See the nice square corners?  See how the slightly narrower width ensures that it will not peek out above or below the waistband itself?

Hand stitch the extension down invisibly along the 3 edges to secure it to the waistband.  This is the other end, which on this pattern has a significant overlap.

The waistband facing is cut from lining fabric.  This keeps the waistband nice and thin.  Again, 7881 has separate facing pieces.  To adapt this technique for another pattern, the only point to note is that the facing pieces need to be shorter than the waistband, because of the long folded-back extensions.

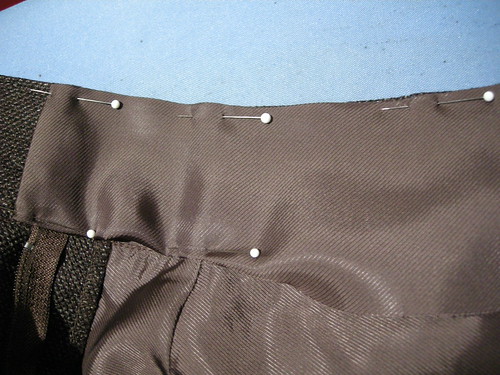
After sewing the CB seam, press the upper edge seam allowance down on the facing.  Then pin this edge to the folded-down upper edge of the waistband, keeping the facing edge a smidge lower than the upper folded edge so it will be invisible from the outside.

Fold under the leading edge SAs, ensuring the edge of the waistband extension is well covered.  Then fold and pin the lower edge along the seam line, ensuring the facing lies nice and flat.

Hand sew the facing to the waistband, using a tiny fell stitch.
Done.

Sunday, April 17, 2011

The exception that proves the pressing rule

Mary left a comment on my last post asking why I don't press the seam (attaching the garment piece to facing or lining) before understitching.  Isn't this inconsistent with the usual rule that you must press every seam before going on to the next step?

Great question!  Like Ann (Gorgeous Things aka The Pressinatrix) I am a firm believer in pressing.  During construction.  Pressing while you go makes a HUGE difference to the look of the finished project.  Not pressing will 100% guarantee that your finished garment will look home made in the worst way.  This is why I've invested in a great iron, a ridiculously expensive ironing board, and a lot of pressing equipment.

So yes, Mary, always press a seam before doing anything else to that seam.

Except ... experience tells me that you get a better result if you do not press before understitching, and that in this specific situation, pressing is a waste of time.  They say an exception proves the rule...

Why?  Well, bear with me as I return to the goal of understitching, which is to exactly preserve the shape of the sewn seam by allowing you to easily fold the two pieces along their curved edge.  The finished edge will ideally be perfectly curved with no rippling, unevenness or other distortion, and it will lie perfectly flat with no bulk.

The problem is that the cut edge inside a sewn oval (such as the neck or arm opening) is always smaller than the seam line, as illustrated.  This means the seam allowances have to be stretched (distorted) to be folded back, and will always want to unfold themselves.  They will take the thinner (lining) or shorter (facing) edge with them.

Pressing this edge without understitching just doesn't produce as good a result.  Understitching is more aggressive with the pesky seam allowances than pressing.  It sews them down flat in their stretched position, rather than just folding them back.  Sewing the seam allowances to the lining or facing also firms up the curved edge.

OK, so why not press first and then understitch?  Well, because you just don't need to.  It's an inferior way to achieve your ultimate goal.  And pressing first does not help you understitch.  In fact, it tends to make the job a little bit more complicated.  It's hard to press this type of opening without building in some distortion.  This can be from stretching the fabric as you try to open the curved seam exactly, but more typically in my experience you will find that you have pressed in a fold which is not precisely along the stitching line.  If you are going to understitch (always!) you end up having to correct this fold as you understitch.

So pressing (but ONLY in this one situation) is (1) unnecessary as well as (2) difficult and (3) counterproductive.

Clear as mud?

More about the sheath dress

Thanks to those of you who signed up to follow my blog (now at 209 210, woo hoo!), and for all the very nice comments on my last post!!  Getting your comments and feedback is the nicest part of blogging so please keep them coming!

 I was going to write a tutorial for how I finish a facing around a zipper.  However, there are several excellent tutorials already illustrating this technique on Sigrid's sewing tutorial site (which is a superb resource, if you don't already know it), so I decided not to reinvent the wheel.  

In particular, I recommend Sherry's clearly-illustrated tutorial.  This technique can also be used to finish the top of any zipper opening.  Kathleen Fasanella has published a great set of instructions for finishing a lapped zipper and centred zipper in the same basic way.  Another variant is the faced fly front zipper - I shamelessly recommend my own tutorial for that, which is also linked at Sigrid's site.

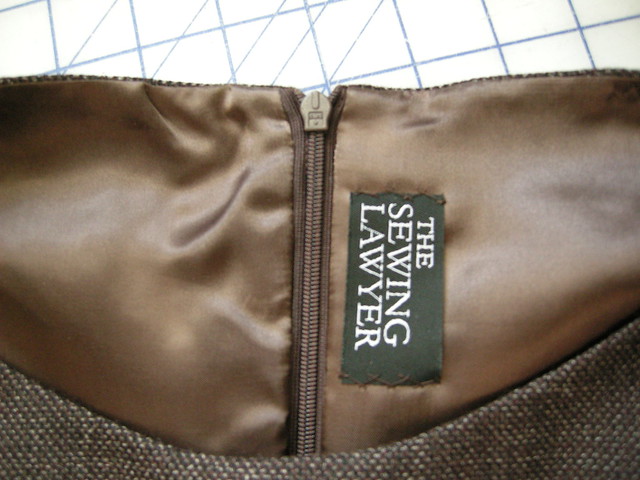
To the left, you can see how neat and clean the inside is, as a result of this easy technique.

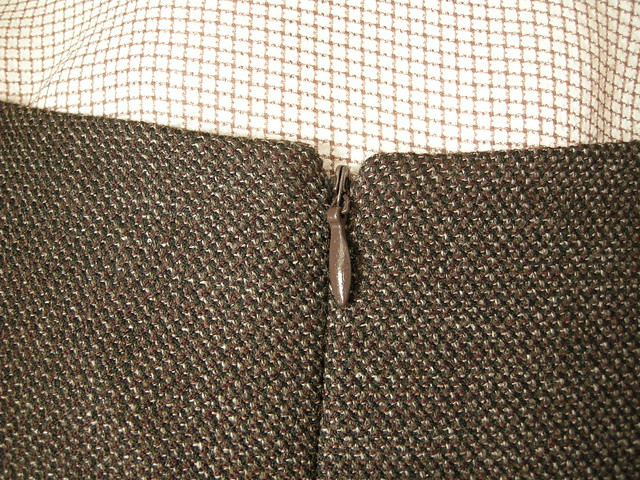
The zipper looks as clean from the outside.  This photo also shows the fabric from my sheath better.  At least on my monitor, the colours are accurate.  The fabric is slightly tweedy.  It's got the extremely dark coffee colour of my leather jacket embedded in it along with a tan and a rich reddish brown.  The fabric is a suiting weight wool, with a tiny bit of lycra (not useful in this sheath, since I underlined it with silk organza).


Here's another detail from my dress.  Understitching at the neck and arm hole edges ensures that the lining never shows.  (Topstitching does the same thing, but understitching is invisible from the public side of the garment.)  If not understitched, the inner layer, especially if made from a light-weight fabric as here, would roll to the outside.  Once understitched, the seam attaching the lining to the dress fabric naturally rolls instead to the inside, as you can see at left.  Understitching is also great for a faced edge, since facings also tend to roll to the outside.

Understitching securely attaches the enclosed seam allowances to the inside layer.  To understitch a curved edge like the neck or arm opening of my dress, first trim and grade the seam allowances.  I'm not a fan of clipping because little corners may form where the clips release the tension.  Trimming results in a smooth curve.  If you trim aggressively (leaving about .7cm or .25", or even less) the seam allowance will easily stretch enough so that the edge won't pucker or refuse to press flat.  If you are understitching, there is no reason to worry about the small seam allowances compromising the strength of the seam.

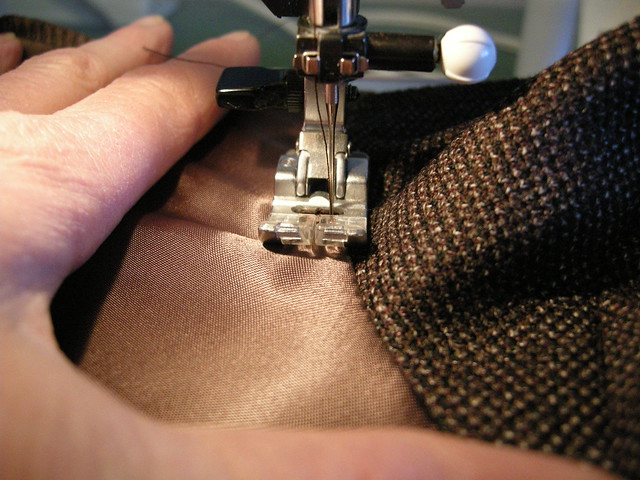
The secret of understitching is to keep the lining or facing as flat as possible on the bed of the machine, forcing the seam allowances underneath to stretch into the curve.  Don't sew straight ahead.  Instead, rotate the piece as you sew around the curve, keeping the stitches close to the seam (and checking to ensure that the seam allowances lie under the inside layer so they will be caught in your stitching). In the photo at right, as I sew I am spreading the lining flat with my left hand, and guiding it through the needle by rotating the garment clockwise.  I do not press the seam at all before understitching.  While sewing I keep spreading the lining away from the garment fabric to ensure the lining isn't folding over on itself.  The goal is to ensure there is no distortion in the curve.


I used the triple stitch zig-zag on my latest sheath dress.  This stitch really ensures that the trimmed seam allowances are well-attached to the lining.  Of course it's a pain in the neck if you have to pull it out (ask me how I know!!).  You can also understitch with a straight stitch, ordinary zig zag, or by hand if you are so inclined (as I apparently was when making my 2nd last sheath, shown to left).

If you don't already use this technique in your sewing, I highly recommend it!

Monday, December 6, 2010

Not the usual Sewing Lawyer style

I'm a member of a group of local sewers (sewists, if you prefer).  We got together initially because we all owned PatternMaster Boutique (PMB) a pattern-drafting computer program.  We still do, and we even use it - but it turns out we're also somewhat omnivorous when it comes to patterns and all of us are on the lookout for good ideas most of the time.  So when one of our membership showed us a simple drapey jacket that she had made, and when we all - different ages, sizes and builds - tried it on and looked pretty good in it, we were intrigued.  We decided we should all purchase suitable fabric and, with our sergers, make our own.

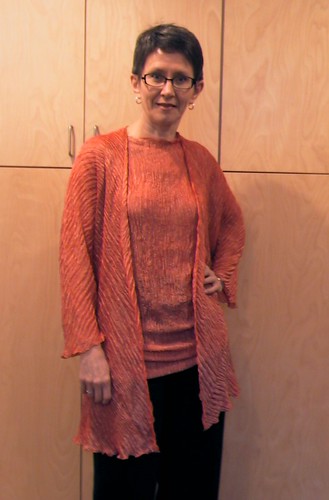
Here's mine.

This jacket design was attributed by my friend to Carter Smith, an American fibre artist who specializes in shibori dying.  There's more about him here.

Shibori is a "Japanese term for several methods of dyeing cloth with a pattern by binding, stitching, folding, twisting, compressing it, or capping. Some of these methods are known in the West as tie-dye", to quote Wikipedia.
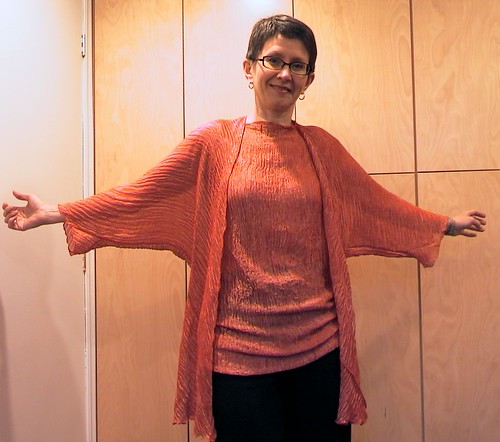
The jacket design takes advantage of the type of fabric Carter Smith tends to work with - drapey silk with beautiful pattern or surface design.  This is because it's made with only two (2) pieces, and each of them is just a big square.


After I was introduced to the idea of this jacket, the perfect fabric presented itself.  This was from Fabricland of all places - it's 85% silk and 15% metallic.  It has a lovely soft hand and is supremely drapey - the crinkles don't lessen much and if they do, a quick dunk in the sink brings them back with no ill effects, I discovered. Great stuff!  I bought the last of the bolt and it was the perfect amount for these two pieces.

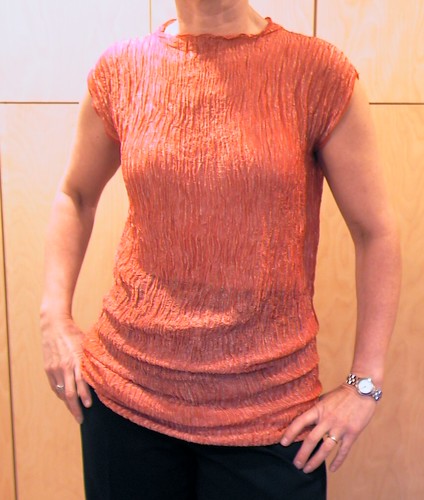
The second piece is this top, which is essentially a tube (CB seam) with shoulder seams and simple slit arm openings.

So, do you want to know how to make the jacket?

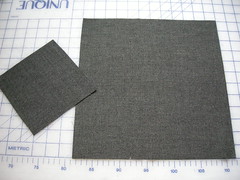
First, you need 2 squares of your chosen fabric.  The small one's sides are half the length of the sides on the big square. My sample squares measure 12" and 6".      

Instructions for a bias garment like this jacket were published in issue no. 143 of Threads Magazine ("Get biased - create a bias topper from two squares of fabric").  However there is a serious error in the article as published.  It said to adjust the size of the smaller square according to your hip measurement - and that the diagonal measurement on the small square should be 1/2 your hip measurement.  In the next issue, after several people complained that this made a garment which was much too small, Threads acknowledged that each side of the small square should be 1/2 your hip measurement.  (Or, more straightforwardly, each side of the large square should be the same measurement as your hip circumference...)  My jacket squares are 40" and 20".
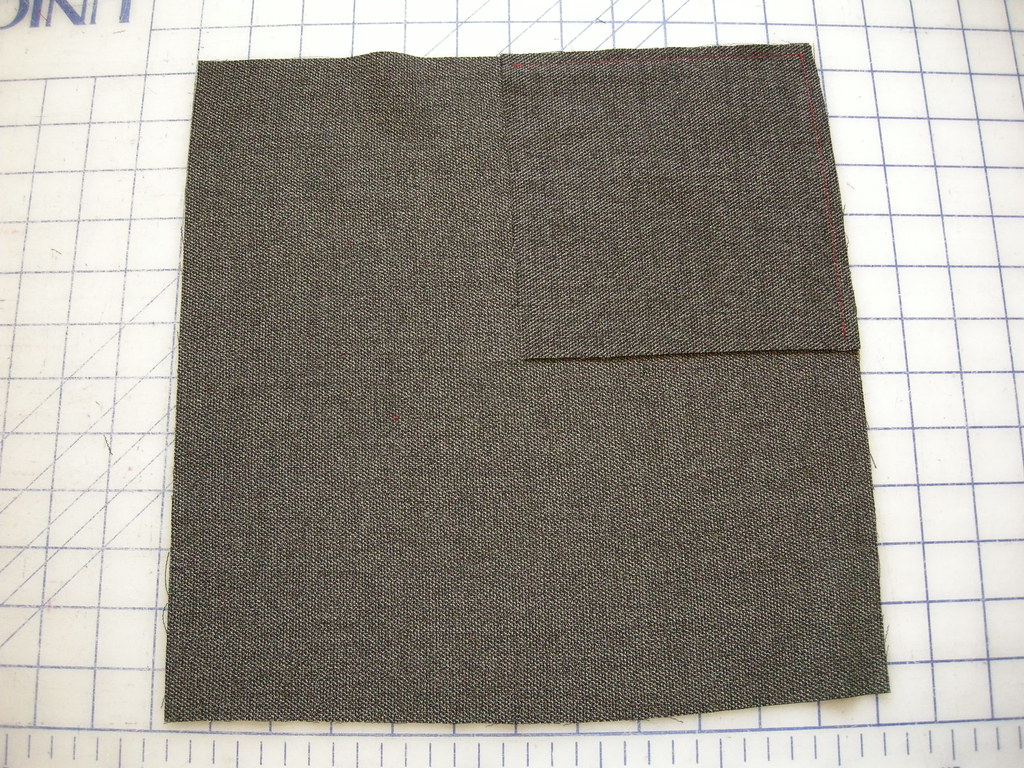
Place your small square on the big one, right sides together, with edges matching at one corner.  Sew the edges together using a narrow seam.  If you trust your fabric you can use a rolled hem on the serger to do this.  I used a 4 thread stitch on my serger but without  the stitch finger - the resulting seam is rolled, a bit wider than the rolled hem, but much stronger.

(If you click on the pictures, they should enlarge.)

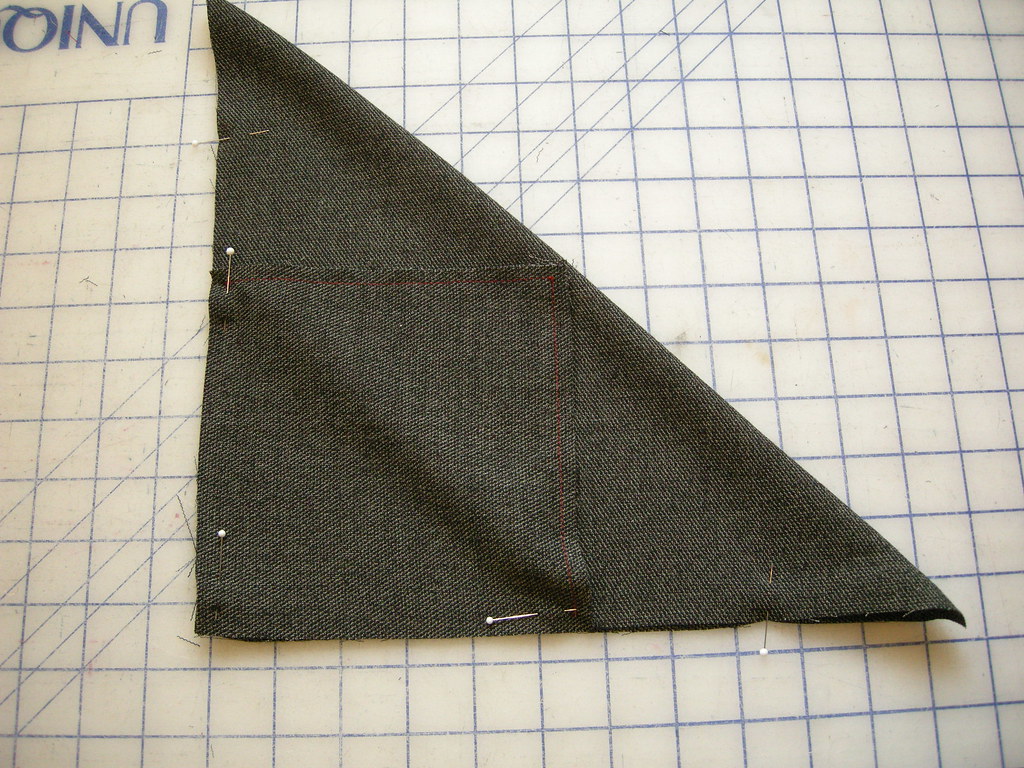
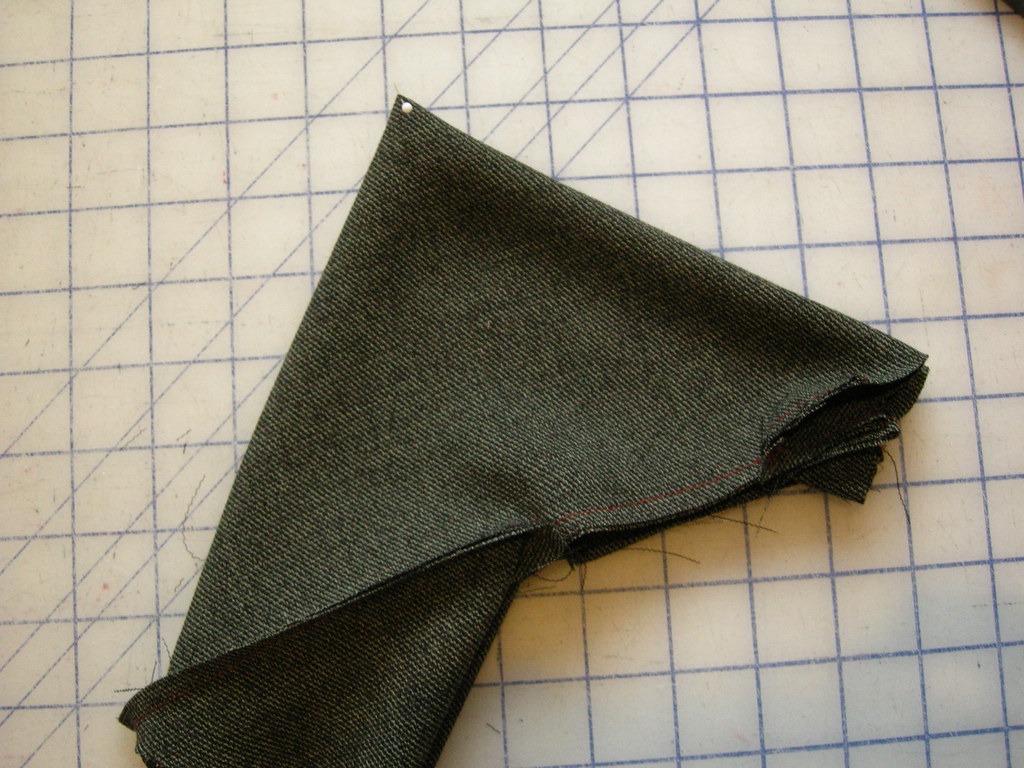
The next step is to take the free corner of your small square, and pull it diagonally across so the edges match those of the opposite corner of the big square. Then, mark a point some distance away from the pointy ends of the resulting triangle.  For a full-size jacket, 10" is about right; at right my opening is about 3", and is marked with pins.

Sew the right angle of the triangle from one marked point to the other, i.e. leaving the pointy ends unsewn.

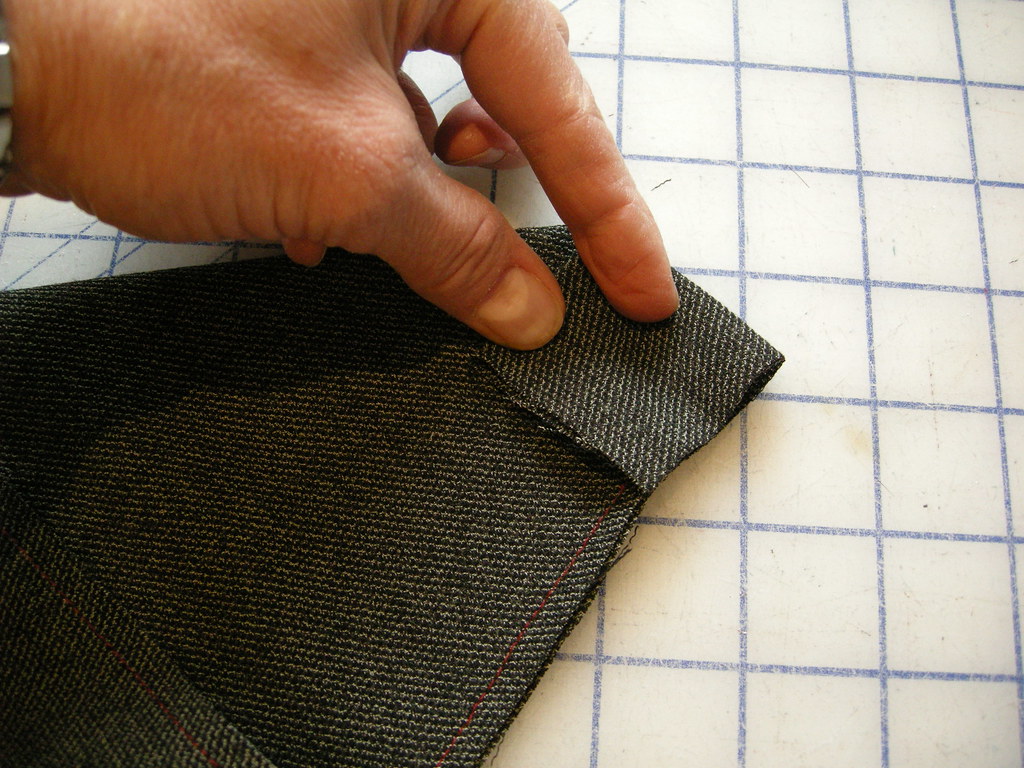
Take that pointy end and fold it down so the free corner is above the end of your stitching, and the unsewn edges are matching.  Sew the remaining open sides of that little square.

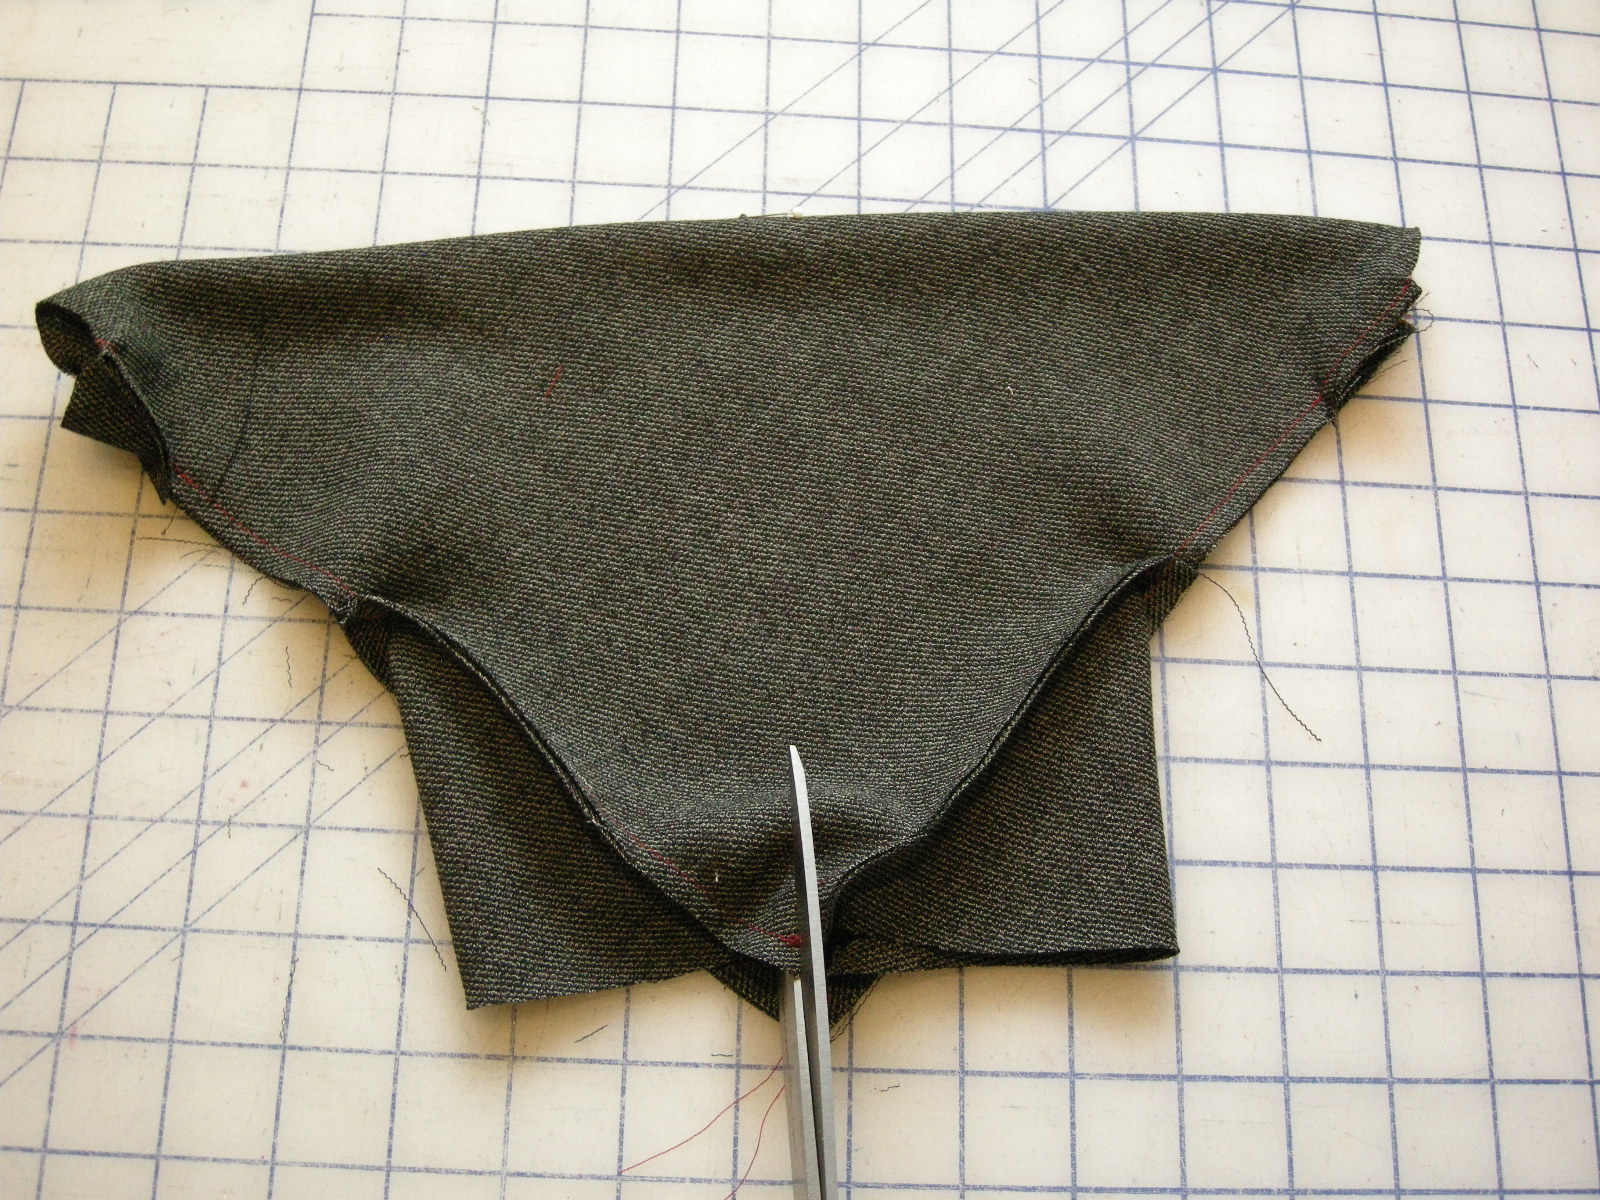
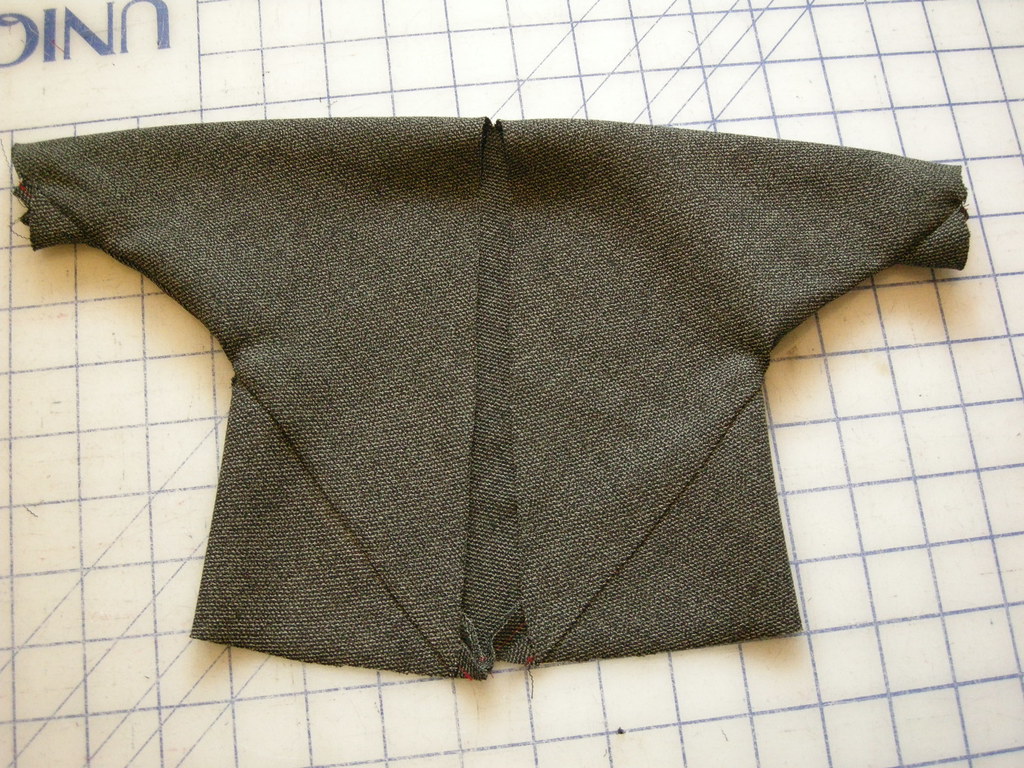
At this point you have a fully enclosed thing which is vaguely triangular with a square bottom.  To turn it into a wearable garment you have to cut openings at the bottom, sleeve ends, and neck.  A front opening is optional since you can make this as a pullover.

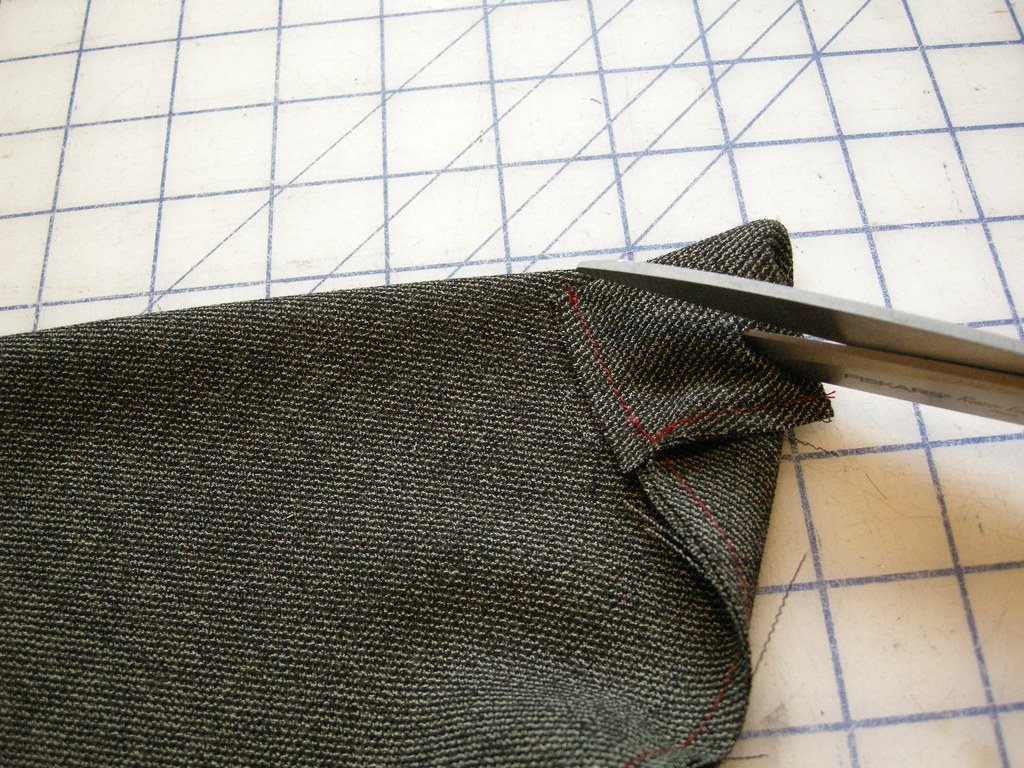
For the  bottom (hip) opening, you slit the small square diagonally.  In the photo at right, I've marked where the ends of the slit will be with little stickers.  It seems slightly counterintuitive to cut in this direction, but just do it - if you paid attention to your intuition at this point, there would be tears...

Do the same thing at the pointy ends of the triangle, which by now you may have guessed will be the sleeve openings.

This is a different sleeve finishing method than in the Threads article - they want you to just cut the pointy end off.  This method makes a neat little gusset instead - it fits better and I think looks better than a batwing shape ending right in the cuff.

Then find the neck point by folding your jacket in half.  Mark this point with a pin.

If you are making a jacket, cut open the CF up to the point marked by the pin at neck point.

Here's what the jacket looks like, in basic outline.  Try it on now to check that the neckline works.  You may need to cut it further into the back, and you may need to widen the opening.

Obviously, for a real garment you would, once satisfied, finish all the edges using a narrow rolled hem.

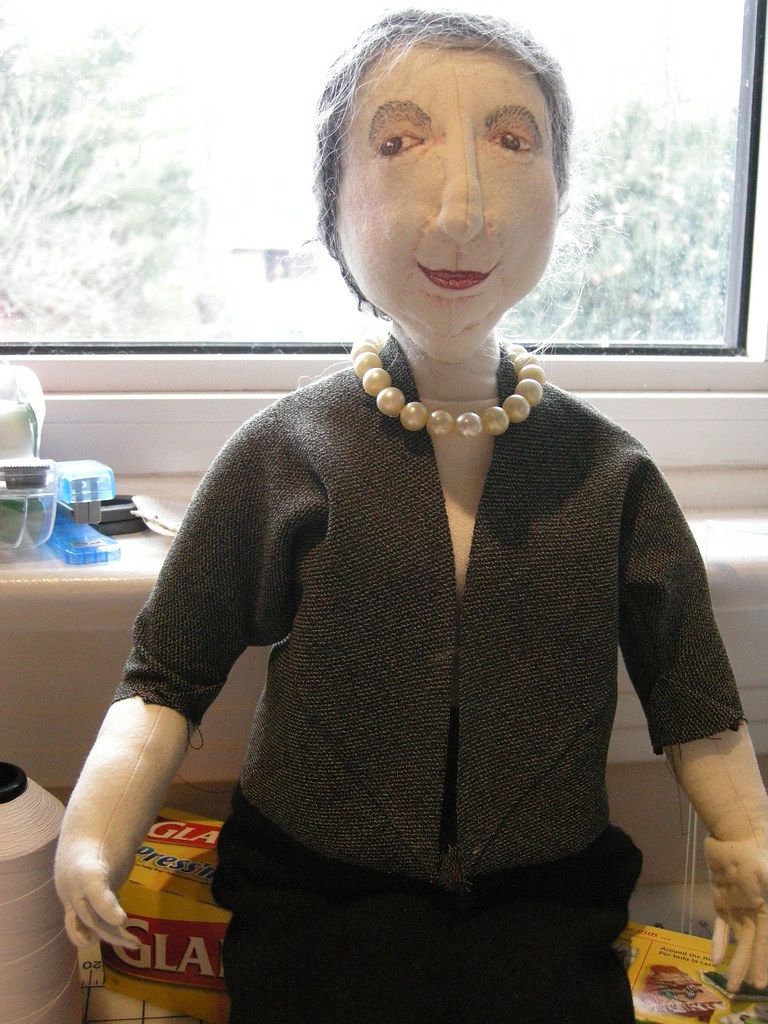
But my client insisted on trying her jacket on, right away!

Sunday, November 21, 2010

A new trick - Spanish snap buttonholes

It's good to stretch your skills by trying something new, right?  The Sewing Lawyer challenged herself by trying the "Spanish snap" buttonhole technique today.  The instructions can be found in Roberta Carr's book Couture:  the art of fine sewing.  Or, read on...

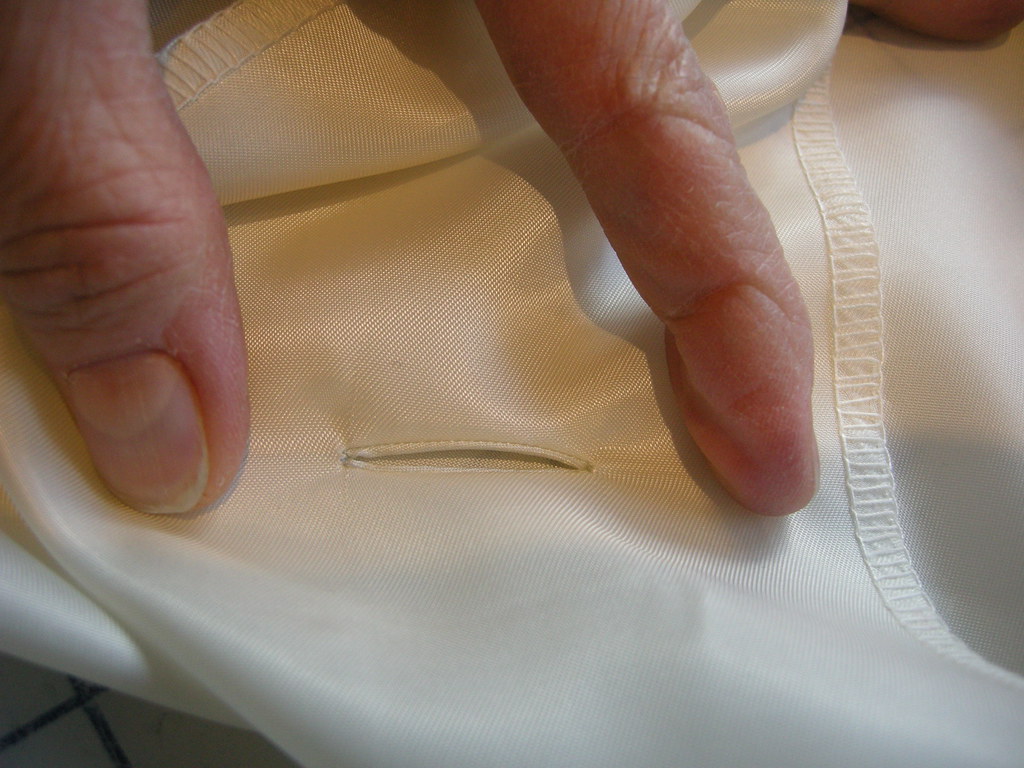
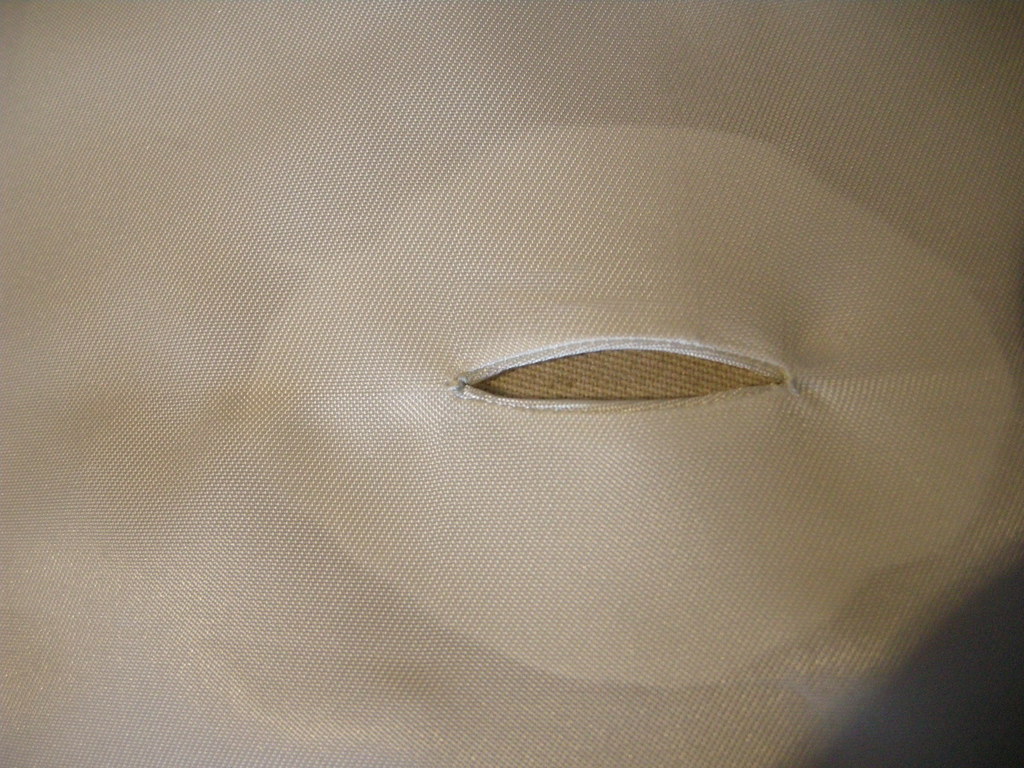
First, here's what a Spanish snap buttonhole looks like (click on the photos for eye-popping close-up detail).


This technique came to mind for the project of re-lining my Auckie Sanft jacket.  One of this jacket's fantastic features is that it's lined to the front edge.  But... that meant that its buttonholes were originally sewn through both the fabulous Linton tweed, and the lining fabric behind it.  Removing the lining meant literally cutting the lining fabric out of the buttonhole stitches.  I needed a way to make buttonholes that would lie behind the original ones and look good from the inside.  The latter requirement meant that sewn buttonholes were instantly rejected.   (Sew buttonholes in one layer of lining fabric?  No thank you!)
Then I remembered reading that Chanel jackets sometimes had bound buttonholes made in the lining to back sewn buttonholes in the outer jacket.  And I dimly remembered the Carr technique.

Ms. Carr wrote:  "Frequently used by the designers, this buttonhole has very thin lips that can hardly be seen.  I like to call them 'invisible' bound buttonholes.  The advantage of a Spanish snap buttonhole is that it can be made very small - as one might use on a silk blouse.  On the other hand, Spanish snap buttonholes are equally effective used on a tweed or nubby fabric with the lips made from wool flannel or worsted."

What's not to like?  Here's how to make them.

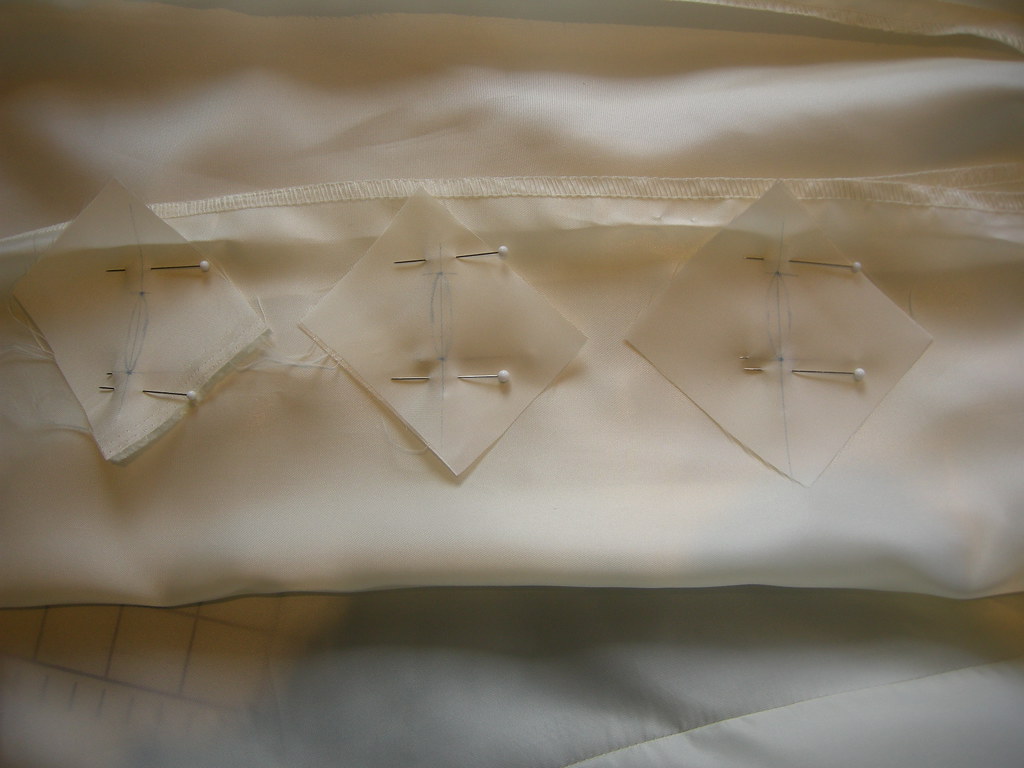
First, mark your buttonhole placement on the fashion fabric.  Then cut little patches that are big enough so that ON THE BIAS (this is important!) they are as long as your marked buttonholes, plus about 2.5cm (1") on either end.  Mark the patch (wrong side) with a line that represents the centre line of your buttonhole, and the ends of the buttonhole.  Then draw (lightly) a pointy oval shape (like a flattened football) that is about 6mm (1/4") wide at its widest, centred on the marked line.  Carefully pin your patch to the markings for your buttonholes, right sides together.

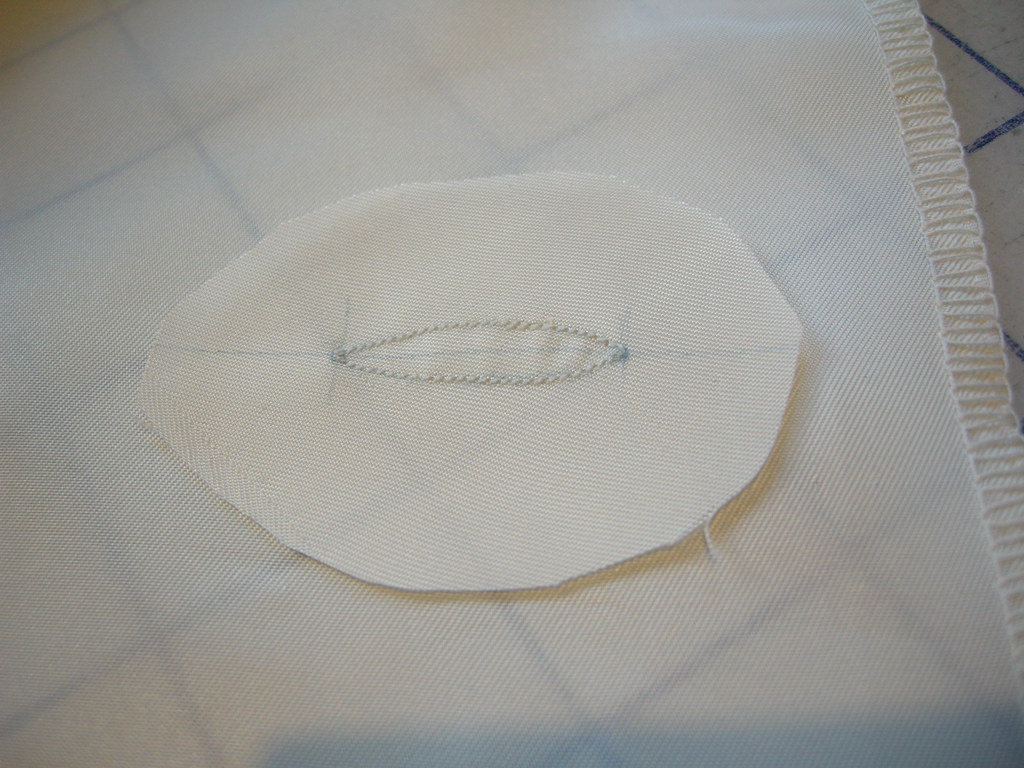
Sew around the marked football, pivoting at the pointy ends, using teeny-tiny stitches (1mm on my machine).  Here's a close up of the stitched patch.  You can see I've trimmed my patch to an oval shape. Ms. Carr suggests starting with this shape but it really doesn't matter. 

Snip carefully along the marked centre line to (but not through) the stitches at the pointy tip.  Then pull your patch through to the wrong side.

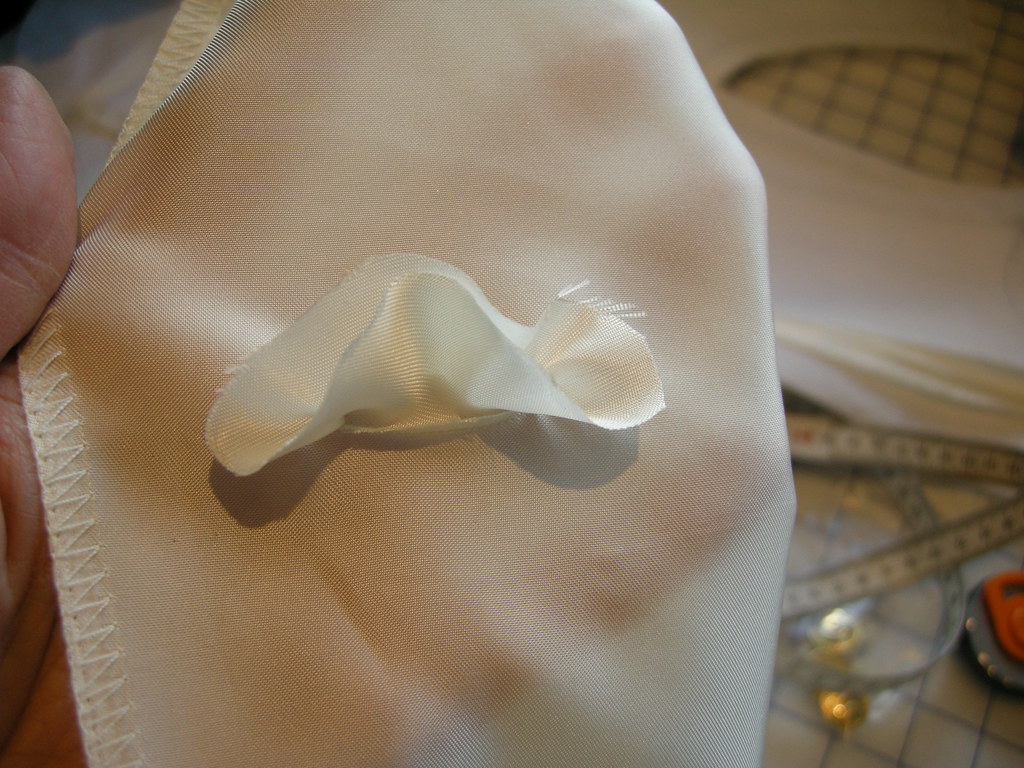
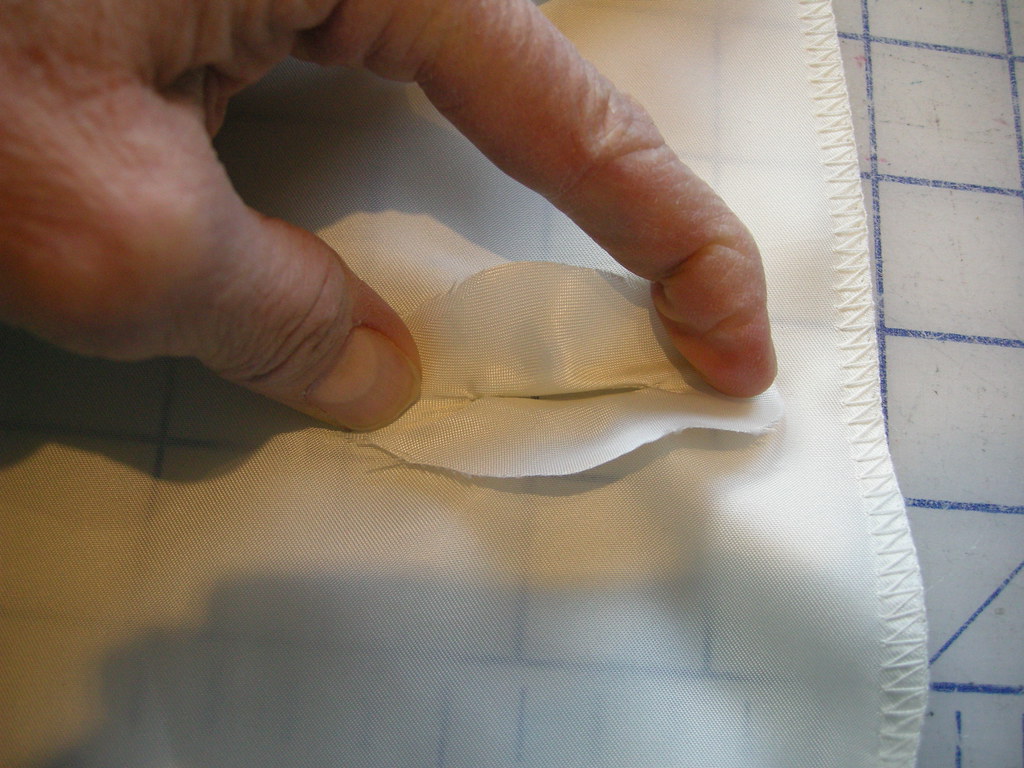
Next comes the magic, ineptly illustrated here because I was holding my camera with one hand.  To quote Ms. Carr:  "Holding each end of the egg shaped patch with the thumb and forefinger, pull in a snapping motion.  One good 'snap' and the bias will wrap around the 1/8" (.3cm) seam allowances and automatically create tiny narrow lips."

This is the right side, even before pressing!  

Magic, I tell ya!

No additional sewing is required - Ms. Carr says you can use a tiny bit of fusible web at each end to keep the patch in place.  (I will however tack the patches to my jacket to keep the buttonholes in place.)


In other news, I had approximately 50 minutes while in Toronto to shop, and I wanted to do two things:  visit Perfect Leather at 555 King Street West; and look for waterproof (or water-resistant) fabric for the fur coat.  


Guess which one prevailed?  (This photo from Perfect Leather's website.)  All I can say is WOW!  I think you can find any kind of leather; any colour; any finish; any size; any combination.  Needless to say there is a very intoxicating and leathery perfume in the place.  I bought 4 sq.ft. of orange goat leather for a little project...