
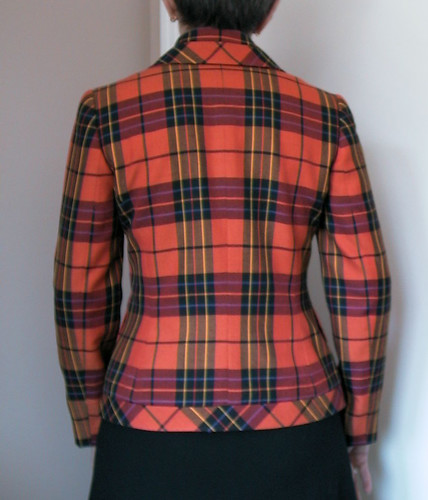
To recap, this is pattern #114 from the January, 2009 issue of Burda World of Fashion, as it was then still known. It has taken an indecent length of time to complete this project but I have several reasons to be pleased, nonetheless. First, it is a smashing success following a crushing failure, the likes of which had not afflicted The Sewing Lawyer for a very long time. Second, it's such a sweet little jacket pattern, all curvy and quirky. Finally, it's such a determinedly cheerful colour! I've been saving this orange plaid for a few years for just such an outing.
Without further ado, here are some more pictures:
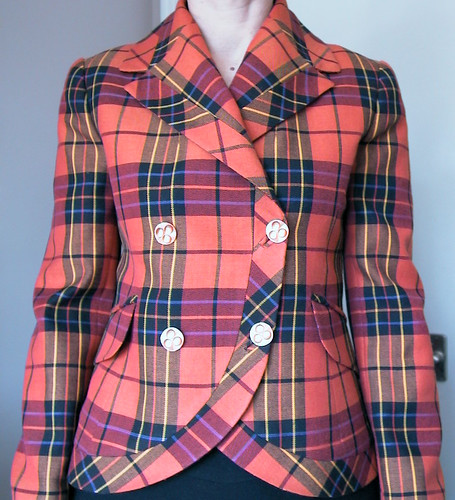
The lapels are slightly chaotic, but that's to be expected. I just did not have enough fabric to do more than make the bias bands on the lapels symmetrical.
To ensure the front bands were the same width throughout, I basted a line of stitching at precisely the right width and then sewed the facing to that line, ignoring the fact that the cut edge seam allowances were quite uneven.
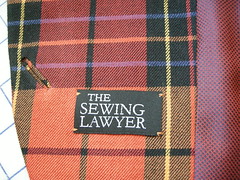
My new label! In this photo you can also see the inside of the bound buttonhole. I made a rectangular opening in the facing using 1mm stitches and a small square of silk organza, then invisibly hand-sewed the opening to the back of the buttonhole.
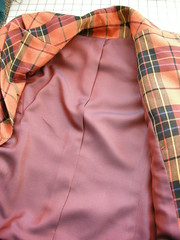
Oh, and check out the orange/blue silk I used for lining the body of the jacket. Here's another shot of the lining.
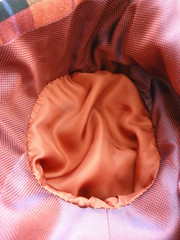
I used orange bemberg to line the sleeves though. It's slipperier. I hand-stitched the sleeve lining at the armscye.
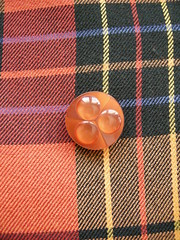 What do you think of these cute buttons? They are vintage plastic, purchased them from my favorite local purveyor, Micheline Gravel. Micheline is a fabulous resource and her button basement is UNBELIEVABLE. We had an international button convention in Ottawa, thanks in part to her, in 2008.
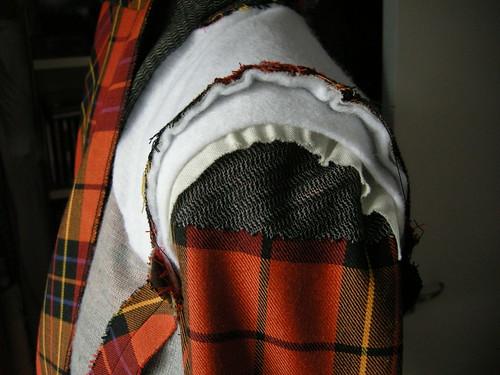
 I built shaping into the shoulders and sleeve caps of this jacket. First, I eased the sleeves using a bias strip of fairly sproingy wool (similar to the interfacing used in men's ties). The strip should be long enough when stretched to go from the front notch to the back notch (or in Burda's case to wherever the easing should stop, since they only give you the front notch). Pin it at the top of the cap and then sew just inside the seam line, stretching the strip like mad. When you have finished doing this, it will look like so:
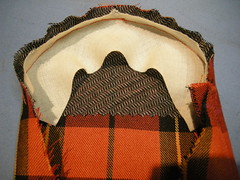

Some of you may use store-bought sleeve heads. My question is ... why? Using the jacket's own sleeve pattern produces a perfect-fitting sleeve head that won't ripple inside the cap. I hand-sew it just inside the seam line to the sleeve after it has been set into the jacket. The seam allowance folds inside to provide a little extra soft lift at the sleeve cap.
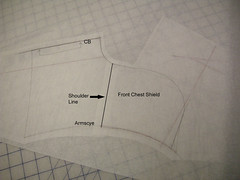
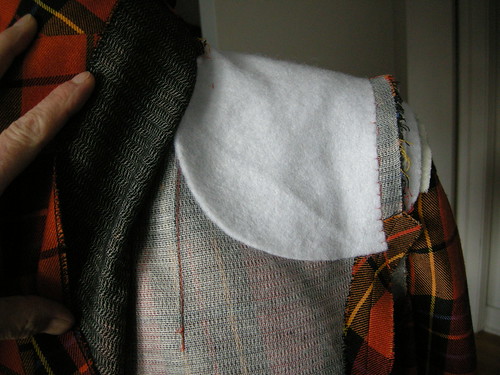
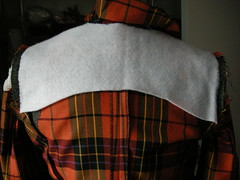
I also made a back/shoulder/chest padding layer out of the same fleece. Here you see my pattern development. I've superimposed the back and front pieces at the shoulder seam and the fleece pattern is traced over this. It hugs the back of the neck and is cut to end at the armscye seam.
This acts like a very thin shoulder pad. The pattern called for shoulder pads and I was prepared to add extra layers of fleece cut in the more standard shoulder pad shape, but found it unnecessary. It isn't bulky but it prevents my bony shoulders from poking up through the jacket. It makes the jacket more substantial and luxurious, somehow.
Notice that the front is fully interfaced with a weft insertion fusible.

On to my next project - a black wool crepe high-waisted pencil skirt to wear with my cheery jacket. Can you believe that The Sewing Lawyer does not already own such a skirt?
No comments:
Post a Comment