
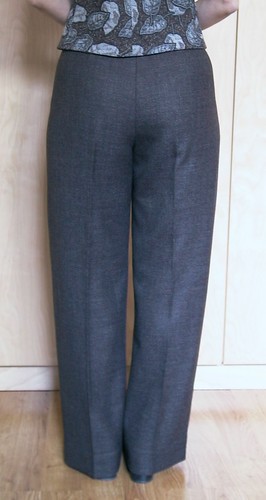
Lined wool pants just in time for ... spring. Doh! Oh well, maybe we will have some more unseasonable cool weather before summer hits. Otherwise, these will wait quietly for cooler weather, and in October or so, the Sewing Lawyer will be glad to have them.
These are the same fabric as the last project: a
sheath dress. I should finish a top to wear with them before turning to summer sewing.
(I believe the legs are both the same length despite the evidence in the photo of the back. I hemmed them quite long, so I can wear them with heels.)
These pants are at least the fourth pair in my closet made from
Vogue 7881, a Claire Shaeffer pattern.
They are plain, comfortable, and versatile. What's not to like?

And they look pretty good with my
leather jacket.
Strangely, since hand-sewing is not my favorite thing, all four pairs are from the "couture techniques" side of the instructions (which are lengthy and, like all the Claire Shaeffer patterns, very informative and helpful). Really, the only special features of the "couture" version are that (1) the wool fabric is eased into the waistband instead of darted and (2) the zipper is sewn in by hand (yes really) and (3) the waistband is constructed mostly by hand.
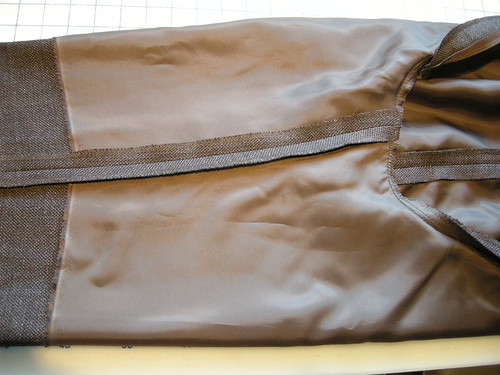
The pattern does not call for lining but I added a half-length underlining of Bemberg. I cut it on the cross grain and use the selvedge for the lower edge of the underlining. No bulk or show-through. I don't fuss too much about how long the half-lining should be. I just place the pattern pieces on the cross grain to get maximum length and so they have the same leg length. It generally turns out that the lower edge hits around my knee.
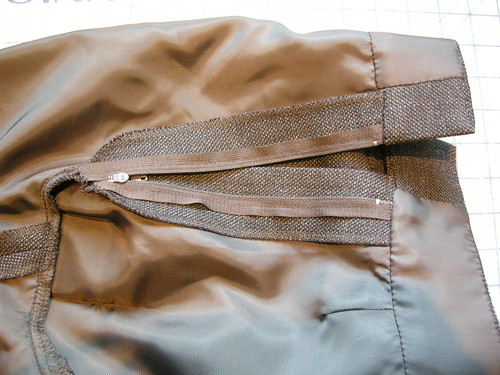
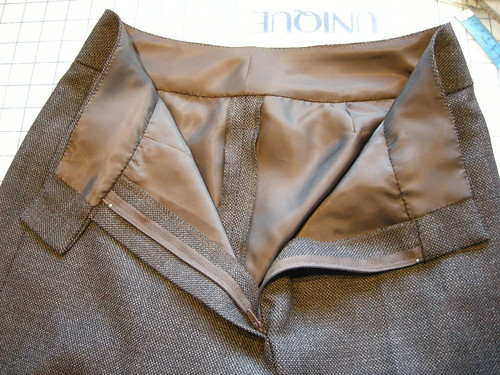
Here is what it looks like at the fly.
Notice there is a tiny dart in the underlining but the outer fabric is eased only. I did these steps separately before basting the underlining to the pants pieces, after which I treated each piece as a single layer.
I particularly like the hand-finished waistband. You know those blumpy corners and wavery, not-square ends that result from sewing a waistband right-sides-together, and then turning it right side out? There's none of that. The couture technique that Claire Shaeffer teaches produces sharp corners, right angles, and uniform width. And it's thin, flexible, and looks great inside and out.
(Later, I added a couple of pant hook and bar closures, exactly like
these.)
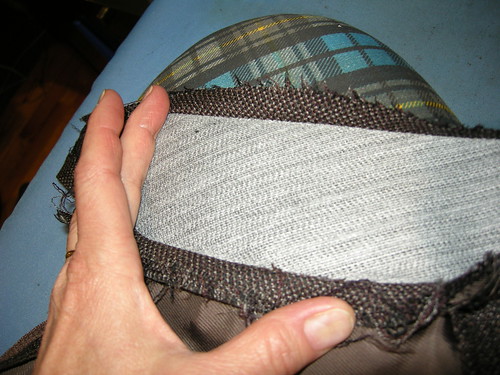
First, interface the waistband to the seam lines only. The pattern includes separate pieces for the waistband interfacing but you can easily remove the SAs on any waistband pattern pieces. (NB: To use this technique you do need a seam at the upper edge of the waistband so would have to further adapt a pattern which has a straight grain waistband with a folded upper edge.) I used two layers of fusible interfacing to ensure stability, since this is a curved piece with the CB area on the bias. I cut one with the straight grain at the CF and the other with the straight grain at the CB. As a result, the whole thing is totally stable and stretch-proof.
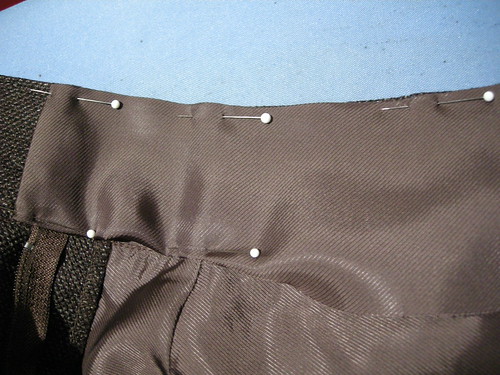
Press the upper SA of the waistband to the inside, along the line of the top edge of the interfacing. Then attach the waistband to the pants by machine. Press so that all SAs at the waist seam are facing into the waistband. To preserve the curve of the pants at the hip I've pressed this seam using my
pressing ham.
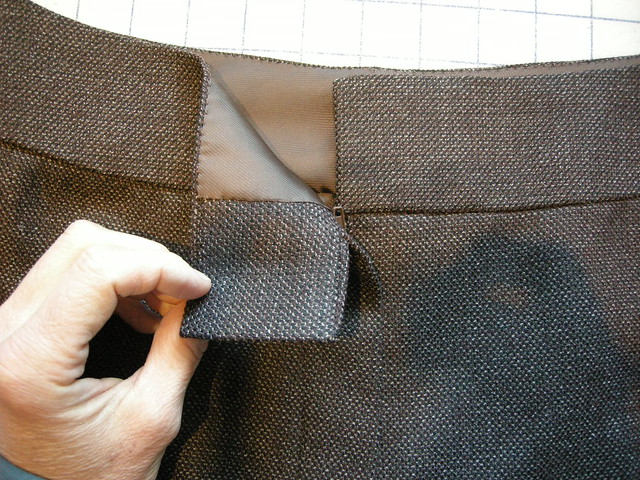
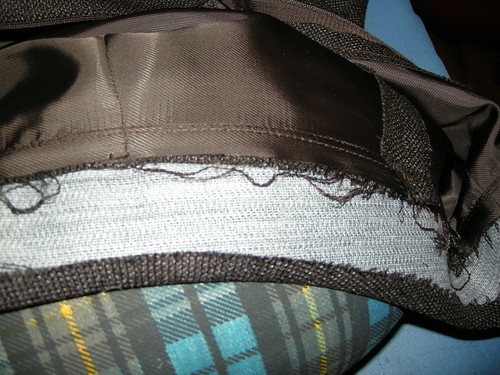
The 7881 waistband piece is extra long with about 6.5cm (2.5") extending beyond the finished end of the waistband. This extension is not interfaced. Press the lower SA up on this piece as well. Notice that the extension is very slightly tapered so that it is not as wide as the waistband itself.
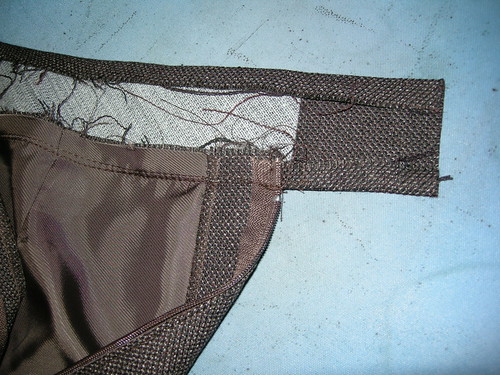
Fold this extension along the leading edge of the interfacing. See the nice square corners? See how the slightly narrower width ensures that it will not peek out above or below the waistband itself?
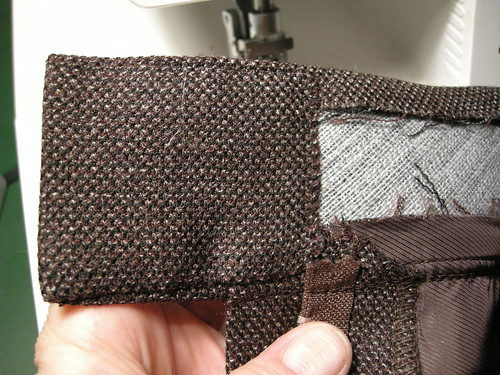
Hand stitch the extension down invisibly along the 3 edges to secure it to the waistband. This is the other end, which on this pattern has a significant overlap.
The waistband facing is cut from lining fabric. This keeps the waistband nice and thin. Again, 7881 has separate facing pieces. To adapt this technique for another pattern, the only point to note is that the facing pieces need to be shorter than the waistband, because of the long folded-back extensions.
After sewing the CB seam, press the upper edge seam allowance down on the facing. Then pin this edge to the folded-down upper edge of the waistband, keeping the facing edge a smidge lower than the upper folded edge so it will be invisible from the outside.
Fold under the leading edge SAs, ensuring the edge of the waistband extension is well covered. Then fold and pin the lower edge along the seam line, ensuring the facing lies nice and flat.
Hand sew the facing to the waistband, using a tiny fell stitch.
Done.


No comments:
Post a Comment