Showing posts with label bra making. Show all posts

Monday, October 17, 2011

Two pink things

First, please admire the perfection of the pink cashmere, neatly wound into a ball (or is there another name for one of these?) using my new wool winder.  Though my husband says I should be sure to mention what a headache it was to make the #*%# thing, I think it's brilliant.

The wool should unwind neatly from the centre.

No doubt this is all old news to you knitters out there, but it's new technology chez The Sewing Lawyer.


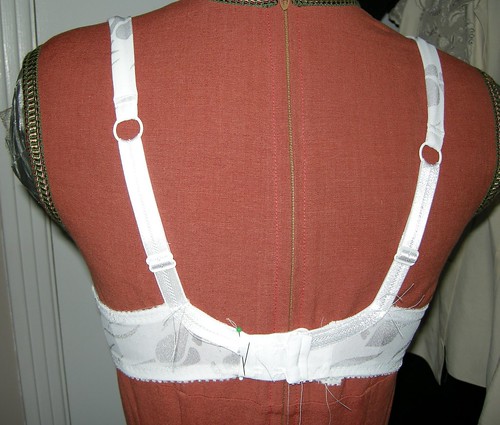
In other breaking news, I successfully changed my second bra (the front closing one) into a standard back-hooking bra with a closed bridge in front.  It actually wasn't that hard and it fits so much better.  Before, the wires were not only too far apart, the bridge was too low which meant the wires were not at the right angle.  Now, as you can see, they come up higher at CF where they are more vertical.  
After

Before
I sewed on 3 of the little pink/écru bows that I bought at the Fabric Flea Market yesterday.  I think they look kind of cute!

Monday, October 10, 2011

Pretty in pink

Following hot on the heels of yesterday's post, here is The Sewing Lawyer's latest custom-made bra - all done!  It is not perfect but definitely wearable. 

Inner bra cup - in progress
The cups and straps are made from shiny and stretchy pink satin.  It has a lot of stretch in the width and hardly any in the length.

Inside the straps (cut on the lengthwise grain) is a layer of duo-plex to ensure they won't stretch.  It pads them very nicely.  The bridge is also underlined with duoplex since you absolutely don't want any stretch there.

Inside the cups is a layer of flesh-tone power net.  I used a triple-stitch zig-zag to flatten the lining seam. The outer cup seam is flattened with the traditional line of straight stitching about 2mm away from the seam, on either side.  

The least satisfactory part of this bra (construction-wise) is the seam along the top of the cup.  I used a stretch stitch to join the satin to the power net, and understitched with a straight stitch to keep the lining from rolling to the outside.  This edge would look better if it was finished with elastic to stabilize it.  It stretched slightly in construction, even though I cut the upper cup with the DOGS (direction of greatest stretch) perpendicular to the edge and seam to minimize the likelihood of unwanted stretching.

The fit would be better if the bridge (the little piece at CF between the cups) was narrower.  I don't know if this is possible, since it has to accommodate the plastic clasp and it would be even more difficult to sew if it was smaller.  Future bras will close in the back so I can better control the bridge dimension.

This bra is a modification of the Sharon front closing bra from the Pin Up Girls line of Bra-Makers Supply but, as explained yesterday, the Sharon cup wasn't doing anything for me so I subbed in the cup from a bodysuit pattern in the June, 1996 issue of Burda Magazine.

Before starting I read up on converting styles in the Bra-Makers Manual (also available from Bra-Makers Supply) and I added 1/4" (7mm) to the lower edge of the cup pieces to ensure there would be enough room for the wires inside the cup.  This is needed because the Sharon is a partial band style (the cups are not sewn into a fabric piece) whereas the front of the Burda bodysuit pattern functioned like a band in relation to the cups.  In a full band bra, the wire sits outside the cup below the seam joining the cup to the band, but in a partial band bra, the wire must be accommodated inside the lower edge of the cup itself.

The band is cut from pink power net which was in the pink bra kit I bought.  Unfortunately I had to cut it with a CB seam since the piece supplied wasn't long enough to put the full length in the correct direction (the DOGS need to be horizontal so the bra band stretches comfortably around your ribs).

An aside:  In a comment on my review of the Amanda bra pattern, Squirrelypoo (of FehrTrade) wondered why there was a side seam in the band on that pattern.  I think it's because the front band of a full band bra cannot stretch but the back band must, so they must at least be cut in different directions even if you use the same fabric.  The pink bra doesn't have a front band and the back band connects directly to the cups with no extra seam.

I notice there's a new pattern on the Bra-Makers site designed for foam cups - the Anita, which is made with stretch lace.  But there's definitely another pink bra in my future before I need to buy new supplies.

Sunday, October 9, 2011

Why I keep old Burda magazines


Too pointy!

I started to tackle the Sharon pattern (at left) from Bra-Makers Supply and I can already tell that the cup design is just not me.

Exhibit A.  My padded-out duct tape double is not precisely me, but close enough.  Erm.

I pinned the wires in place for these pictures so the cup would maintain its shape.  It sure does.  It's shape isn't mine.

So to plan B.


One of my favorite old Burdas is from June, 1996.  This issue included some great summer clothes (including the long tunic-shirt I showed you here)  but it also had a great lingerie section, including 2 bodysuits (one also doubles as a swimsuit) and a boned bustier.  All in all there are patterns for three different styles of seamed cup garments in this single issue.  Bonanza!

Bodysuits from 1996-06 issue
And I had made the swimsuit before, and remembered being pretty impressed with the fit of the cups.

Against my better instincts I'm posting a picture.

The fabric was a border print, nylon and lycra.  Purchased at the late-lamented Textile Outfitters store in Calgary.  I remember it was fun figuring out how to use the border print on the cups.  Putting the upper cup on a gold stripe meant that I ignored the grain line on the pattern.  I did not use wires although the pattern is perfect for them.  I like the wide straps which are pleated into the extension of the upper cup.

Sadly, the elastic in this suit has disintegrated but I'm glad I kept it for today's examination.  I like the line of the seam in this cup much better than the more horizontal Sharon seam.  And it's not pointy.

I think I'll just sub the Burda cups into the Sharon band.  Why wouldn't this work?  The Sharon pattern is designed for low or no-stretch cups and the Burda is designed for stretch fabric, but the cups are lined so they are reasonably firm.  I don't think it should matter.  I cut the Sharon cups out of Duoplex, a fabric included in the bra kit which, I have to say, is the most hideous stuff ever.  I have some lovely stretchy satin in pink in my stash.  

Sunday, September 11, 2011

Hooked?

One of the anxious-making things about sewing a bra is that you can't try it on until it's finished.  So they say.  But there was no way The Sewing Lawyer was going a centimetre farther along in the construction process without having at least a pretty good idea whether hers was going to take pride of place in the undies drawer, or languish, finished but unworn, in a dusty pile on the sewing room floor.

This morning the front was done, more or less, and the back was at the point of paralysis where I needed to know (a) how big around it should be and (b) how long the elastic straps should be.  I managed to get it whacked together in an approximate sort of way, but definitely unpickable, so I could try it on.

I'm using one of Beverley Johnson's patterns - "Amanda" of the "Pin-up Girls" line.  This pattern uses a foam cup and is pretty similar to some RTW bras I wear.  The website says it has dramatic push up effect but that remains to be seen.  I also bought the "Sharon" which is a front closing partial-band "demi-cup" style.  It's going to be the next one I make.

Let me introduce you to Amanda, finished enough so that I could verify its wearability, and make some informed decisions about band and strap length.

The foam cups are covered with a very stretchy and thin tricot from stash.  The front band, straps and back are made from a firmer lycra-and-something, also stash.  I used one of the bra findings kits from Bra-Makers Supply.  It has plush elastic for the top and bottom bands, strap elastic, hooks and sliders, underwire channeling, and some little decorative bits.
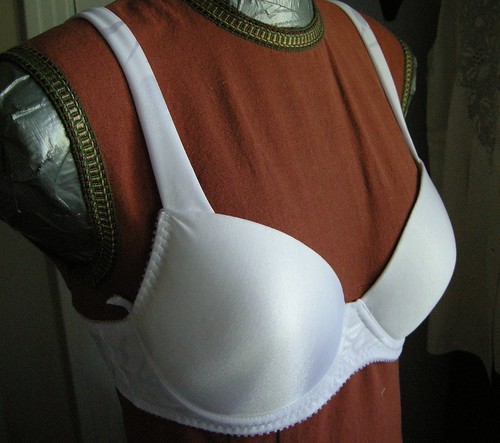
When I was at the store, Beverley turned her practised gaze to my upper half and guessed, correctly, that a 36 cup would be right.  She checked the 34 too (what I thought would be my size) and indeed they were noticeably too skimpy.


I did not purchase underwires, thinking I could repurpose some wires from old RTW.  Wrong! Do you know what?  34 wires just won't go around a 36 cup.  The curvature is definitely not the same.  So I bought size 36 wires from Fabricland, but they are too long for this cup, and stick out about 1cm.  I am going to have to cut them off and attempt to  file/cover/treat them in some way so the ends are not razor sharp.

The straps are sewn fabric in front, and attach to an adjustable elastic strap in back.  The strap elastic is continued on the upper scooped edge of the back.  Here, I've just sewn it on any-which-way to check fit, and verify that the hook and eye bits will attach properly.  However, the picture shows the general idea.

Below you can see the inner construction.  Washable Wonder-tape is an essential tool in attaching the stretchy fabric to the cup.  The instructions are very clear and good for this process.   The band/bridge piece is stabilized with a very non-stretchy layer (the pattern does not suggest this but I intuited that the piece should be as stable as possible and my fabric had, I thought, too much stretch).  The sticking-out ends will be resolved, some time soon I hope.

Sewing a bra is a little tricky but not as intimidating as it may look.
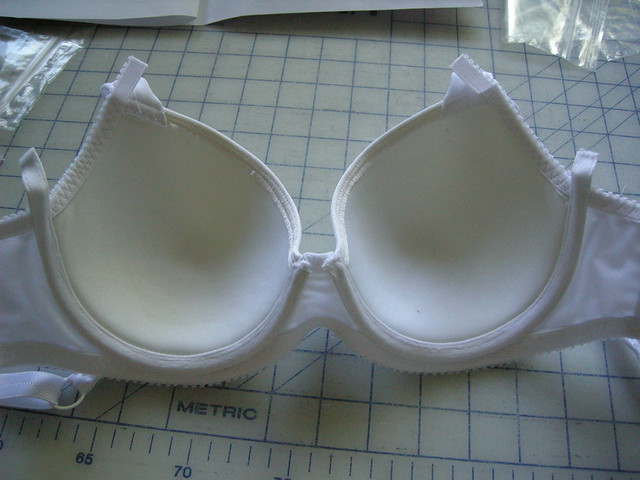

However, the sizing thing is really confusing.  All my life I've worn a 34B bra and here I was confronted with a 36 cup.  Not only that, but the band size and the cup size can be mixed and matched.  I measured myself according to the instructions in the Amanda pattern, the Sharon pattern, and for RTW as described in Beverley's book which I also purchased.

Amanda puts me at 36.  In actual RTW I am a 34B.  The book and the Sharon instructions put me at 32B (??!!).  I know these are just numbers, but for heaven's sake!!

Anyway, there is an error in the pattern.  The instructions say to trace the band size according to the cup (36) but with its length based on the under-bust ribcage measurement.  They say:  "If you measure 75cm (34"), trace the 75/34 line on the pattern size.  If you measure 78cm (35"), trace the 80/36."

Okey dokey.  I measured myself:  72.5cm around my ribcage.   And checked my tape measure which conveniently has both metric and imperial measurements printed on it.  72.5cm is 28.5".  I stared at the pattern and the instructions, and then back at my tape measure.

So here's the problem.  The numbers in the instructions are wrong in every way.  75cm is not 34", it's 29.5".  34" corresponds to 86.5cm.  And these numbers don't match what is printed on the pattern pieces.  The pattern piece for size 36 has lines on it which are labelled 70/28", 75/30", 80/32" and 85/34".   These number combinations somewhat closer to real metric/imperial equivalents but they are still off by enough to make your bra fit badly.  Which number to choose?  Accurate metric?  Accurate imperial?  Measuring the pattern pieces does not help because the bra has negative ease and  the band length will be extended by the hook and eye pieces, in some hard-to-verify amount.

To make a long story short, I initially cut the band pieces on the 85/34" line, based on the theory that I could make too-long pieces shorter.  Then in construction, I compared the in-progress bra to a RTW bra and got all over-confident and cut the bands down 2 sizes.  Then later in construction, I realized the band was sure to be too short, and added a little extender piece at CB on the right side (to which the shorter hook bit will be attached).  I figure the extender piece adds back almost as much as I cut out in the over-confident part of this story, and based on my almost-done fitting, I have to take most of it off again.  But not all of it, so I still don't know what size I should have cut.

Next time (there will be one; I have another set of the foam cups) I should ignore the numbers and re-trace the pattern piece based on the length I actually needed for this one.

There is a similar dithery story that goes with trying to figure out how long the elastic strap extensions need to be.  I won't bore you with the details.  However, the principle which is guiding me in relation to both band size and strap length is that the bra will not get snugger as time goes on, all other things being equal.  Therefore, I should determine lengths based on what feels reasonably snug but comfortable now, with everything positioned so I can tighten it up in future, if needed.


Saturday, July 30, 2011

The Sewing Lawyer has been on vacation

Which is why there have not been any posts for a little while.  So... what have I been doing?

Well, right after I made my second version of Vogue 1250 we departed for a week away, planned around an extended family celebration in the great urban agglomeration that vaguely surrounds the city of Toronto.

I'm happy to report that I survived the hottest July 21 on record in downtown Toronto - the actual temperature was 38C (just over 100F) and the humidex something like 51C (almost 124F).  It remained hot, but thankfully not that hot, while we attended the family event and during two days spent in the delightful tiny town of Jordan, which is in the heart of the main wine-producing region of Ontario.

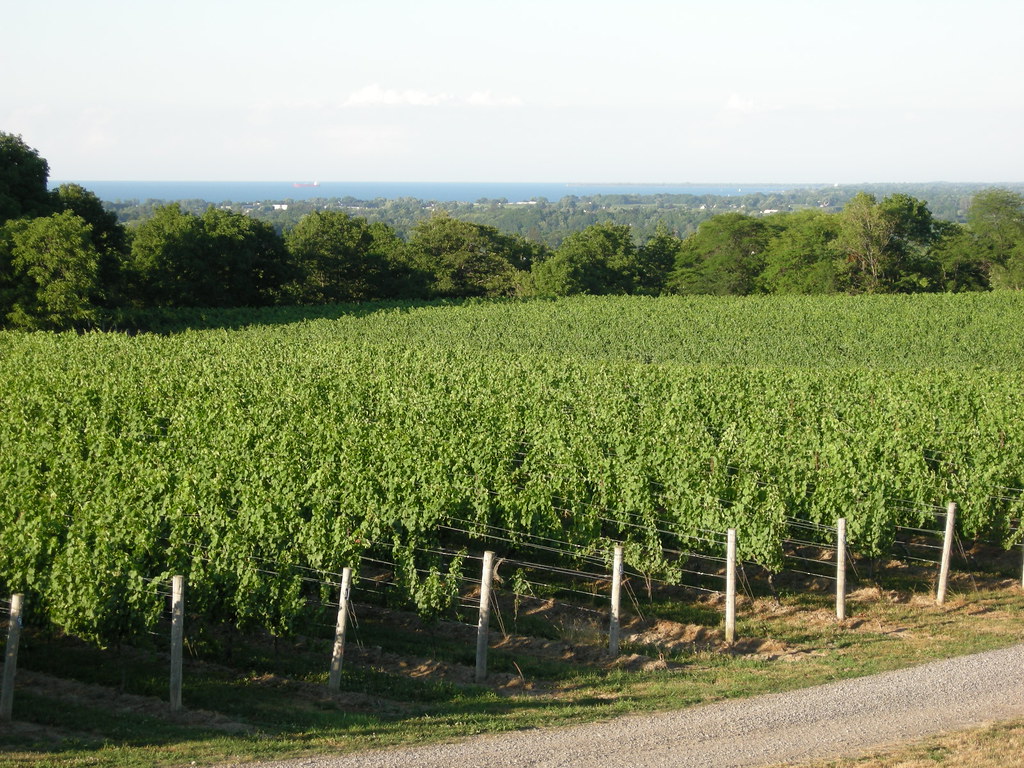
Since this is a sewing blog you may not care much about The Sewing Lawyer's vacation, but let me just share with you one photo, which comes close to capturing how gorgeous this wine-producing part of the country is.  (What the photo misses is the country silence, the warm and pleasant breeze, and general feeling of goodwill instilled by being in good company in such a place.)


This was the view from up high on the Niagara escarpment at the lovely terrace of Vineland Estates Winery, where we enjoyed a delicious dinner.

OK, one more thing.


Excellent local wine.  Ahhhh.

Enough of that.

I did have some sewing-related touristical experiences.  In Toronto, I again visited Perfect Leather and bought some brick red lamb leather to make another jacket.

Toronto has realized that it ought to celebrate its different districts and there are a few pieces of public art in the area around Spadina and Queen, the heart of the garment district.

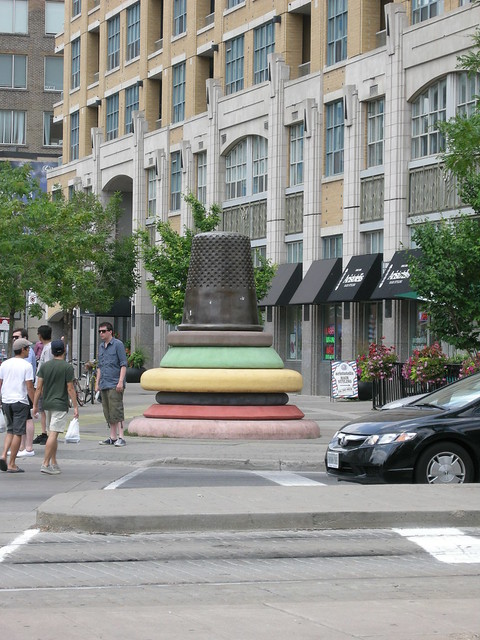
The thimble which sits on a pile of giant buttons at the corner of Richmond and Spadina is well-known.

A quick internet search informed me that this was created by Stephen Cruise, and was commissioned as a result of a City of Toronto juried public art selection process.  It dates to 1997 when street cars were reinstated on Spadina Avenue.


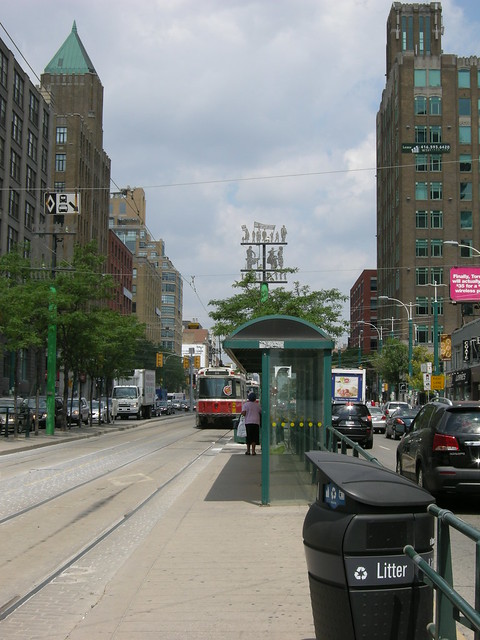
These two metal sculptures are located at a streetcar stop on Spadina in the heart of the "Fashion District".  

These are part of a series of sculptures at different intersections created by Randy & Berenicci.  According to the City of Toronto, the pieces "represent the people and events chronicled in existing public domain images that record the changes to the neighborhood throughout this century. The structures supporting the vignettes recreate the shape of the original Hydro poles, whose function to carry and transmit power and communications is maintained in a metaphorical sense, transmitting the history of the neighborhoods. Replacing the glass insulators of the original poles, overscale cast glass birds sit on various support struts, adding an element of three dimensionality and an air of whimsy."  Whew!  


The fact that Hamilton Ontario also has a little garment district is less well known.  It's on Ottawa Street, and I had a chance to visit en route to Jordan.  My semi-planned destination was Bra-Makers Supply, renowned purveyor of all things necessary for beautiful and supportive undergarments.  My visit was fast, since there was little on the premises that was of much interest to my husband.  Not having enough time to consider and reconsider what I was doing (my usual shopping pattern), I bought The Book (Beverley Johnson's Bra Maker's Manual), two patterns, a bra kit (all fabric and other materials needed for one bra), two additional findings kits, some spiral steel boning, and I forget what else.  Oh yeah, two pairs of foam cups.  I was fitted for these by Beverley herself, with 3 students taking the intensive 2-month course preparatory to opening their own custom bra businesses looking on.  Fastest fitting ever.

Fortunately for my husband, many of the more interesting stores on Ottawa Street seemed to be closed for vacation, but we discovered more garment/sewing themed art.

The artist is Daniel Davelaar and it's the result of another juried public art competition.  According to this site, the sculpture is 3m (10'-0") high and "draped in cloth in such a way as to recall classical Roman and Greek sculpture. It is ... carved from a single block of Mountain Rose Granite."  The dark parts are polished and the lighter drapery is left rougher so it looks completely different.  I love it!  


Back at home, I'm almost finished the jacket from Vogue 8718.  The only thing left to do is the front fastenings.  The pattern calls for 4 smallish snaps.  I don't like that idea - they would be kind of ugly if the jacket is not done up, and the size Vogue wants me to use (9mm or 3/8") seem all too likely to pop open at the slightest provocation.  I'm toying with the idea of using hooks on the overlap side and making thread loops (almost invisible) on the underside, but I haven't decided.  The overlap is very small (about 1.5" in total or 3cm) so buttons are really out of the question.  Anyone have other ideas?