Showing posts with label Vogue 1083. Show all posts

Monday, February 28, 2011

Mmmmmmink lined coat

I know I promised photos on location, but so far nobody I was travelling with has obliged and I did not have any on my own camera. I was temporarily stymied in uploading the few decent photos I do have by the discovery that I seem to have lost the cable to connect my go-to digital camera to my computer.  All together now:  AAAAARGHHH!  However I have a work around so you will not be completely deprived today, and I promise to share any additional pics I get from my colleagues.

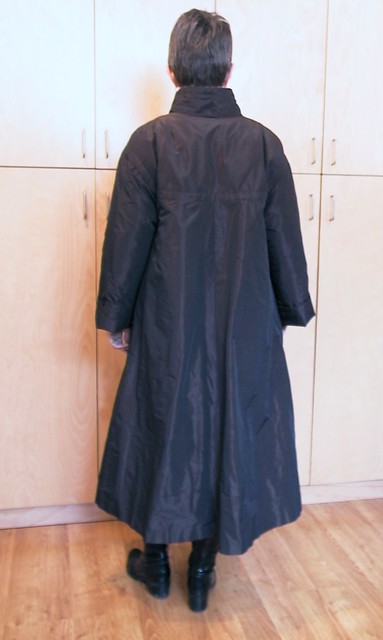
Because they are the only ones I have of the completed coat, here are a few photos shot in my indoor "studio location".

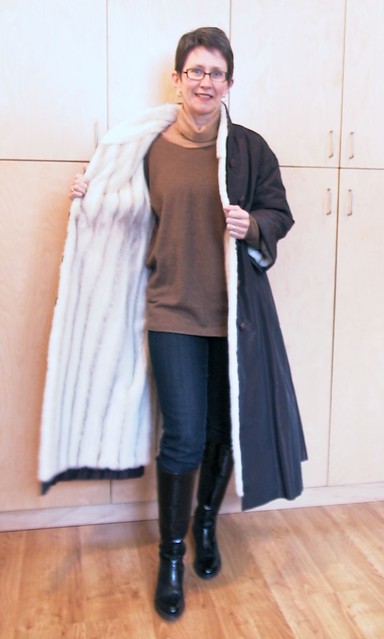
Ahh, the mink inside. So cozy!  It did finally get a "real" workout in the north when the temperatures plummeted to about -30C, with a wind.  I'm pleased to report that it came through with flying colours!  No wind penetration, except below the bottom button of course.  If I had thought to wear my snow pants I would have been entirely toasty warm, if not so elegant.

I like how the mink peeks out from behind the outer coat at the front and collar edges.


The top button pulls a bit as you can see in the buttoned-up photo.  I think I probably sewed it on a bit too high, above the point where the collar starts to curve.  However, all things considered I am pleased with how the collar looks, since I had to adapt the pattern to match the front edge and collar of the fur.


I took a lot of the flare out of the hem at CB but still, the outer coat is more flared at the hem than the fur.  Because the fabric is thin and a little stiff (think a synthetic taffeta) I weighted it by sewing small metal washers into the hem.  I thought airport security might be puzzled, but no questions were asked.

The coat is hemmed a bit longer than Vogue called for.  This decision was motivated entirely by the need to control flare.  I thought the 3" hem Vogue wanted me to sew would have been unwieldy.


To the left is is the best picture showing the edges in more detail.  I sewed the outer and inner coats separately, finishing the edges of each.  The outer coat facings are topstitched at about 2cm (.75") using heavy duty thread on my Featherweight.  I then hand-sewed the coats together along the front edge.

I've already blogged about the construction of the edges on the coat.  Here are a couple more pictures.  First, to the right is the front edge, showing how the bias strip is hand-tacked to the interfacing/lambswool layer below.

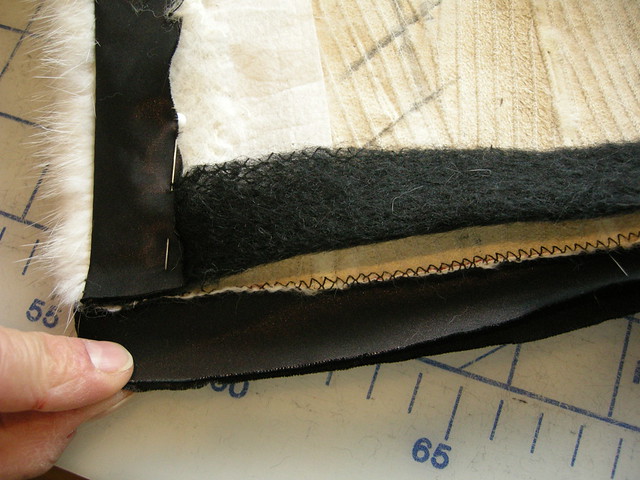
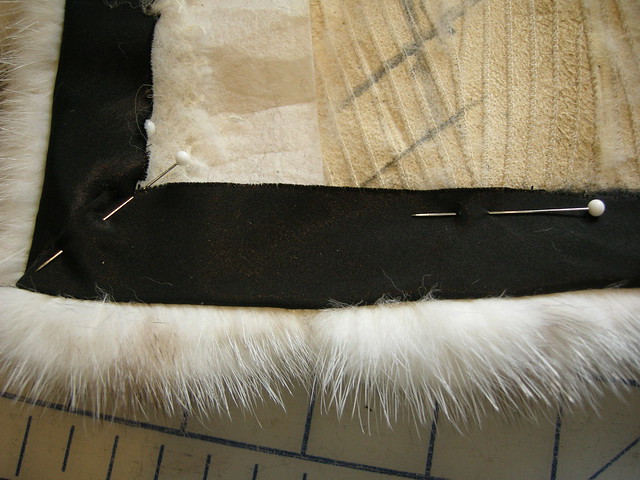
At left you can see how the bias strip is attached by zig zag to the lower edge of the coat, and the lambswool strip is in place.  To the right, I have folded up the bias strip and mitered the corner in preparation for hand sewing it to the coat.

By the way, I used a small glovers needle with ordinary sewing thread to do all hand-sewing on the leather, even though an ordinary needle would have been able to pierce the soft leather.  Glovers needles have a triangular tip (think bayonet) that went through this leather very easily.

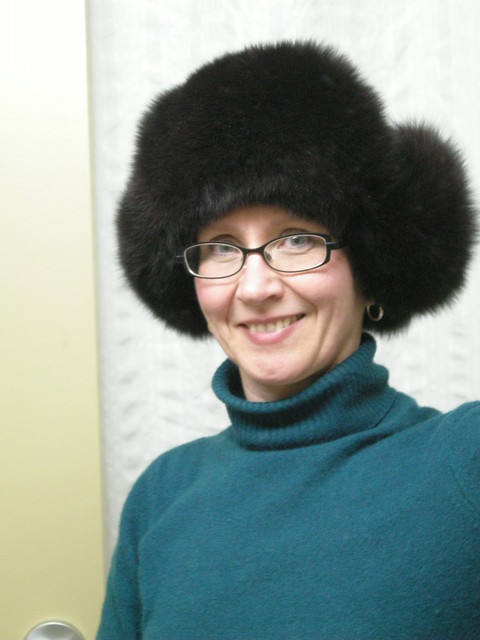
My souvenir hat:

Dark brown fox fur.  The crown is brown synthetic fabric, so ends up looking quite OK with the coat.  It has ear flaps that can be worn up or down.  They look kind of silly when down, but fox fur on the cheeks is divinely warm at -30 something with a wind chill.

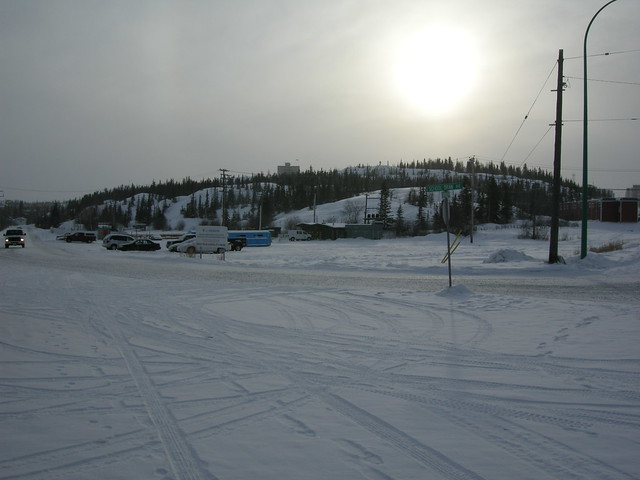
So here's a few shots of the locale.  Can you feel the wind chill?

Bullock's Bistro.  I had the musk ox.  The place was hopping!
Yellowknife, old and new.  The Wildcat Café was closed for the season.

I was the most stylish passenger in this dog sled.  Notice how the dogs are all different colours and do not have bushy long fur.  I thought sled dogs would look like the ones in this Wikipedia article.  Instead, they are Alaskan Huskies, which apparently originated from the "Native Village dog" i.e. a miscellaneous domesticated canine which happens to live in the far north.  And loves to run.  These doggies were anxiously waiting to be hitched up (I think 10 of them pulled 4 of us).


And the northern lights (Aurora Borealis) were out, and were seen, but not photographed by me (due to inadequate camera + frozen digits).  Here's one taken by the pros at AuroraMAX, on one of my two late nights outside in Yellowknife.


Now I'm back at home, and looking for a simpler project!

Fur-lined coat - pattern adjustment

This is a post about the adjustment of Vogue 1083.  I had to alter the pattern for two reasons.  First, for fit, and second, to suit the fact I was lining it with an existing fur coat.

Let's look at the fit adjustments first.  There are only two reviews of this pattern on PR but they served as a warning to watch out for the shoulders.  As they predicted, I found that the sleeve cap has too much ease given that it's a dropped shoulder.  However, the bigger problem is that the shoulder seam is too straight (think T-shirt).  The result of these features was an unattractively pointy low shoulder which had to be changed.  

To fix the shoulder, I curved the shoulder seam downwards about 1cm (3/8") from just beyond my shoulder point to the armscye seam.  This took a total of 2cm out of the length of the armscye seam which (along with the too-much-ease) meant that the sleeve pattern needed to be reduced in length even more.  To the left is a snap of this modification (which was also made on the back yoke piece).

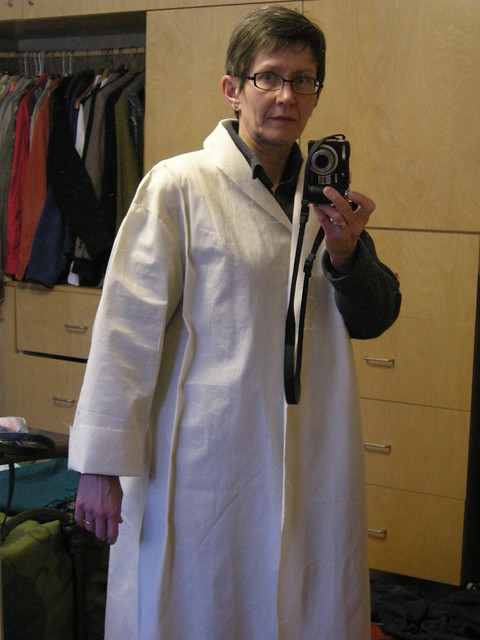
The second main fit alteration needed was to take width out of the front at the shoulder level.  My back is evidently wider than my front.  I've learned to trust the make-a-muslin-and-pin-out-the-extra-fabric method pictured below.

At the shoulder in the photo at right, you can see the pinched-out 2cm along the shoulder seam.  Below the shoulder is a more-or-less vertical dart which tapers to nothing at the shoulder, and at its widest is about 3cm (1.25").  This eliminates an unattractive fold that was forming, and which would have made the coat look far too big across the chest.

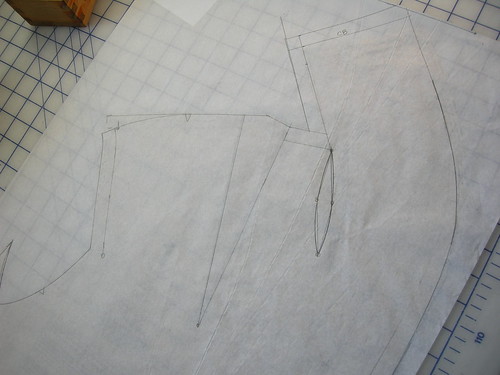
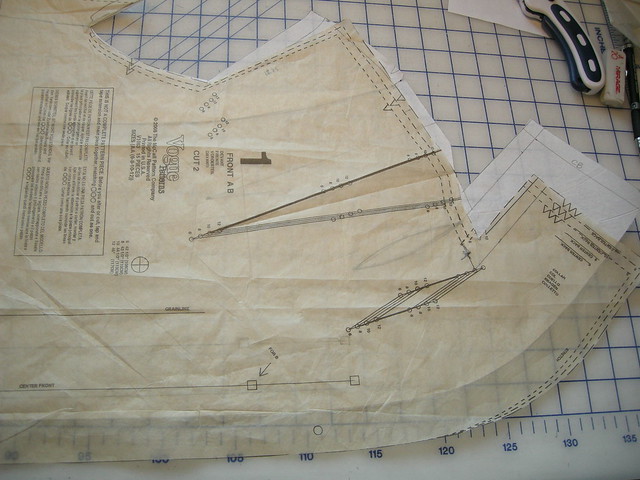
At left, you can see this vertical dart drawn on the pattern tissue.

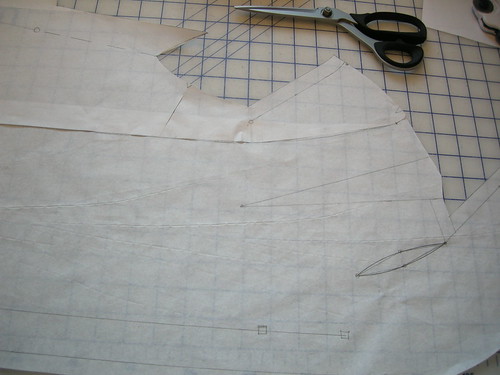
The next step is to slash the pattern along the dart's edge, and literally overlap the tissue so the lines (more or less) line up.  You can see, in the photo at right, how I had to slash through the pattern at the armscye to get it to lie flat.

The style adjustments were needed to accommodate the existing line of the collar on the fur coat.  The original coat had a shawl collar.  I removed the upper collar which left a curved under collar (CB seam) that transitioned to a straight CF edge.  Vogue 1083 also had a curved collar (a shawl) and straight CF edge but they were different shapes.  The Vogue pattern's neckline was higher and tighter than Furla's.  Also, the curve of the collar was lower and more gradual.

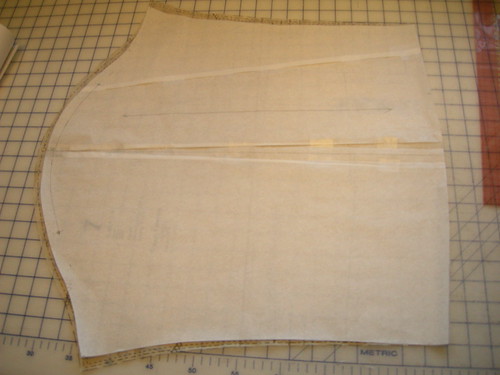
Here are some pictures showing how the final pattern pieces differed from Vogue 1083.


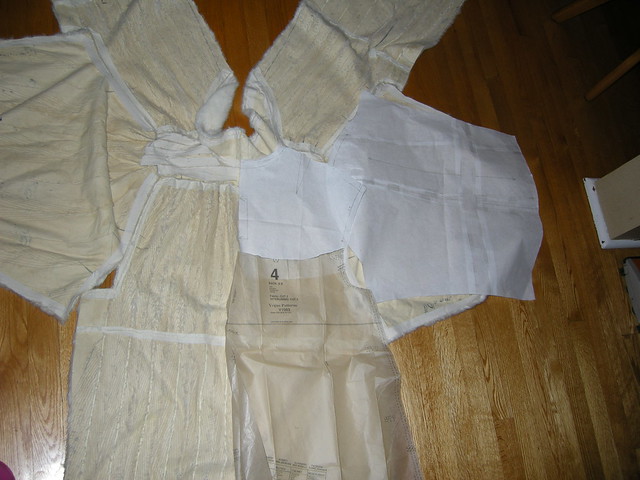
Finally, here's a picture of the taken-apart fur coat, with the adjusted pattern pieces laid out on top.  In the end I did not use the pattern pieces to cut the fur.  I completely winged it!

Wednesday, February 23, 2011

Toasty Warm

That's the verdict on the fur-lined coat so far.  However, even though The Sewing Lawyer is now Way Up North the coat hasn't had a real test.  It was only -19 yesterday when I went for a long walk, and -21 just now walking back to the hotel from dinner.  (Edited to say, those numbers are degrees C, but getting down to those temperatures there's less and less difference between C and F.  In degrees F, -21C is -6, and at -40, it doesn't matter which letter you use.)

I'm still lacking for photos of the finished coat on me, but in the meantime I'll share some construction details.

Not knowing how a fur coat is built, I paid careful attention when disassembling Furla.  It was a big surprise to me to realize how much sewing there was in this coat.

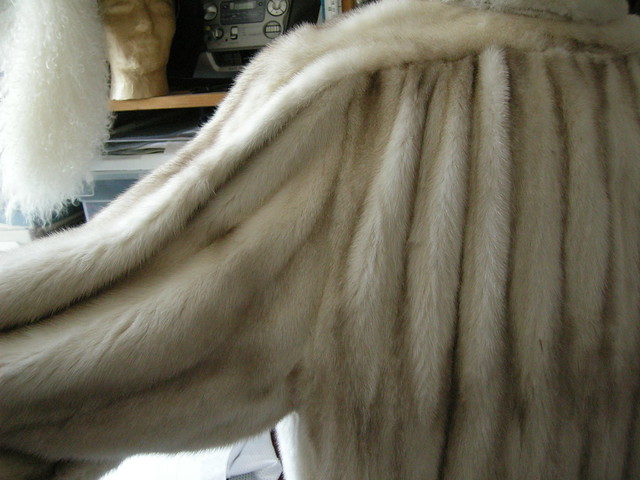
First off, the "fabric" of the fur is carefully constructed to maximize its natural beauty.  The mink was "let-out" - which means that the raw pelts are sliced into thin strips, apparently diagonally, and the strips are offset and sewn back together so that the original piece is lengthened.

Here's a photo of the inside of the upper front of the coat, after I took out the lining and removed the upper collar and front facing.  You can see (click the photo to get more detail) the diagonal lines of stitching joining these strips of fur, as well as vertical lines where the lengthened skins are joined to each other.  Towards the bottom of the photo you can see little dashes forming connected Vs.  These seem to correspond to darker markings on the fur and must have guided the furrier who originally painstakingly transformed the raw pelts into the symmetrical fabric needed for the coat.

The sewing is done with very light thread and the seams are extremely flat.  There must be miles of thread in the average let-out coat.

The construction seams are a little different.  They look like a tiny serged seam and create a slight ridge.  In the photo you can see the seam joining the under collar to the body of the coat, at the shoulder and joining the front of the sleeve at the armscye.  Something vaguely similar can be accomplished on an ordinary zig-zag sewing machine using a universal needle.  Set the zig-zag for about 2.5mm in width and the same in length.  The trick is to align the edges of the skins, fur sides together and sew catching both layers in the left swing of the needle, with the right swing landing to the right of the cut edges for an extremely narrow seam.  So, for sewing fur you do not need to allow for a seam allowance.  All the while, you have to be pushing/poking all the fur inside and away from the edges to be sewn.  I found my seam ripper worked reasonably well for this, but I had to stop very frequently to readjust.  If you do catch some of the fur in the seam, it may well not show, and if it does, you can (carefully) pull the hair out of the seam from the right side.

Back to Furla.  Bias strips of a woven fabric were applied  to all edges of the garment pieces in the original coat, as well as horizontally at the waist level.  You can see it in the photo above.  The tape appears to have been attached with a blind hemming machine or similar - the stitch is a chain stitch and again, very light weight thread is used.  I am not sure what function the tape plays.  It wouldn't work really well to prevent stretching of the fur, since it is cut on the bias.  Second, it's only lightly attached in a single line down the centre of the tape (and sometimes not too neatly).  Third, it is inconsistently sewn along with the skins in the seams, so doesn't seem necessary to strengthen the seams.  If any furriers read this, please enlighten me - what's it for?
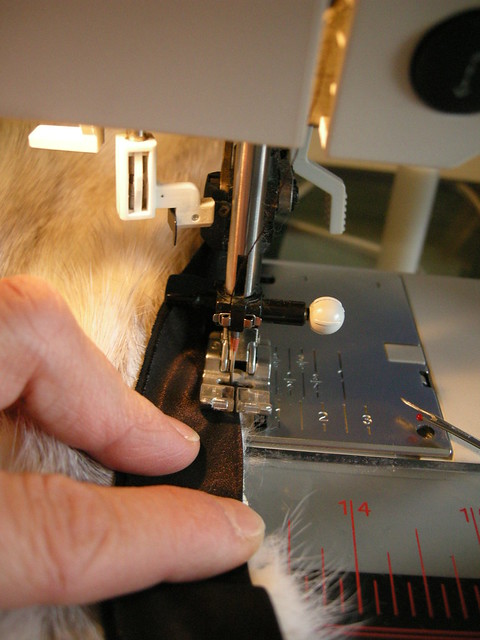
The skin of the mink is very soft and thin.  Once I had cut off the original facings and upper collar, the edges were very insubstantial.  However, I remade the edges as they were in the original coat.  All edges of the fur (i.e. where the lining attached) were finished with a bias strip of lining fabric (a substantial polyester) that was folded in half lengthwise.  The folded edge was attached to the fur.  I cut 5cm (2") bias strips of the outer coating, which is thin, folded them down the middle, and used a narrow zig zag stitch to attach them.  At left you can see an in-progress photo.  The seam ripper is just visible on the right - ready to poke those pesky hairs in and out of sight.

In addition, all edges (front, collar and hems) were originally padded with folded strips of lambswool interlining.  The collar and front edges were also reinforced with fairly rough-cut pieces of sew-in non-woven interfacing. Folding the bias strip over the lambswool produced a firm padded edge, very surprising in comparison with the un-reinforced fur.
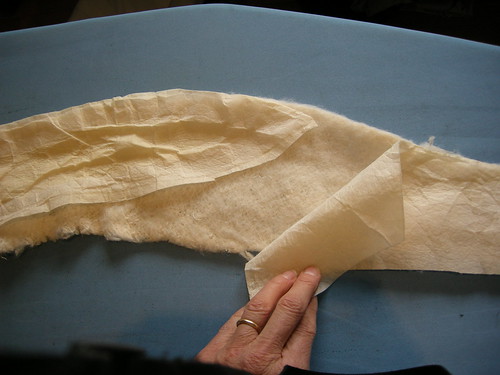
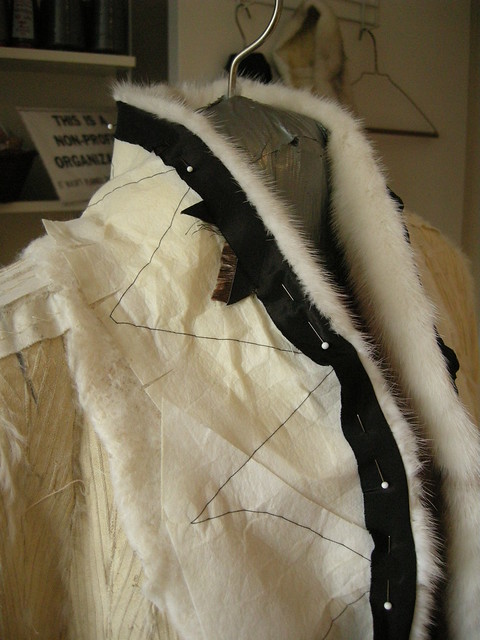
To the left are the lambswool padding and interfacing removed from the collar of the original coat.  I decided to re-use this material.  I first pressed the interfacing, and then loosely basted the layers together.  To the right is a photo of this padding sandwich, in the process of being reinstalled.  You can see that I've pinned the bias edges over it.  This causes the fur to roll attractively at the very edge.

I was surprised to discover when taking Furla apart that there are little holes all over the coat.  Most of these are a byproduct of the sewing needed to let-out the fur.  There might be a little point missing or imperfectly sewn at the edge, so the edge of one strip isn't a perfectly straight line.  However I also spotted a couple of mistakes, which were roughly repaired with a couple of hand stitches.  You would never spot these from the furry side, and the little holes do not impair the warmth of the coat, apparently.  Unlike sewing with leather, sewing with fur conceals a multitude of errors and imperfections!

That's it for now; I've got to get ready to go out to watch the Aurora borealis tonight.  My fingers are crossed for a really good show.  Will try to get photos...
Monday, February 21, 2011

Fur-lined coat - reporting in

I'm sure I had a clever title for this post, but it seems to have evaporated along with my energy.  I was gunning to have this coat finished today, and finished it is.  However I do not have pictures, yet.  You will have to watch this space.

I'm jetting off tomorrow morning at an ungodly hour for points north.  Yellowknife, Northwest Territories, to be exact.  It is 62.3 degrees north, 400 km south of the Arctic circle and about 1,500 km north of Edmonton, Alberta, which at 53 degrees is the furthest north I have been in Canada to date.  I have been further north in the entire world, having in 2007 visited Iceland where one day we went to Hafsós which is at 65.9 degrees north, but that was in August.  This is February.  In Yellowknife (unlike Iceland which has an extraordinary and surprisingly moderate climate) it is frigidly cold at this time of year.  The forecast is not filling me with abject dread - the coldest is -34 -on Thursday (wind chill -42) but daytime highs will be around -18 or so.  This will give my fur-lined coat a good winter workout, without causing me to worry that my life will be at risk.

I am hoping to see glorious displays of the northern lights, or aurora borealis.  This astonishing photo was taken at Yellowknife on February 5:


The garden variety northern lights are green only.  But still...

I shall walk out onto the frozen surface of the lake near my hotel where it's dark, to see them better.  Wearing fur on the inside.

Things to know about sewing fur:

  • Little hairs will be everywhere, no matter what you do.  
  • You don't need seam or hem allowances.
  • Mink is very light weight and the leather is extremely soft.  However, you can give it incredible oomph with interfacing and lambswool padding.
  • Glovers needles don't differentiate between "leather" and "skin".  If you have bad hand-sewing habits, blood will be shed.  Ask me how I know. 
Once I'm in the NWT I'll get someone to take a picture of me in situ, and I'll post more info about sewing a fur coat.  

Monday, January 31, 2011

The fur is flying

Remember my fur coat?  (Just ignore the actual subject of that earlier post and scroll right to the bottom.  The Sewing Lawyer will get back to that partially-constructed leather jacket a bit later when spring is in the air.)  "Furla" as the coat is known around here (obviously not the Italian high fashion leather products company), is partly deconstructed.  It's going to be the very luxurious inside to a weather-proof outside, using Vogue 1083.  The muslin-modification is in progress, and The Sewing Lawyer is gathering the inner strength needed to tackle fur coat sewing.  Removing the pocket bags and invisibly closing the openings in the coat fronts went very well, suggesting the project might actually be feasible.

Here are some in-progress photos.  First, introducing Furla.  

Here you can see the original smock-like cut of this coat.  I've removed the original line-backer shoulder pads.  The front and back are actually gathered onto the yoke.  The sleeves extend from the yoke, and are pleated at the cap for extra fullness, and pleated/gathered into fur cuffs.  The armscye is extremely deep (hits me at about waist level).  The back-neck length of the coat is a full 50" (127cm).  It hits me only a few inches above my ankles.  And it's very large - the original owner was clearly tall and a big lady!  This coat must have cost a fortune when new, there is SO much mink in it.


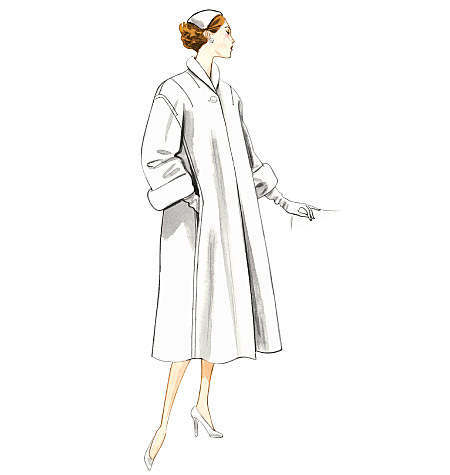
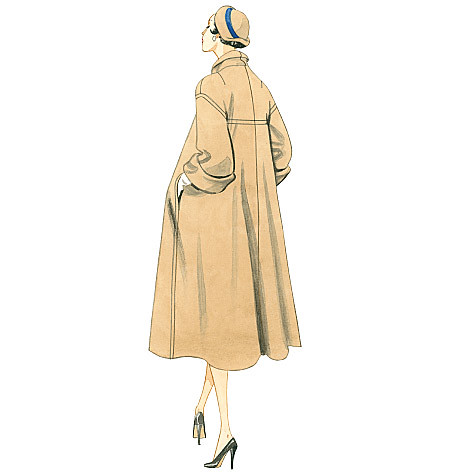
Now, introducing my first muslin of the pattern.  Here are some pictures from the Vogue site to show you what it's supposed to look like.
I see I managed to accomplish the look of stunned concentration that seems to go with the task of taking-a-picture-of-myself-in-a-mirror.

These photos show a couple of problems with the pattern.  It's too voluminous in a thin fabric.  I'm going to be using a thin fabric.
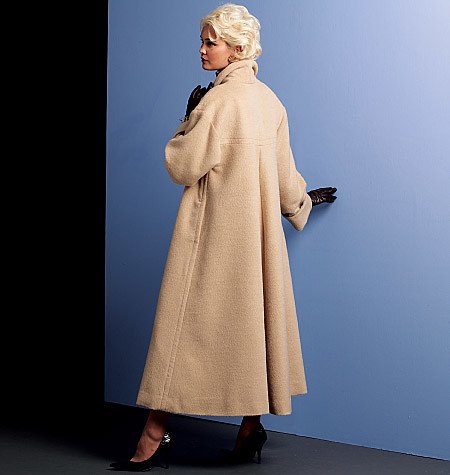
It won't fall beautifully like a wool coating, which is what this pattern is designed for - check out this photo (also from the Vogue site, and yes, the length shown here is more accurate than the line drawings - the back length of the coat pattern is 45" or 115cm).

I also found that the dropped shoulder sewn according to the pattern is not sufficiently dropped to get the graceful look on the pattern envelope - far from it, it stuck out most unattractively.  In the above photo, I have pinned a curved dart starting at the curve of my shoulder which will pinch out 3cm in total from the armscye at the shoulder.  There is also (surprisingly, since the cap is very flat) quite a lot of ease in the sleeve which contributed to the unattractive stick-outy look.  I'm going to have to take out a lot of width at the sleeve cap, but I don't want to lose the height since the angle of the sleeve is good.

So where am I going to remove volume?  First, from the lower front at the CB - I may take out about 20cm at the hem.  Second, in the front, I'm taking a vertical tuck of about 3cm in width to the outside of the bust dart, tapering to nothing at about the shoulder point.  I've pinned it out in the above photo.

The other adjustments to the pattern I'll have to make are dictated by Furla's neckline.  It is about 1.5 cm lower at the back and wider at the shoulder than the Vogue pattern.  I want the necklines to more or less match.

As for Furla, my plan is to leave as much of it as I can intact.  I'll let the yoke of the outer coat skim over Furla's gathers, for example. I have removed the upper collar for future purposes.  The under collar will line the Vogue shawl collar which I will wear standing for extra coziness.  I have to take the back yoke and collar in at CB by approximately 3cm because it's far too big in that area.  I am taking off the fur cuffs, which I will save, maybe for some leather mittens since they are quite small.  I will definitely have to remove width from the sleeve below the arm, and take the coat in at the sides, below the sleeves.  Hopefully this will have the effect of raising Furla's armscye enough to match the Vogue pattern, which is also pretty low in that area.  I will also have to shorten it.  My current plan is to simply attach the fur to the edges of the coat at CF and around the collar, which will let the fur peek out only slightly.

I'm taking this a little bit slowly since I have to think it through in terms of construction and inner materials as I go.  I expect to use lambs wool to pad the entire coat yoke, and I think I'll use fusible interfacing to stiffen the collar and front edges enough to support the fur.  Closures remain to be decided but I have some big buttons in stash.  Maybe round elastic button loops?  Should the cuffs be fur or fabric?  Any thoughts on any of this?

Wish me luck!