Showing posts with label leather. Show all posts

Sunday, December 11, 2011

Uh oh - too many projects

And it's not because The Sewing Lawyer's sewing room has been transformed into Santa's workshop this year.  Oh no.  Last year I was busy as the proverbial bee, secretly refashioning all those bits into fun presents for the entire family.  This year, I've got too many ideas on the go, and sorry, they're all for me.  I'm trying to convince myself that doing a bit at a time on them is an overall advance, but it may be well into 2012 before any of these see the light of day.

Project No. 1 - future leather jacket

You've already seen prototype no. 1 for this - my quilted curling jacket.   They say that a "wearable muslin" should be made up in fabric similar in hand and weight to your intended "good" version.  Well, on that theory, this jacket was a big fail as a muslin.  The knitted version is stretchy and puffy while the intended "fabric" - luscious lamb leather - is sleek and firm.  Apart from the too-low armscyes, I couldn't tell if the pattern would turn out well in leather.  And I wasn't certain if the armscyes would really be too low, if made in a fabric that wasn't prone to stretching in the length.

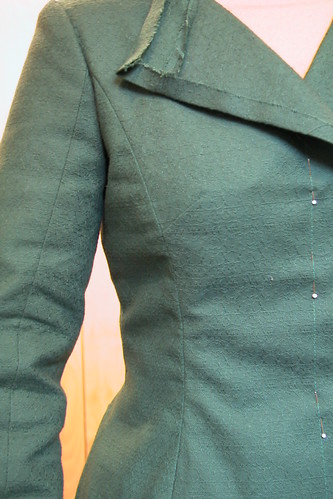
But the curling jacket did pass the "I think I like the style well enough" test.  So I made a real muslin out of some hideous green woven stuff I found a bolt of at a thrift store.

I'm still liking it.  And it turns out that raising the armscyes by about 2cm was a good call.  But this muslin shows the things that still need adjusting.
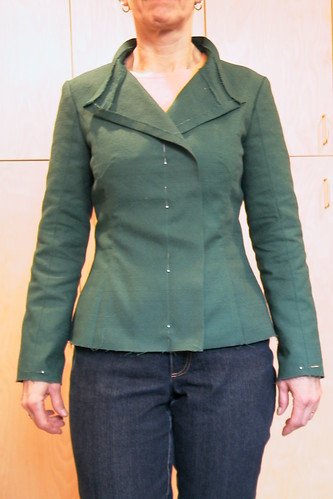
I over-adjusted at the hip when I graded out to a size 40.  I'm going to remove the extra width at least at the side seams.

The neck seam is about 1cm too high.  I have a forward neck.  This won't matter a bit when the jacket is open, as I'd probably wear it about 98% of the time.  But I'm going to lower the neck, and lengthen the collar accordingly.

The bust darts are too long.  This could be a marking/sewing error.  I'll sew them shorter in my good version.

The sleeves are a tiny bit too short, though I already took out my customary 2.5cm.

As you can see better in this view of the back, the shoulders are a tiny bit too wide.  I am going to think about whether to adjust the pattern, or (easier) fix this with some shoulder structure in the jacket, with minimal padding.

I really like how the seam on the front of the sleeve lines up with the princess seam.

I'm going to plan the zipper placement properly and put a seam in the right side facing and the left jacket front, rather than apply the zipper on top of these pieces.  I have deluxe Riri zippers for this jacket, and even though the front one will be partly hidden, the shorter ones in the front sleeve seams will be on full display.

I am going to retrace this with my adjustments, and 1cm seam allowances.  I will make a pattern piece for every single piece, i.e. one for each of the left and right sides, as taught by Kathryn Brenne.

Project No. 2 - Leather mittens

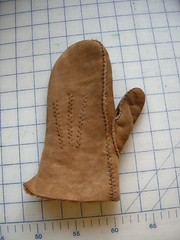
I've made leather mittens before.  But the ones I've got planned will up the ante, in terms of the complexity of the pattern.  

I recommend Make your own gloves by Gwen Emlyn-Jones. I've had a copy for years but confess to not really having examined it before being challenged to replicate these worn-out mittens.   There are patterns in the back, in several sizes.
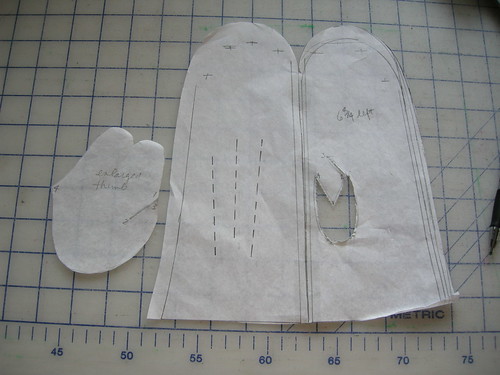
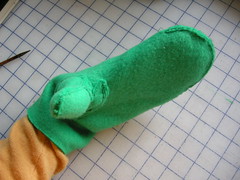
I mocked up a pattern, which I enlarged since my material is a little thick.  I then made a muslin out of fleece scraps.  Frankly I had my doubts about the thumb, which looked so much bigger than the hole it was to go into.  But it was absolutely the perfect size, and the muslin turned out pretty well, as you can see here.  

These are sewn together by hand - a simple running stitch - but they go together surprisingly quickly.  I have some quality time with a glover's needle ahead of me.


Project No. 3 - Knitting

I'm well into my version of this great sweater/jacket.  The pattern is available free here (in English) and here (in original Finnish).

I'm making it in a gorgeous teal colour.

Pictures to come.  Or check out my progress on Ravelry.

Sunday, September 4, 2011

OOO RAH Wallet

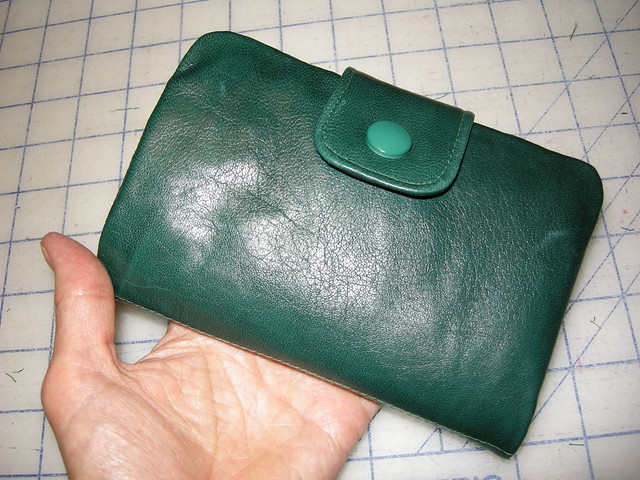
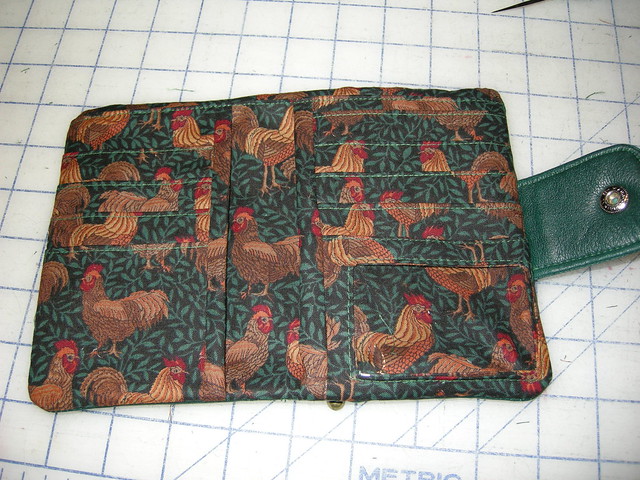
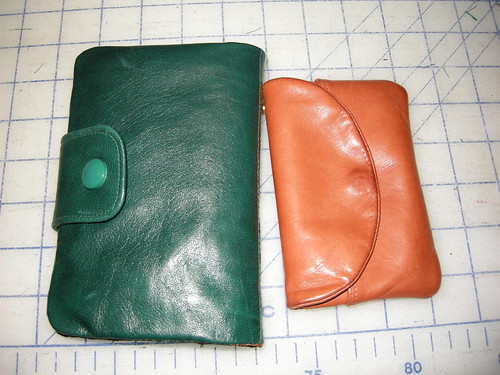
As promised,  here it is.  A green lamb-leather folding wallet.  It measures 6" x 4.25" (approximately).

I considered doing the topstitching to complete it, but after eyeing the thickness in the middle of one side (10 or maybe more layers of inner cotton, 2 layers of padded snap tab, and outer leather layer, doubled because turned in on itself) I decided discretion truly is the better part of valor, finger pressed the edges as much as I could, and called it done.

Debbie suggests using quilting cotton for all layers, and cutting the pattern from three fat quarters.  The Sewing Lawyer has heard this term "fat quarters" before, but not being a quilter, isn't 100% sure what they are and wasn't about to go out and buy fabric for this little item, since there is a fabric supply to last several lifetimes within reach at home.

And the stash came through.  This cunning print, miracle of miracles, coordinated perfectly with the green leather.

Chickens?

Yes, those are chickens.

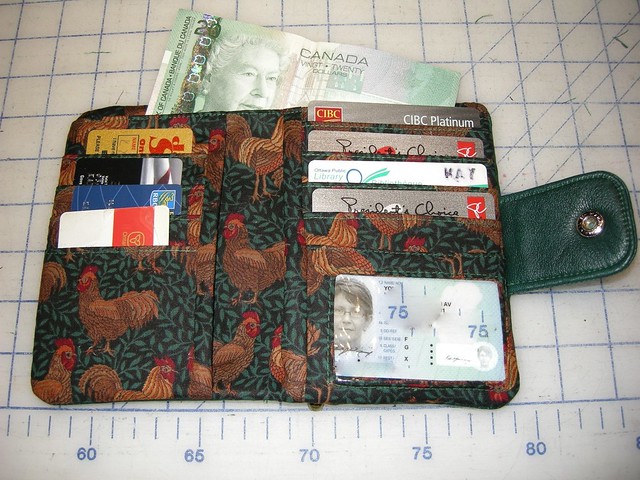
The wallet has many many pockets for the numerous credit, debit, library and other cards a person seems to need these days.  In addition, there are pockets under the pockets on either side, and a deep pocket opening at the top, which is the full size of the wallet.

The lower right slot has a vinyl insert for your most used ID.


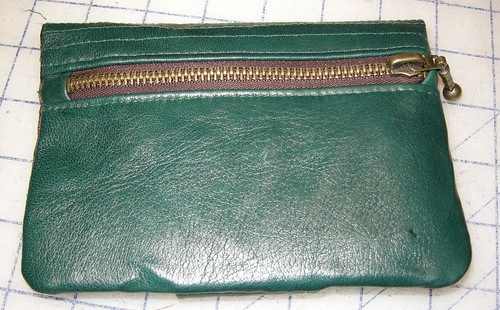
It has a zipper coin pouch at the back.

It's bigger than my last wallet effort.  Maybe surprisingly, they both hold the same stuff.  It's nice to have alternatives, don't you think?


I've stuffed it here, to illustrate.  A person could go shopping.

Good Job, Debbie!  (Click on this link to buy the pattern.)

Miscellany

First, an apology for not posting much in the past few weeks. It's a source of continual amazement to see that people do continue to visit this blog daily, and that the number of followers here continues to rise even in my absence.  Almost 300!!!

During her absence in the real world, The Sewing Lawyer seems to have been busy.  Although there isn't much production.  Actually, if I am honest, there hasn't been any.  The Sewing Lawyer's sewing room has mostly been dark and neglected.  Too bad the cleaning fairies didn't take advantage of the opportunity to get in there and do some serious organizing.

Really the machine has only been running in connection with a little project which is (sort of) for someone else.  If you hang about on sewing sites, you will have come across Debbie Cook of Stitches & Seams.  Recently she's turned her considerable talents to producing a pattern and I volunteered to help test it.  She kept up her end of the arrangement admirably by sending me the pattern (PDF) and then e-mailing updates on its development in real time.  I'm not so sure I've performed adequately as a tester as the item is languishing, almost finished, in the messy sewing room.  I did send Debbie feedback on the pattern as I went, anticipating that this might happen, but I'm still hanging my head in shame, and hoping I'm not too deeply entrenched in Debbie's bad books.

On the positive side, the pattern (which is for a wallet) is for sale in her Etsy store where I seriously hope it is selling like hotcakes.  It's very professionally-done, IMHO.

On the negative side, The Sewing Lawyer (as usual) has made things difficult for herself by choosing to make the wallet out of leather. My machine is struggling through the layers in places even though the innards are cut out of the intended material - quilting-weight cotton.  I think I see some difficult hand-sewing in my near future since there is no way I am attempting to topstitch this baby by machine.

Perhaps in my far-distant future, I see a sewing machine that can power through layers of leather without faltering and skipping stitches.

Pictures to come (I promise) this very weekend.  Which is a long weekend in Canada!  Yay!

Other things to know, which have something to do with sewing.

While doing laundry today, the evidence clearly indicated it was time for new undies.  Not only does The Sewing Lawyer have a guilt-inducing pile of bra patterns with all needed materials sitting on the cutting table, the stash contains all the stuff for making panties, including a TNT pattern (before you ask, it's cloned from a pair purchased in the far distant past, then tweaked through several home-factory panty-making sessions over the years).  My version looks (sort of) like Jan Bones "smoothie" panties.  But it has a lower rise.

If you are inclined to make your own underthings, not only are there commercial patterns out there (this one from Jalie, for example), there are several for download on the www.   I first saw the "cheeky panties" pattern on Burdastyle, but today Google turned up this site which has a link for the graded version as well as the original instructions by Burdastyle member EmilyKate.  This pattern intrigues me but having traced it out and compared it with the TNT, my strong suspicion is that it's best reserved for teenagers or those with figures like teenagers.  In short, the TNT looks more like a TeNT.  I console myself with the thought that the back piece has to be big because it wraps mostly around to the front.

If I blog about making undies, the posts may very well not be illustrated, if you know what I mean.

Finally, I got an iPad for my birthday last month.  Being new to Apple (I'm a confirmed PC user) it's taking me some time to get comfortable with and understand how I ought to be using this intriguing little machine.  Please help!  What are your best recommendations for apps and content?  How do you use your iPad in the sewing room?

Thursday, May 5, 2011

Cloning a new wallet

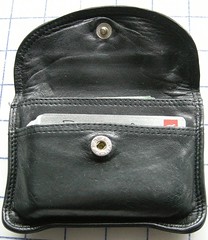
The Sewing Lawyer has been using the same wallet, on and off, since 1984.  That's a lot of years for a little leather object.  I know I bought it in 1984, because I remember doing so very shortly after my arrival in Cambridge, UK, where I spent a glorious year as a graduate student.  I think it was very inexpensive - £5 sticks in my mind.


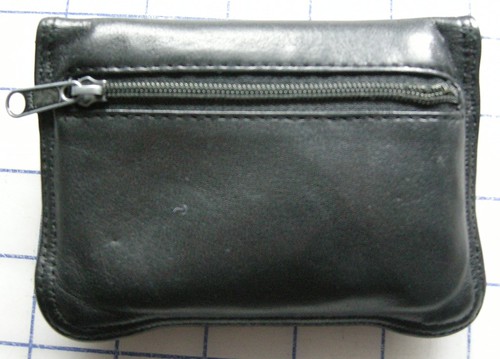
I thought it was pretty nice when I bought it, but I probably didn't come to appreciate how great a thing it is until I had used it for a while.  It's a really simple but effective design and it's extraordinarily well made.  If I had known that the leather of that wallet would stay so glossy and beautiful through moderately intensive use for more than a quarter century (ULP!), I probably would have sprung for a few of them even on my student budget.  And now, if it was only a question of wear to the leather, I wouldn't consider abandoning my old friend.  Unfortunately, however, the coil zipper of the coin compartment, at back, is about to give out.

Really, the thing only has two flaws (aside from the fact that the zipper only lasted for a couple million openings and closings).

First, it's a small black object that tends to lurk in the deep recesses of a black-lined handbag.  The Sewing Lawyer was a graduate student in 1984.  Those of you who are her contemporaries will find that enough has been said.  Those of you who are younger ... well, let me just say that the day will come when you too will curse the designer who chose black fabric for the lining of your handbag.

The second flaw is probably the reason that the zipper won't be lasting into its fourth decade.  The coin compartment opening doesn't open up very much, really. Over time,  a lot of stress has been put on the coils at the closed end where the pull is repeatedly forced (a couple million times so far) as far open as it will go, when the Sewing Lawyer's not-really very big fingers probe the innards of the wallet to find the correct change.

So thoughts turned to producing a comparable object, but without the two flaws, to replace the original.  The first problem was to get the right kind of leather.  When I visited Perfect Leather in Toronto last fall, I showed the knowledgeable lady at the desk my wallet and asked her what kind of leather it was made from.  Without missing a beat, she said "Goat .... what colour do you want?"  There was quite an array.  I came away with a couple of square feet of orange goat leather.  I used some of it to make a case for my reading glasses (not all of those were presents), which is extremely easy to find in my handbag.

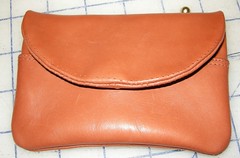
I approached the design and manufacture of the orange clone as an experiment, on the "just do it" approach to sewing.  So it's definitely not perfect.  I may make a second one that will look and perform slightly better, but for now, I'll happily use my new wallet.

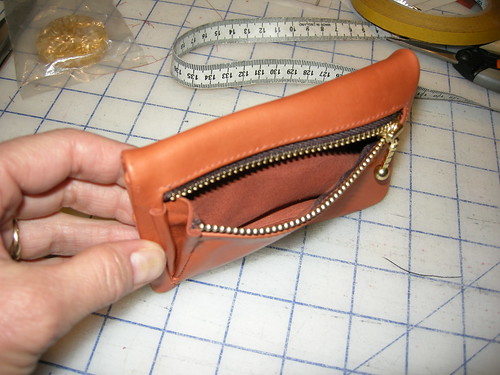
This pic reveals two problems.  First, the edges were too thick for my machine so I abandoned my original complete clone plan and didn't do the double row of topstiching on the original (yes, the original was sewn right sides together and turned, just as my clone is).  I had to rip out the stitches around the flap, leaving unsightly holes (sigh).  I would have to figure out how to remove a lot more bulk from the edges if I am going to replicate the original in this respect.

Second, I forgot to cut the outer layer of the leather flap longer than the under layer to allow for turn of the "cloth", so the seam tends to flip up in a not-great-looking way.  This would be easy to remedy.  Next time.  And I think the flap is a slightly less attractive shape than the original, even though I made the pattern by tracing around it.  This would also be an easy fix.  Next time.

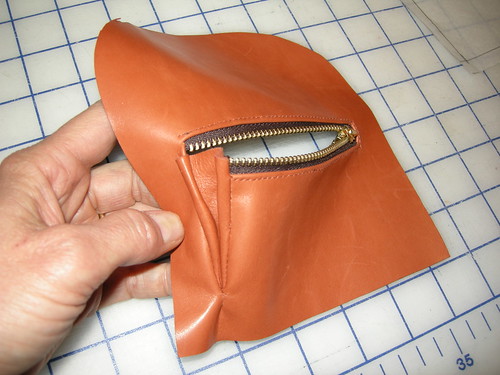
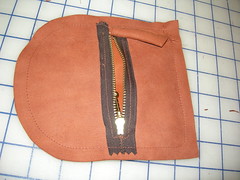
Anyhow, but for these problems which I might be able to remedy, the construction of this little project was super simple.  It has two layers - the inner layer with two pockets and the outer layer with the zipper opening.

Construct each layer.  Above you can see my functional but not beautiful gusset to remedy the second flaw.  I found a metal zipper which should be stronger.  To the left, proof that I realized I needed to build in turn of "cloth" room in the pockets, even though I stupidly forgot to do the same for the flap.

Apply the snap.  Seriously, this was the part that took the longest, since it has been many years since I've used any of these four-part snap assemblies of which I seemingly still have hundreds in my stash.  (Cleverly, the snap is attached in such a way that it absolutely does not matter if the usually-visible part matches the leather - my snap is green.  Can you tell?)


Sew the layers together around the edges, right sides together.  Trim seam allowances.  Turn it right side out through the zipper opening.

Done (except for my abortive attempt at topstitching).

The gusset works rather well.  

Sunday, November 21, 2010

A new trick - Spanish snap buttonholes

It's good to stretch your skills by trying something new, right?  The Sewing Lawyer challenged herself by trying the "Spanish snap" buttonhole technique today.  The instructions can be found in Roberta Carr's book Couture:  the art of fine sewing.  Or, read on...

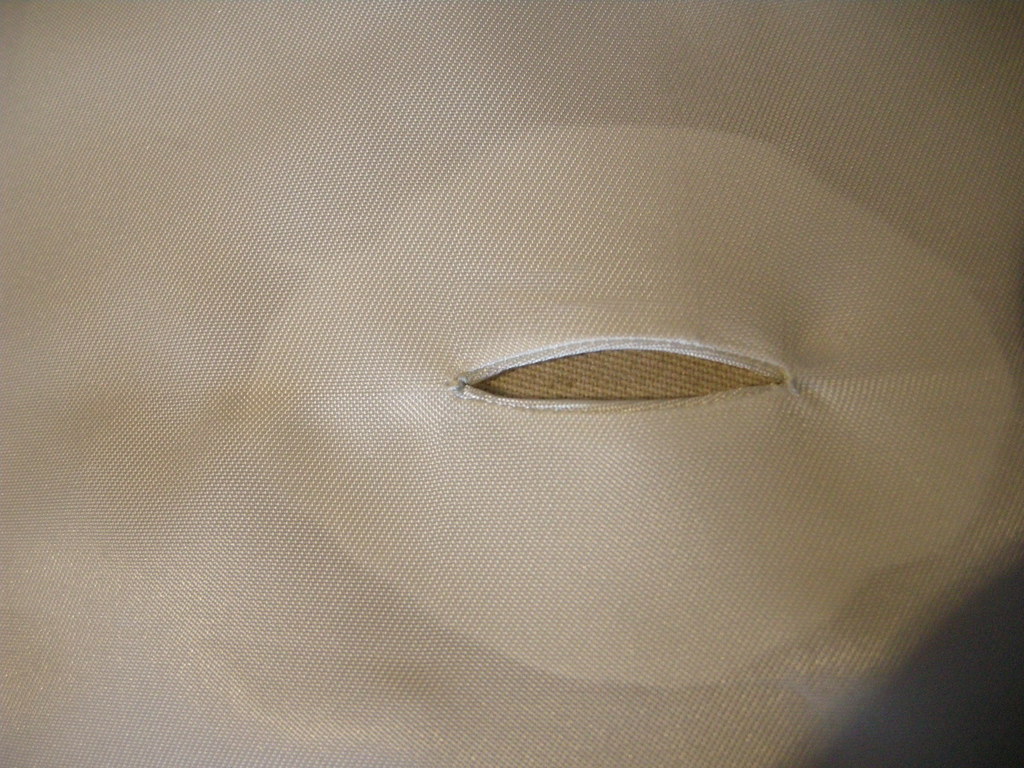
First, here's what a Spanish snap buttonhole looks like (click on the photos for eye-popping close-up detail).


This technique came to mind for the project of re-lining my Auckie Sanft jacket.  One of this jacket's fantastic features is that it's lined to the front edge.  But... that meant that its buttonholes were originally sewn through both the fabulous Linton tweed, and the lining fabric behind it.  Removing the lining meant literally cutting the lining fabric out of the buttonhole stitches.  I needed a way to make buttonholes that would lie behind the original ones and look good from the inside.  The latter requirement meant that sewn buttonholes were instantly rejected.   (Sew buttonholes in one layer of lining fabric?  No thank you!)

Then I remembered reading that Chanel jackets sometimes had bound buttonholes made in the lining to back sewn buttonholes in the outer jacket.  And I dimly remembered the Carr technique.

Ms. Carr wrote:  "Frequently used by the designers, this buttonhole has very thin lips that can hardly be seen.  I like to call them 'invisible' bound buttonholes.  The advantage of a Spanish snap buttonhole is that it can be made very small - as one might use on a silk blouse.  On the other hand, Spanish snap buttonholes are equally effective used on a tweed or nubby fabric with the lips made from wool flannel or worsted."

What's not to like?  Here's how to make them.

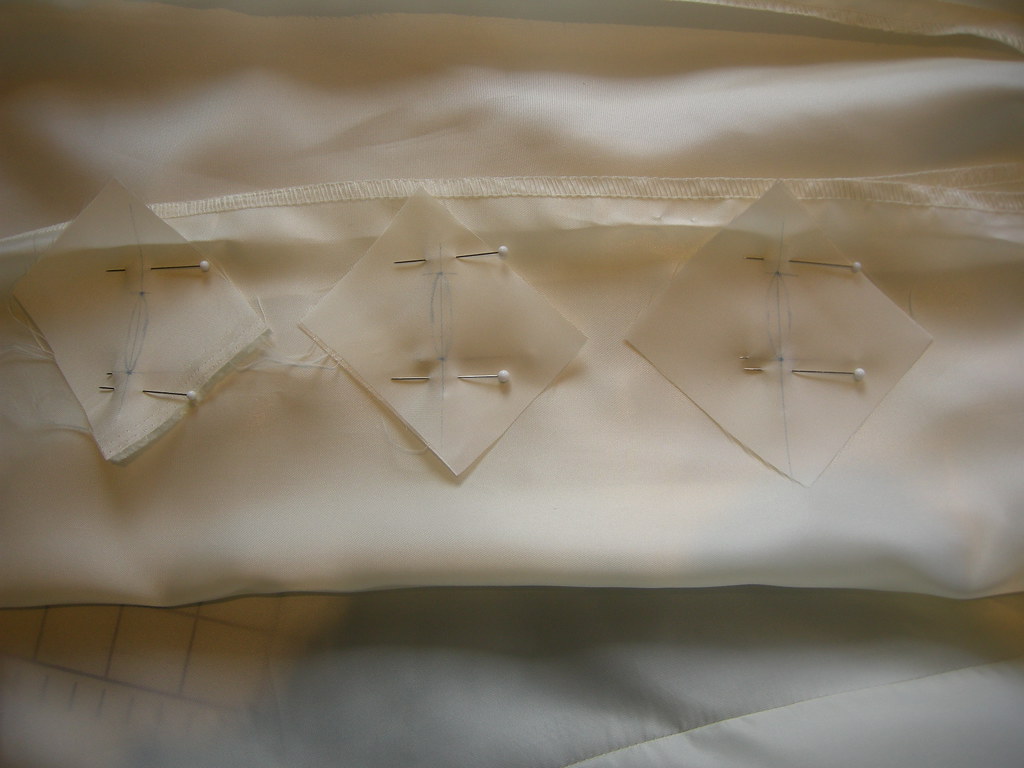
First, mark your buttonhole placement on the fashion fabric.  Then cut little patches that are big enough so that ON THE BIAS (this is important!) they are as long as your marked buttonholes, plus about 2.5cm (1") on either end.  Mark the patch (wrong side) with a line that represents the centre line of your buttonhole, and the ends of the buttonhole.  Then draw (lightly) a pointy oval shape (like a flattened football) that is about 6mm (1/4") wide at its widest, centred on the marked line.  Carefully pin your patch to the markings for your buttonholes, right sides together.

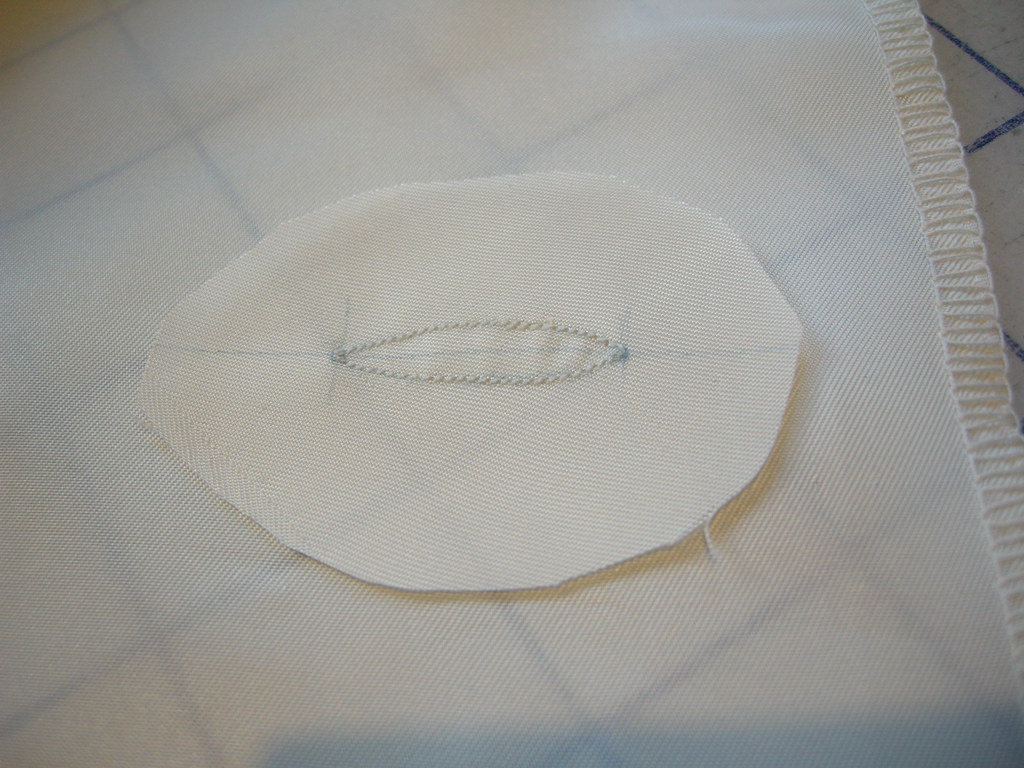
Sew around the marked football, pivoting at the pointy ends, using teeny-tiny stitches (1mm on my machine).  Here's a close up of the stitched patch.  You can see I've trimmed my patch to an oval shape. Ms. Carr suggests starting with this shape but it really doesn't matter. 

Snip carefully along the marked centre line to (but not through) the stitches at the pointy tip.  Then pull your patch through to the wrong side.

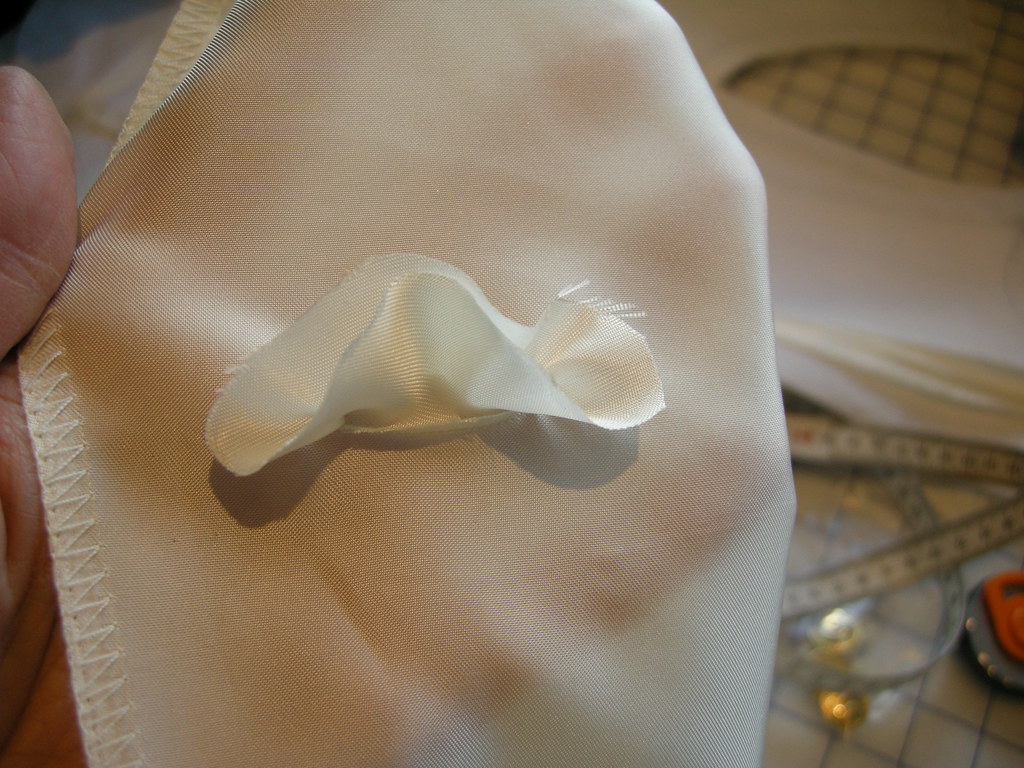
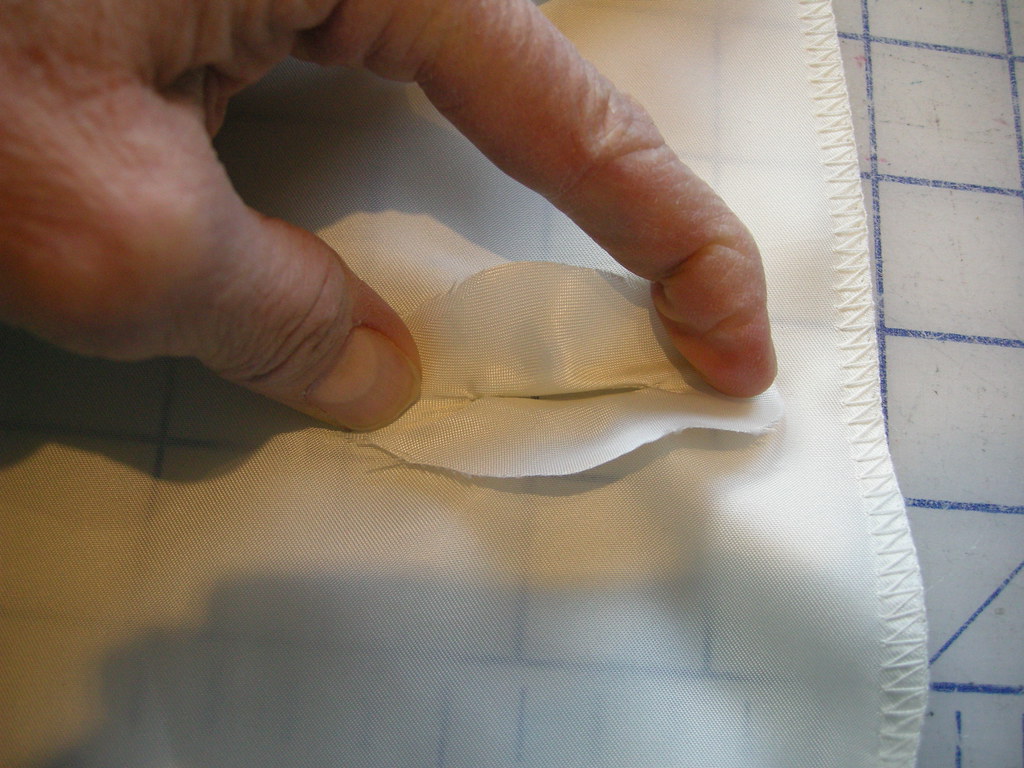
Next comes the magic, ineptly illustrated here because I was holding my camera with one hand.  To quote Ms. Carr:  "Holding each end of the egg shaped patch with the thumb and forefinger, pull in a snapping motion.  One good 'snap' and the bias will wrap around the 1/8" (.3cm) seam allowances and automatically create tiny narrow lips."

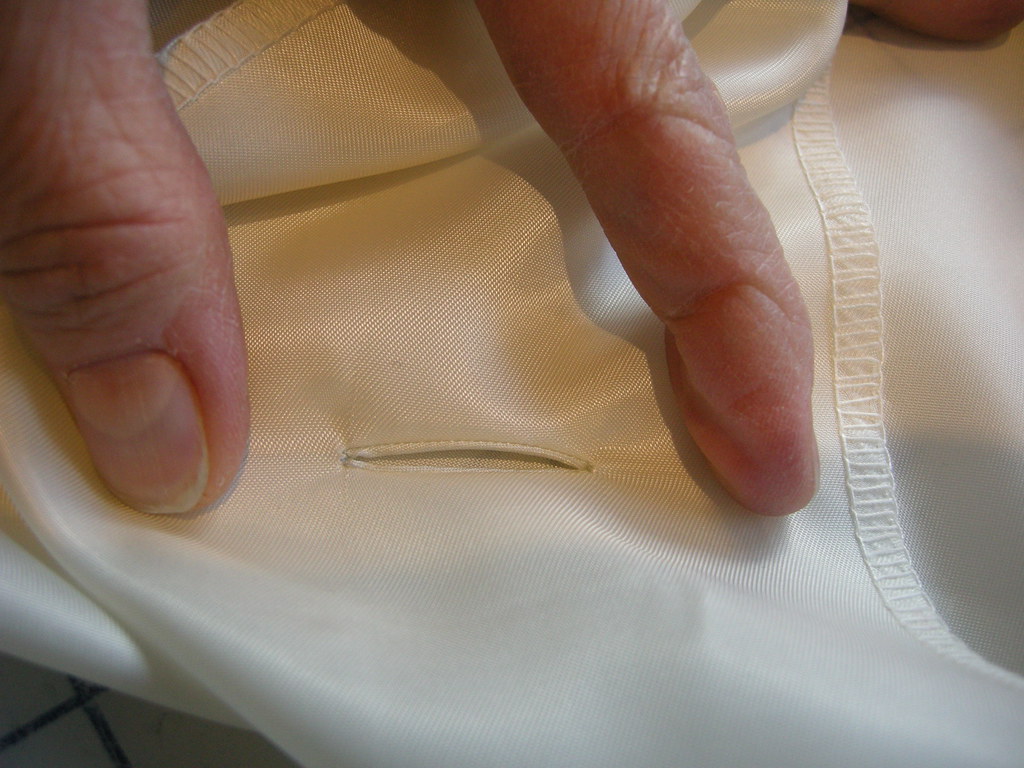
This is the right side, even before pressing!  

Magic, I tell ya!

No additional sewing is required - Ms. Carr says you can use a tiny bit of fusible web at each end to keep the patch in place.  (I will however tack the patches to my jacket to keep the buttonholes in place.)


In other news, I had approximately 50 minutes while in Toronto to shop, and I wanted to do two things:  visit Perfect Leather at 555 King Street West; and look for waterproof (or water-resistant) fabric for the fur coat.  


Guess which one prevailed?  (This photo from Perfect Leather's website.)  All I can say is WOW!  I think you can find any kind of leather; any colour; any finish; any size; any combination.  Needless to say there is a very intoxicating and leathery perfume in the place.  I bought 4 sq.ft. of orange goat leather for a little project...