 The Sewing Lawyer has been using the same wallet, on and off, since 1984. That's a lot of years for a little leather object. I know I bought it in 1984, because I remember doing so very shortly after my arrival in Cambridge, UK, where I spent a glorious year as a graduate student. I think it was very inexpensive - £5 sticks in my mind.
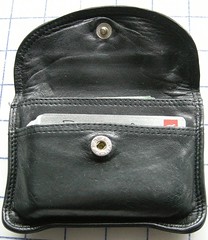
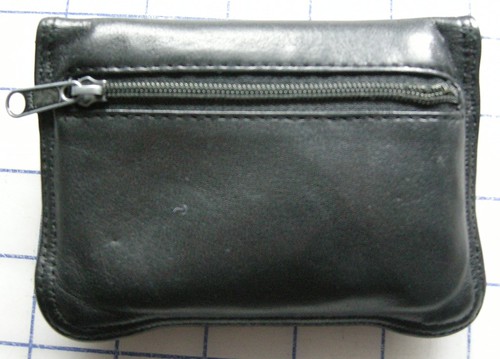 I thought it was pretty nice when I bought it, but I probably didn't come to appreciate how great a thing it is until I had used it for a while. It's a really simple but effective design and it's extraordinarily well made. If I had known that the leather of that wallet would stay so glossy and beautiful through moderately intensive use for more than a quarter century (ULP!), I probably would have sprung for a few of them even on my student budget. And now, if it was only a question of wear to the leather, I wouldn't consider abandoning my old friend. Unfortunately, however, the coil zipper of the coin compartment, at back, is about to give out.
 Really, the thing only has two flaws (aside from the fact that the zipper only lasted for a couple million openings and closings).
First, it's a small black object that tends to lurk in the deep recesses of a black-lined handbag. The Sewing Lawyer was a graduate student in 1984. Those of you who are her contemporaries will find that enough has been said. Those of you who are younger ... well, let me just say that the day will come when you too will curse the designer who chose black fabric for the lining of your handbag.
The second flaw is probably the reason that the zipper won't be lasting into its fourth decade. The coin compartment opening doesn't open up very much, really. Over time, a lot of stress has been put on the coils at the closed end where the pull is repeatedly forced (a couple million times so far) as far open as it will go, when the Sewing Lawyer's not-really very big fingers probe the innards of the wallet to find the correct change.
So thoughts turned to producing a comparable object, but without the two flaws, to replace the original. The first problem was to get the right kind of leather. When I visited Perfect Leather in Toronto last fall, I showed the knowledgeable lady at the desk my wallet and asked her what kind of leather it was made from. Without missing a beat, she said "Goat .... what colour do you want?" There was quite an array. I came away with a couple of square feet of orange goat leather. I used some of it to make a case for my reading glasses (not all of those were presents), which is extremely easy to find in my handbag.
I approached the design and manufacture of the orange clone as an experiment, on the "just do it" approach to sewing. So it's definitely not perfect. I may make a second one that will look and perform slightly better, but for now, I'll happily use my new wallet.
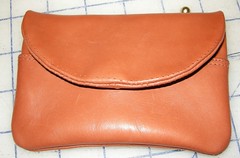
 Second, I forgot to cut the outer layer of the leather flap longer than the under layer to allow for turn of the "cloth", so the seam tends to flip up in a not-great-looking way. This would be easy to remedy. Next time. And I think the flap is a slightly less attractive shape than the original, even though I made the pattern by tracing around it. This would also be an easy fix. Next time.
 Anyhow, but for these problems which I might be able to remedy, the construction of this little project was super simple. It has two layers - the inner layer with two pockets and the outer layer with the zipper opening.
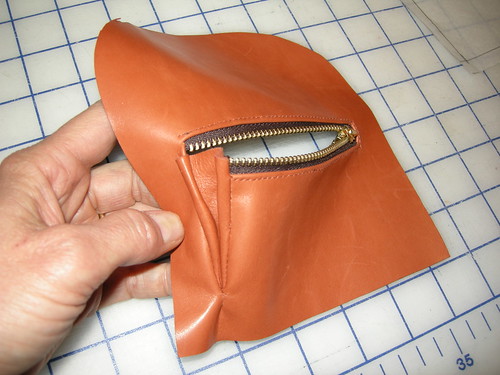
 Construct each layer. Above you can see my functional but not beautiful gusset to remedy the second flaw. I found a metal zipper which should be stronger. To the left, proof that I realized I needed to build in turn of "cloth" room in the pockets, even though I stupidly forgot to do the same for the flap.

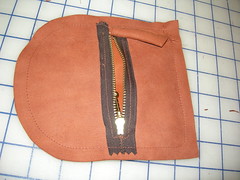
Sew the layers together around the edges, right sides together. Trim seam allowances. Turn it right side out through the zipper opening.

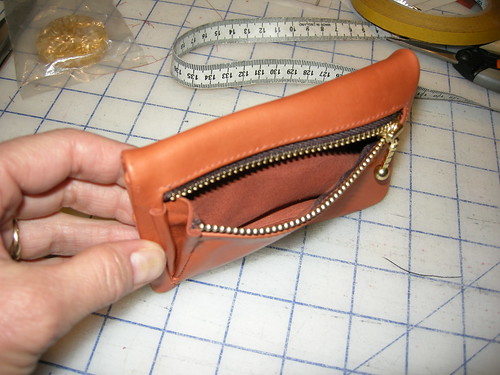
The gusset works rather well.
No comments:
Post a Comment