Showing posts with label Burda 7731. Show all posts

Monday, February 7, 2011

Burda 7731 - back from the dead

The Sewing Lawyer hates UFOs and sewing failures.  So she has been stewing over Burda 7731 since January 1, 2010, the date on which she took it off life support, and told you about it.  It was so sad.  And so frustrating, since there ought to have been a warm, wind and waterproof winter coat in there somewhere.  But Burda 7731 languished, unfinished, in the Sewing Lawyer's sewing room, for the last 13 months.  It mocked her from its hanger.  It loomed over her.  And heck, she wanted a coat like that!  Recently, the Sewing Lawyer was even spotted trying on coats, in stores (!) that were kind of like Burda 7731, except shorter.

And so, an idea was born.

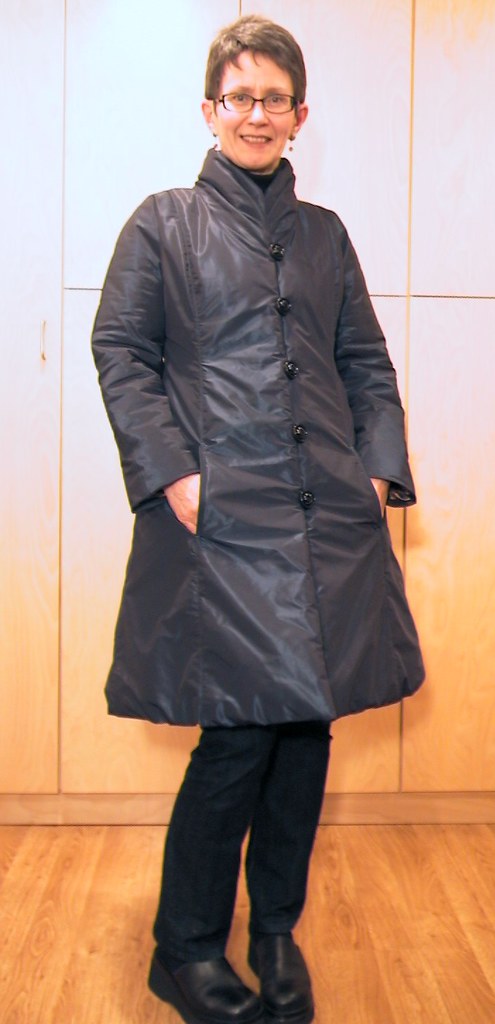
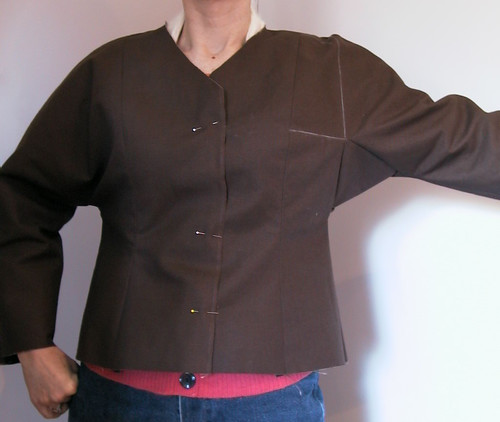
Really, there was little that remained to be done - just the hems and buttons.  So much easier after 34cm were lopped off the bottom (marked with a line of pins in the picture at left).

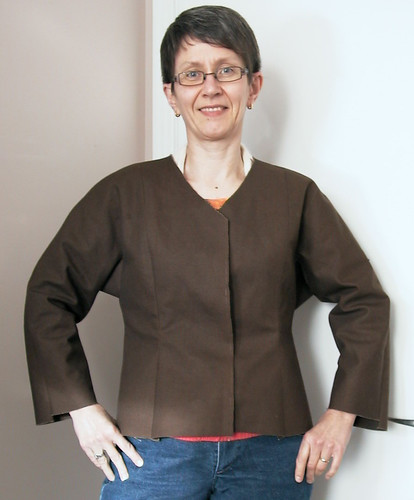
Now, the Sewing Lawyer likes to think that the rumpled and puffy synthetic taffeta looks sporty instead of sad.

Details?


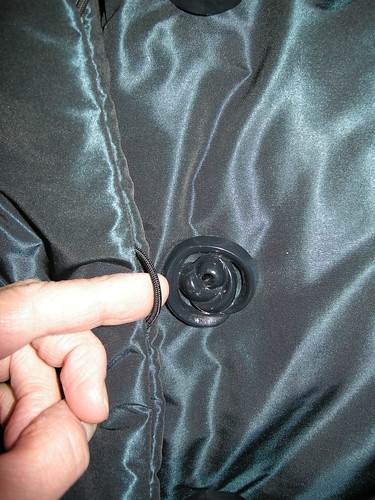
In the stash were these interesting vintage plastic buttons, and some firm black round elastic.  It was a simple matter to poke the elastic through the seam attaching the facings to the coat front.  The ends of the elastic were first singed to prevent fraying of the synthetic outer coating, and knotted inside the coat before being stitched into place.

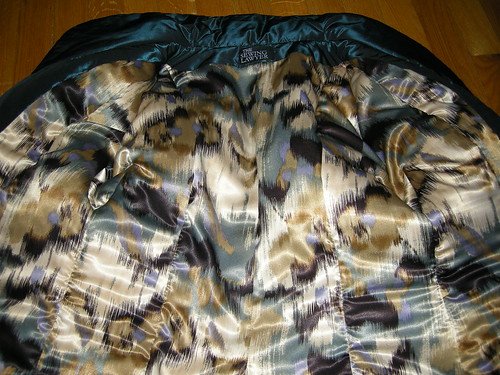
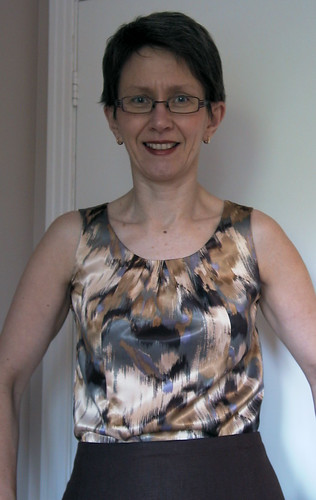
The lining is a poly satin (Fabricland).  Quite some time ago (October, 2009 if Flickr is to be believed), the Sewing Lawyer used the scraps left after cutting out the lining pieces for Burda 7731 for a top (left).

Truly, this coat has been a long time in the making.

Hallelujiah for Finished Objects!

Saturday, January 2, 2010

Burda 7731 Coat - sad, sad news

After a short, much too labour-intensive and difficult existence, Burda 7731 Coat, latest sewing project of The Sewing Lawyer, was removed from life support on New Years Day, 2010.

Burda 7731 was a lovely idea - a long, elegant, flared overcoat with cut-on sleeves, a high and sinuous pleated collar, cute button-on belt and in-seam pockets.  Burda 7731 was an eagerly-anticipated addition to the Sewing Lawyer closet - the fabric a lustrous and waterproof taffeta in iridescent teal, the lining a satiny and elegant ikat-like floral print.  With light and warm interlining of Thinsulate, Burda 7731 would have been the go-to workhorse of a winter coat for wet/snowy workdays.  Burda 7731 will be sadly missed.

Burda 7731 Coat had a difficult birth.  A few hours into its existence, a congenital pattern defect needing immediate, experimental surgery was discovered.  The surgery was successful but Burda 7731 would continue to struggle.  Sadly, the Sewing Lawyer's choices for Burda 7731 only added to its (and her) misery.  The in-seam pockets were a disaster given the thinness of the fabric and the lack of any stabilizing for the pocket opening.  Further surgery was needed to install piping at the openings.  The fabric was also constantly prone to puckering at the seams no matter how much The Sewing Lawyer adjusted stitch length and tension, used "taut sewing" (holding the fabric behind and in front of the needle, applying tension to the fabric as it passes through the needle but without pulling it), and labour-intensively edge stitched each and every seam. This is why even though Burda 7731 Coat was within striking distance of actually being finished, there will be no photos.*  The Sewing Lawyer has her reputation to uphold and Burda 7731 Coat was, at the end, a sad wrinkled thing. 


Although The Sewing Lawyer is one seriously stubborn person with lots of experience in curing apparently-fatal defects which have cropped up in many of the older sibling sewing projects of Burda 7731, it became clear with the end of 2009 and in the clear (okay, snowy and gray) light of January 1, 2010, that Burda 7731 would never recover, that further surgery would be extremely painful for all concerned, and that it would not likely succeed.  And that is why, after much anxious thought and with sincere regret for the iridescent teal taffeta-like fabric and all that sewing time which are now lost forever, The Sewing Lawyer decided that she had to let go.

R.I.P. Burda 7731 coat.

*  As Vicki has pointed out, a picture is available on my Pattern Review.  That's for the scientific interest of other sewers who need to know why they must run far away from Burda 7731 so as to avoid having this fatal condition attack one of their own sewing projects...  But the point of this post is only to mourn the brief existence of Burda 7731 Coat.  (Closed casket, ya know?)

Monday, November 16, 2009

Back where I started

Ripping and testing and re-sewing are not my favorite sewing activities, but sometimes you just have to force yourself to do them.  In fact, I rip and re-sew quite a lot because I'm a perfectionist.  However the ripping done on this coat is far beyond what I'd normally expect to do in a given sewing project.

I basically wasted 2 sewing days ripping out what I had sewn, making changes and then advancing back to where I should have been last week.  Now I have a functional gusset and a lining that shows more of the promise of the coat-to-be.

After I figured out, using the muslin, where the gusset needed to be and how big it should be, I transferred the necessary details to my pattern and then to the side fronts and backs of my partially-sewn lining.  Of course, this meant I had to rip.  While I was taking out the side/underarm seams, I decided that at the same time I would have a try at fixing another problem with the lining as first sewn - the sleeves felt too bulky and too narrow.  So I also removed the Thinsulate from the sleeves.

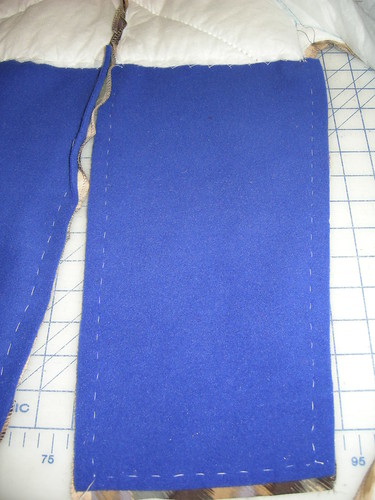
I decided to replace the Thinsulate with some 200-wt polar fleece.  Here you can see the new pieces, hand-sewn into place.  Yes, you read that right!  The sewing lawyer (who has been known to wonder what those thin and sharp metal objects known as "needles" are for) basted these babies in by hand.  I did it because the sleeves, which are slightly on the bias since they're cut-on, were stretching longer and narrower when machine-basted to the underlining.  When I realized how much narrower they were than the just-cut pieces of polar fleece, I knew I would get better control and have less reason for more growling in the sewing room, if I just bowed to inevitability and basted them in by hand.

I recently bought a life-time supply of white basting thread from a charming lady who runs a tailoring supply store in Montreal.  I own needles.  I have no excuses!  I didn't even mind the hand-sewing activity.  I laid the very bulky coat out on my cutting table, as you can see in the picture, and did the sewing while standing there.  It was quite Zen...  Changing the underlining to a less-bulky one, and paying attention to the stretch factor solved my too-narrow sleeve problem very nicely.

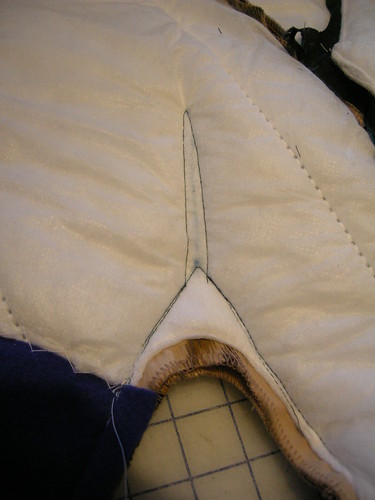
I then stitched around where I would alter the underarm area to insert the gussets.  Pictures speak louder than words, and here is one that will explain what I did.  Between the lines of stitching, you can see the gusset marking.

I sewed the new underarm seam up to but not over these lines of stitching.  Then, I slashed up between the lines of stitching. 
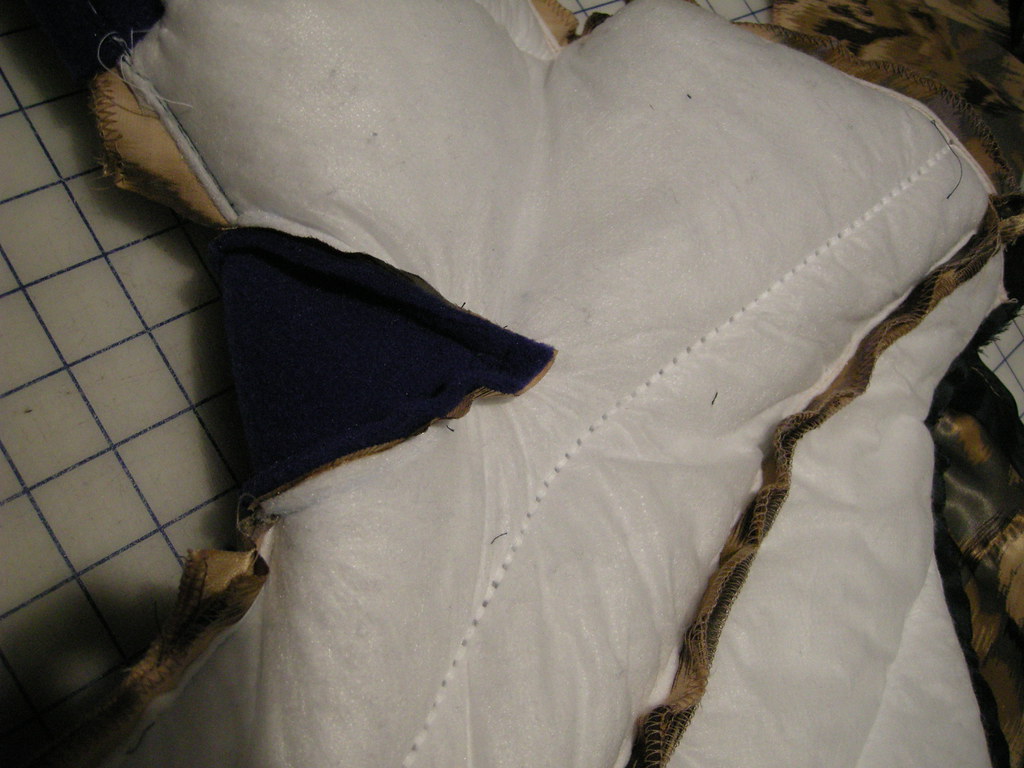
After that, it was relatively easy to sew the gussets into place.  Don't be fooled - I didn't do it in one pass.  I went over the pointy ends several times to ensure that on the inside, there were no little raw edges peeping out.  I am relatively confident they will hold, and if they don't I have that "needle" thing and am not afraid to use it!

And look, now I can move my arms!  This modification should be invisible in the finished coat.  But what a difference it will make...

Thursday, November 12, 2009

Retrofitting the coat pattern - next time, make the muslin first!

In response to my plea for help, several of you responded (thanks!!) to reassure me that gussets are not really all that mysterious and that I could do it.  I am not all that afraid of the sewing of the gusset - what has required more mental effort is the notion of exactly where the gusset should go, and what shape and size it should be to make this coat actually wearable.  This problem brought the sewing on the actual coat to a crashing halt.  I backed up to muslin stage.  If only I had started with such a step, instead of having to down tools in mid-project to "fix" a bad pattern!  (Will I ever trust Burda again????)

I assembled a muslin out of a rather stiff canvas-y fabric so that I could test my gusset-making skills.  I've taken photos along the way to document my attempts, failures and "progress".  It does not really feel like progress when you start to progress from 3 steps back!

Here are my muslin demo pictures:
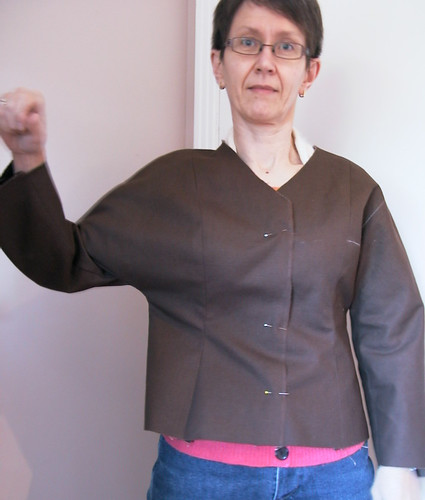
On the right sleeve (to the left in the photo) you can see the original design.  I have no range of motion because the arm attaches to the body of the jacket far too low.  When I try to lift my arm, the body of the jacket comes right along.

The next step was to figure out how far into the jacket body to slash so that I could insert a gusset.

I did this very unscientifically!  Wearing the muslin and looking in the mirror, I took a white marking pencil and located the top of the slash by feel/instinct where it seemed that if opened up to that point, the "hinge" connecting the sleeve to jacket body would give me enough room to move.  Then I had my husband figure out where the corresponding point would be on my back.  
This turned out fine, somewhat to my surprise.

On the left sleeve (right of the photo) I have inserted a gusset which turned out far too big.  I did not modify the original underarm seam.  With that very low underarm, I needed the gusset to be this size to achieve an acceptable range of motion for my arm.  However, it is UGLY!


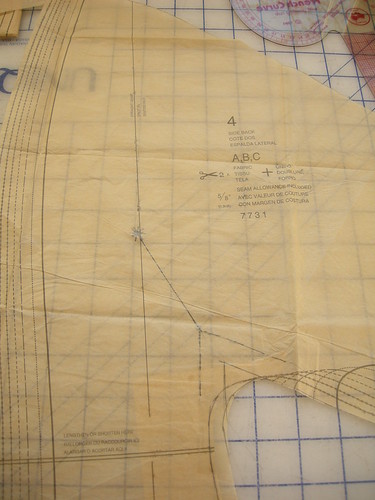
On to my next experiment.  I realized I could turn the original upside-down U shaped underarm seam into a higher pointy-cornered seam.  In the next photo you can see my pencilled changes on the pattern piece for the back, including the line up into the body of the piece, which marks the slash where the gusset will be inserted. The effect of this change is to raise the insertion point for the gusset, meaning the gusset will not have to be quite so wide to give the same range of motion.

And here you can see the result of the smaller gusset (inserted in the right sleeve, to the left of the photo).  It's a little cleaner looking than the big gusset on the left sleeve.

I look a bit happier with this experiment now.

Wish me luck translating this change, and a few others I thought of while puzzling over this problem, into my actual coat.

Monday, November 9, 2009

We have a problem!

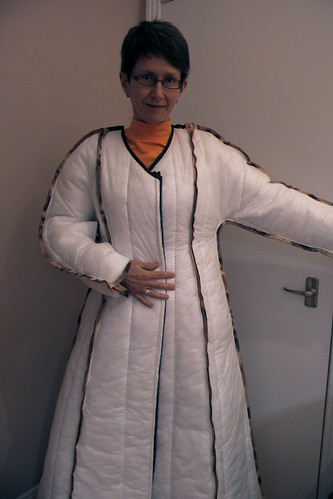
My husband says my latest project, in progress, looks like a cartoon drawing of a coat.  Proof is in the picture to the right. 

I'm not so troubled by the look - what you see is the Thinsulate, which has been sewn to the lining and facings.  It'll be covered by the fashion fabric, once I get further along.

My problem is the fact that the sleeves leave me with virtually no mobility.  The depth from shoulder point to underarm is about 11" (28cm) which is FAR too much.  The arm parts from the body just a bit higher than my bottom rib.  Methinks I will have to insert a gusset.  This does NOT make me happy!

I'll have to read up on gussets.  To free up the sleeve from where it is tethered next to my ribs, I figure I'll need to slice at least 9cm (3.5") up on either side of the underarm seam.  I'll first open the seam, figure out the placement for the cut, and sew a line of stitching on either side to anchor the lining fabric and Thinsulate.  I'm not looking forward to the sewing of the gusset.  I think I'll underline it with something less bulky than the Thinsulate - perhaps some 100 weight Polartec. 

What say any of you experts reading this?  All advice including references to articles or books will be gratefully received.

Saturday, November 7, 2009

Two Projects

So here are two projects in the queue chez The Sewing Lawyer.  The first is my next winter coat.  Winter is, they say, coming again this year, and we must Prepare.  Today it was below 0 degrees (celsius) so they must be right.  I do own several winter coats already.  I made a nice wool one last year, taking part in Marji's Great Coat Sew-along.  It is very warm.  And. Very. Heavy.  Despite the fact that it is really not much more than a single layer of fabric (OK, plus a wind-stopping interlining of mystery fabric, and Kasha lining).  It was a magnum opus of sorts.  I used a vintage Vogue pattern and everything, and it wasn't even my size.  Oh, and the pattern would not have made a winter coat that would go over anything more bulky than a light cashmere twinset.  So I did have to modify.  You can read about my coat project here and here and here and here. For those not interested in the long tale or details, here is my finished coat.  Yes, that is heavy wool coating cut on the bias.  It really worked! 
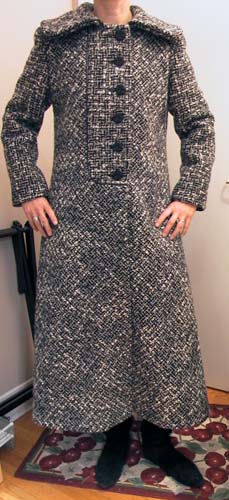
This year I thought I'd make a different kind of coat altogether.  One that would be presentably elegant, would cover any wardrobe item I might choose to wear in deepest winter, would be warm, but would be L I G H T.  This requires abandonment of heavy wool, and the embracing of impermeable synthetic fabrics and Thinsulate!

For my pattern I chose a Burda envelope pattern, number 7731.  Like my heavy wool coat, this one is quite long and has a nice easy A-line.  It has an interesting collar.  Unlike my heavy wool coat, it has no difficult-to-sew details.  The sleeves are cut-on.  It has princess seams.  It does have pockets, unlike the ostentatiously impractical Vogue Couture pattern. And it will not be heavy! 

I had a marathon cutting-out session a few weeks ago.  But I'm having trouble getting into this project.  More to come.

I'm also going to be making men's shirts.  I've asked my husband how he would like to be referred to here - he didn't go for "Mr. Sewing Lawyer" so "my husband" he shall remain.  Anyhow, he has designed some fabric for himself, which he had printed up at Spoonflower.  The motif is trilobites.  These ones are from the Ordovician era (488 to 443 million years ago, give or take).  In our city (Ottawa, Ontario, Canada), the sedimentary rock was laid down in this time period and fossils of trilobites and other creatures of the time can be found, if one looks carefully.


The fabric is Spoonflower's bamboo and cotton blend rayon ($27US per yard).  It's very smooth and nice.  I haven't prewashed it yet but will do so and report on shrinkage.

My husband created the image using rubber stamps cut out of gigantic pink erasers.  The stamped images were then coloured with chalk pastel and scanned.  He manipulated the scanned image using PhotoShop.  Stencils were also involved.  The resulting print is very attractive, and it's going to be my job to turn it into a truly one-of-a-kind shirt.  Stay tuned.