Up until now I was wearing exercise gear which had really seen better days. I was a YMCA member in the 1990s and sewed a bunch of tights/leotard combo outfits for my step class (stop laughing!). Time for some new stuff.
In Montreal at PR Weekend one of our big draws was that Jeanne Binet and Émilie Fournier from Jalie Patterns were in attendance, and would do a sewing demonstration for us. Jeanne set up her Pfaff Creative 4.0, and BabyLock serger and coverstitch machine and talked pretty much nonstop about what she was doing, with Émilie translating as she went. She had prepared 6 garments and partially sewed them up to demonstrate the techniques and construction methods needed for each. One is a new pattern (to come out before the end of September, we were told) for a dress with two bodice views. This pattern will unveil a new technique for finishing and binding the edges (neckline and armscye) of a stretchy garment, without using elastic. Jeanne gave us the preview, and it is a really wonderful technique that produces a stable and professional-looking finish and, best of all, you do not need to fiddle with any elastic.
The next day, Jeanne and Émilie took us to three of their favourite stores in Montreal for buying stretchy exercise/technical fabrics - Suzie Spandex, Stretch Text and Tonitex. These are all located on St. Laurent Blvd, north of highway 40. I had been to Tonitex before but would never have found the others which are located upstairs in a nondescript building.
You may be able to guess where I'm going with this. Yes, I purchased some stretchy fabric. In fact, I sort of went overboard...

But my first piece of fabric purchased in Montreal has been sewn up, along with a good chunk of fabric I probably bought 10 years ago. To the right is the completed outfit.
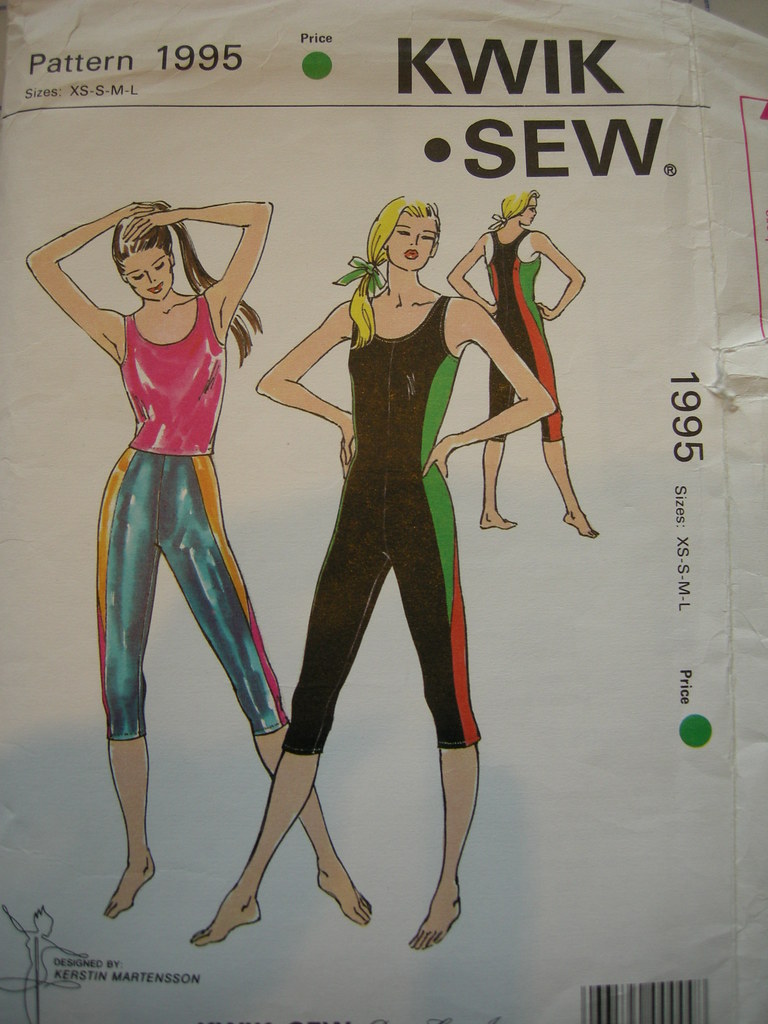 This is from three different Kwik Sew patterns which I have had for many years. The top is from KS 1995, which is actually 20 years old (ca 1990 or as KS amusingly styles their copyright date, MCMLXXXX). The unitard is rather fetching, no?
 The shorts are from another 1990 beauty, KS 2005. Gotta love the heavily shoulder-padded T-shirt (not) but the tights are classic - and super easy to make with only two seams).
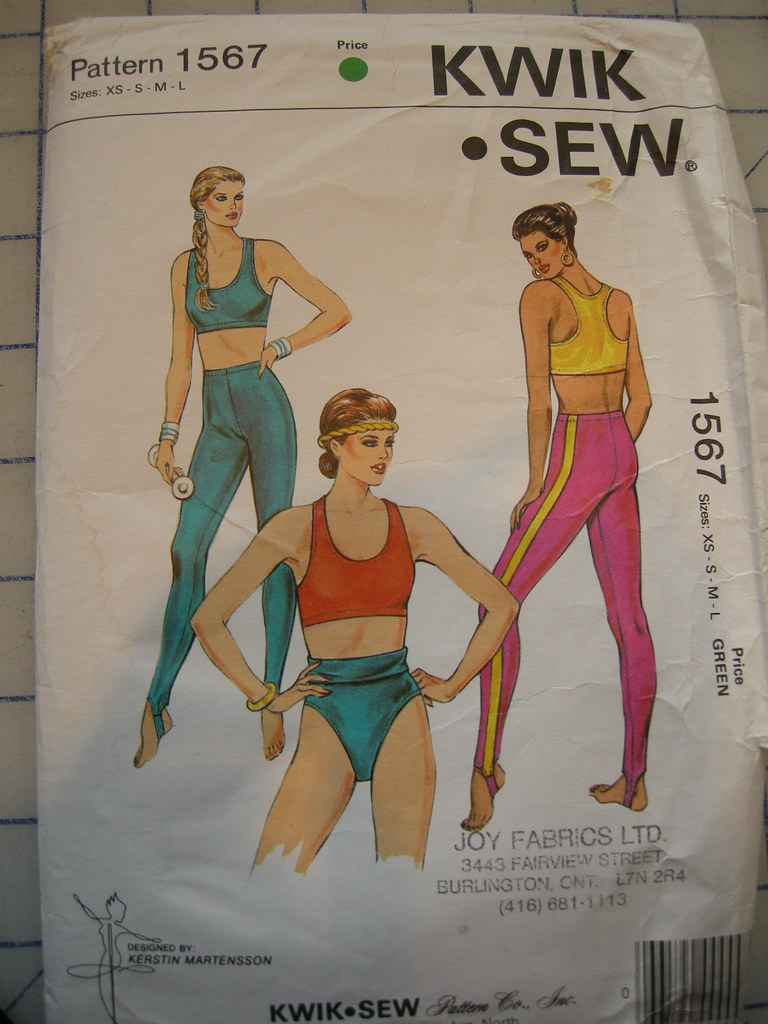
 And there's a sports bra too, which is made from KS 1567 from 1986. It's very Jane Fonda.
I bought the patterned jersey in Montreal. It seems to be a sort of cottony blend and only has moderate stretch. The rest of the outfit is some lovely supplex nylon/lycra. I love this stuff. It feels soft, never fades, and wears like iron.
I used Jeanne's new technique to bind the edges on the tank. Here are some photos.

Sew the strip in a loop with a tiny seam. Mark the quarter points on the loop and do the same on the edge you are binding. Then serge the binding loop to the garment, letting the knife just skim the edges without cutting off any fabric (Jalie and KS both use narrow seam allowances). Ensure that the binding will curl towards the seam (as shown to the left). If you want the binding to be visible on the outside of the completed garment, sew it to the WRONG side of the fabric, as I have done. If you sew to the right side, your binding will be inside.
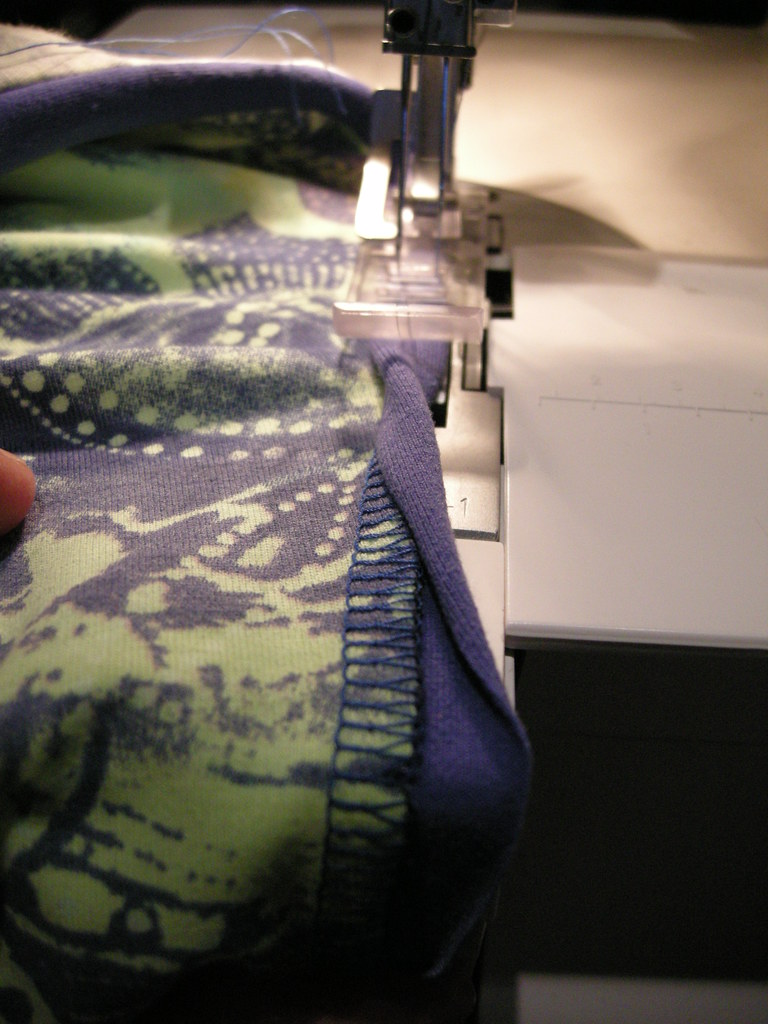
 Smooth the serged seam towards the binding. Then flip the binding over the seam allowance - it should just cover the stitching. The last step is to fold the entire thing along the seam line, and using your cover stitch machine, topstitch neatly. I hope you can see how this works from the photo to the right.
This is a wonderful finishing technique for knits. To the left is a close up of the completed top.
No comments:
Post a Comment