Showing posts with label sheath dress. Show all posts

Sunday, April 17, 2011

More about the sheath dress

Thanks to those of you who signed up to follow my blog (now at 209 210, woo hoo!), and for all the very nice comments on my last post!!  Getting your comments and feedback is the nicest part of blogging so please keep them coming!
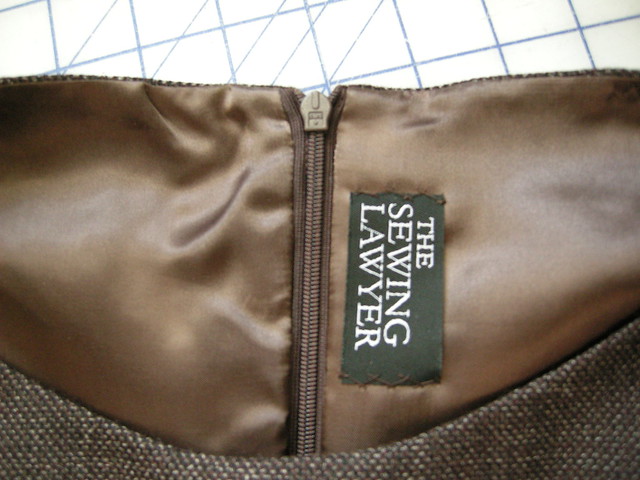
 I was going to write a tutorial for how I finish a facing around a zipper.  However, there are several excellent tutorials already illustrating this technique on Sigrid's sewing tutorial site (which is a superb resource, if you don't already know it), so I decided not to reinvent the wheel.  

In particular, I recommend Sherry's clearly-illustrated tutorial.  This technique can also be used to finish the top of any zipper opening.  Kathleen Fasanella has published a great set of instructions for finishing a lapped zipper and centred zipper in the same basic way.  Another variant is the faced fly front zipper - I shamelessly recommend my own tutorial for that, which is also linked at Sigrid's site.

To the left, you can see how neat and clean the inside is, as a result of this easy technique.
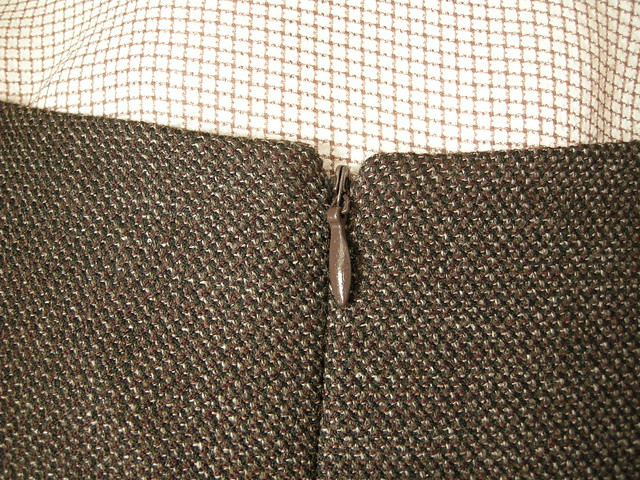
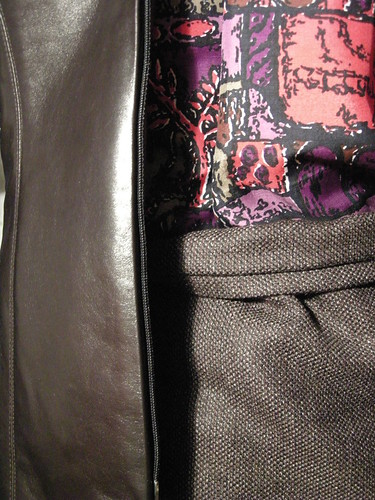
The zipper looks as clean from the outside.  This photo also shows the fabric from my sheath better.  At least on my monitor, the colours are accurate.  The fabric is slightly tweedy.  It's got the extremely dark coffee colour of my leather jacket embedded in it along with a tan and a rich reddish brown.  The fabric is a suiting weight wool, with a tiny bit of lycra (not useful in this sheath, since I underlined it with silk organza).


Here's another detail from my dress.  Understitching at the neck and arm hole edges ensures that the lining never shows.  (Topstitching does the same thing, but understitching is invisible from the public side of the garment.)  If not understitched, the inner layer, especially if made from a light-weight fabric as here, would roll to the outside.  Once understitched, the seam attaching the lining to the dress fabric naturally rolls instead to the inside, as you can see at left.  Understitching is also great for a faced edge, since facings also tend to roll to the outside.

Understitching securely attaches the enclosed seam allowances to the inside layer.  To understitch a curved edge like the neck or arm opening of my dress, first trim and grade the seam allowances.  I'm not a fan of clipping because little corners may form where the clips release the tension.  Trimming results in a smooth curve.  If you trim aggressively (leaving about .7cm or .25", or even less) the seam allowance will easily stretch enough so that the edge won't pucker or refuse to press flat.  If you are understitching, there is no reason to worry about the small seam allowances compromising the strength of the seam.
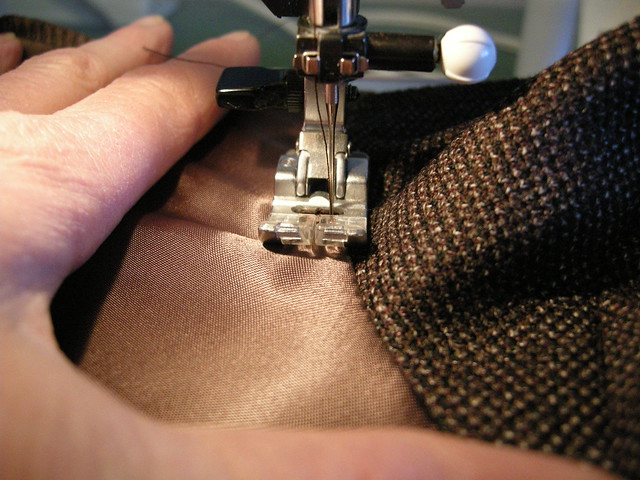
The secret of understitching is to keep the lining or facing as flat as possible on the bed of the machine, forcing the seam allowances underneath to stretch into the curve.  Don't sew straight ahead.  Instead, rotate the piece as you sew around the curve, keeping the stitches close to the seam (and checking to ensure that the seam allowances lie under the inside layer so they will be caught in your stitching). In the photo at right, as I sew I am spreading the lining flat with my left hand, and guiding it through the needle by rotating the garment clockwise.  I do not press the seam at all before understitching.  While sewing I keep spreading the lining away from the garment fabric to ensure the lining isn't folding over on itself.  The goal is to ensure there is no distortion in the curve.


I used the triple stitch zig-zag on my latest sheath dress.  This stitch really ensures that the trimmed seam allowances are well-attached to the lining.  Of course it's a pain in the neck if you have to pull it out (ask me how I know!!).  You can also understitch with a straight stitch, ordinary zig zag, or by hand if you are so inclined (as I apparently was when making my 2nd last sheath, shown to left).

If you don't already use this technique in your sewing, I highly recommend it!

Saturday, April 16, 2011

Another sheath dress

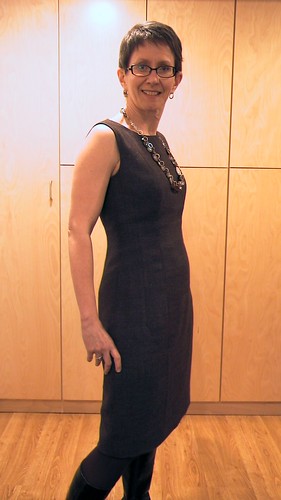
The Sewing Lawyer cannot have too many sheath dresses, since she has a pattern that fits.  For years, a simple dress with no waist seam that fit everywhere was an elusive goal, given a hip measurement that is about 2 sizes bigger than the waist or bust.  PatternMaster Boutique to the rescue.

PMB produces a pattern that is a decent but not excellent fit.  It needs tweaking in the pattern editor (CAD) component of the program.  My goal for the program is to produce basic blocks, like this dress and my princess seamed skirt, that I can make over and over as is, or adjust for different styles.

For this sheath, I started with a princess seamed dress.  This is a simple shape that as originally drafted, had both a shoulder princess seam and a second seam that corresponds to the second waist dart in front and back.

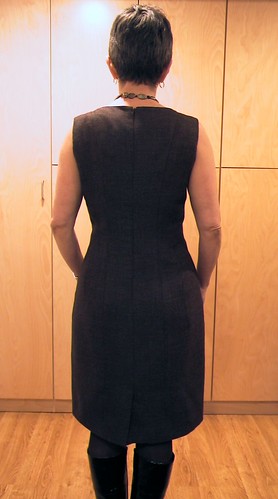
To the right are the finished pattern pieces.  One of the standard changes I make is to take a little wedge at the CB waist, since PMB drafts with a dead straight CB seam.  I'm not straight there, are you?  As you can see, I converted the second princess seam back to a fisheye dart in the front.  In the back, it's a long dart that ends in the armscye.  The hem is also slightly pegged so it looks less blocky.

So this is at least the third sheath dress I've made from the pattern.  You last saw it here.


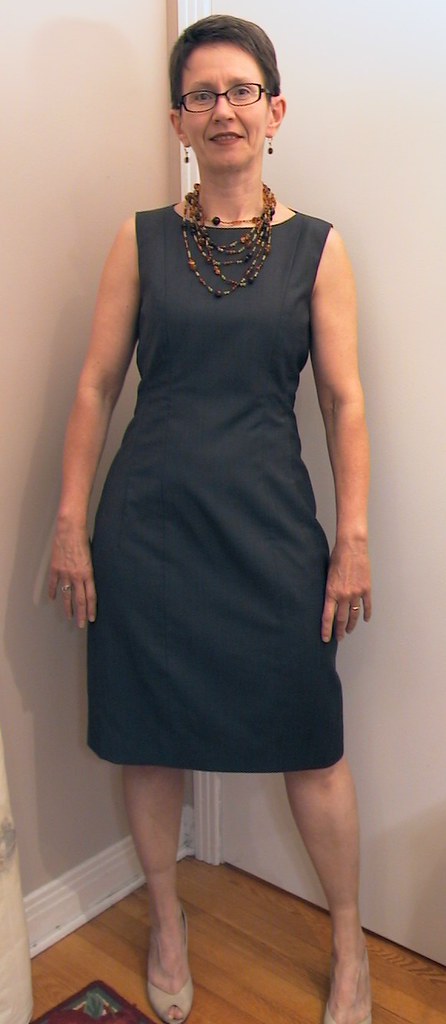
Here are the pictures of my most recent iteration of this dress.  So comfortable!  It has about 2" or so of ease at the hip.  

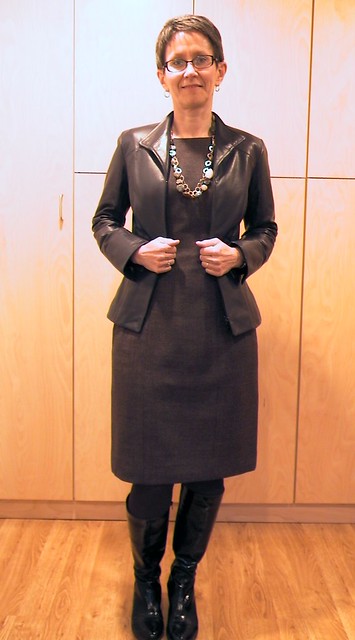
I think it looks pretty good with my leather jacket.  

I wore this to the Haute Couture Club of Chicago luncheon and fashion show last Sunday.  But I had not correctly anticipated the weather.  It was 85 degrees F (29.5 C)!    

Wednesday, March 16, 2011

Coordinating from stash with TNT patterns

So my leather jacket completion project is moving along.  The body of the jacket is finished except for the topstitching which will require a clear mind and a steady hand.  Thus far I haven't felt up to it, so I started on the lining.  I have to say, making the lining is the least fun part of sewing a nice jacket.  But I can see the finish line so am working through my lack of interest.


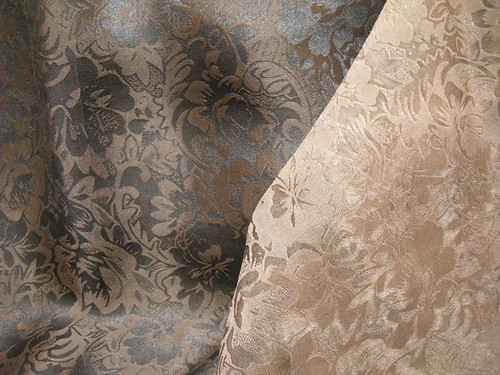
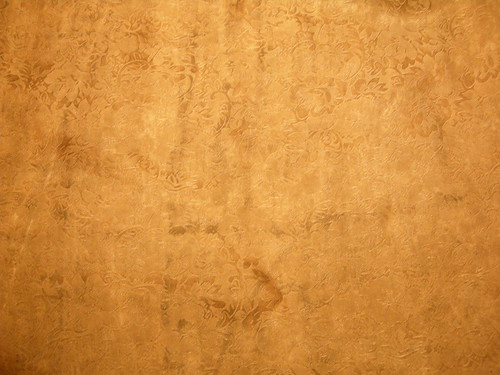
The lining fabric is a silk and rayon blend from Fabricland which I think they were marketing as "dirty silk".  Here's a close up of the fabric.  You can see it's a floral jacquard weave and the right side is brownish-black, or blackish-brown, in an interesting kind of way.   The lighter side is the wrong side, and it really does look "dirty" - the dye is uneven and smeared as you can see below (the real colour is less yellow than the photo below, and less pink than the photo to the right).
The dark side looks great with my "navy brown" and buttery soft leather.

My thoughts then turned to the inevitable question:  "But what (besides jeans) can I wear this with??"  I went burrowing into my stash, where I found some likely candidates.

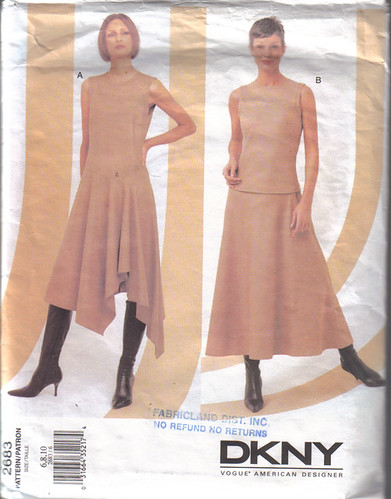
My first thought was to identify a suiting weight fabric and I came up with a really soft and drapey, slightly tweedy pure wool that gives just the right overall effect of rich brown but is really a complex mix, in a tiny woven pattern, of at least three different browns - one really dark and cool in tone, the second a rich red-brown, and the third is a mix of beige and dark brown.  I have just under 3 metres.  I'm going to make my PMB sheath dress (again) and a pair of wide-legged pants.  I have had great luck with  Vogue 7881 which I have made three times already.  There should be enough left after cutting these 2 pieces to make my favorite bias shell, from an OOP Vogue, 2683.  Like 7881, this is a real TNT (tried 'n' true) pattern for me since I have made the top at least 4 times (and the skirt at least 3 times).  The dress/top combo is 100% appealing to me, but the dress leaves me completely cold.

But what else to wear with these future elegant and flowy trousers?  In my silk bin, I found many possibilities, but the one that has caught my eye is a refashioning project.  My super-shopper friend found a Thai silk skirt in one of her second-hand haunts which she gave to me while extracting a promise that I actually do something with the fabric.  The skirt is a floor length, front-buttoning dirndl in an interesting print.  The colours are unusual for me since I don't gravitate towards purple, but I like that it's combined with a cool beige, black and a couple of nice pinks and reds.  There is lots to make a little shirt.  I could reuse the front button detail since it has really gorgeous tiny self-fabric loops and covered buttons, but right now I'm leaning towards the top from Simplicity 2938.  I've made this one before too.

To the left is a sneak peek of the jacket together with the two coordinating fabrics I'm planning.  What do you think?

Monday, October 18, 2010

A finished object

In the aftermath of the Fabric Flea Market, I did muster enough energy to finish a sheath dress which had been in the planning for several years, and in the execution for several weeks.

I had purchased the fabric for this dress a couple of years ago on a flying trip to the Wool House when I was wearing  this jacket:


(I pause here to note that I hate Windows Live Writer.  When I first used it, it was brilliant.  Then I got a notice to update it.  Now I hate it.  I can no longer figure out how to format text around the photos – the previous version worked perfectly.  I think I’m going back to editing using Blogger.)

Back to the regularly scheduled blog.

As I was saying, I was wearing that jacket, which I seem to have made in November, 2007.  I know that because that's when I reviewed it on PatternReview (here).  I was having trouble finding pieces to coordinate with it – the fabric has some dark blue, some light blue, some creamy beige, but putting any of these colours next to it looked strangely wrong.  I dashed into the Wool House and asked for advice.  The man in the store led me straight back to the Zegna shelves and pulled out a bolt of the fabric I bought for my new finished object; this dress:


This fabric is thin, smooth, and I think it’s a blend of wool and mohair.  It has black and a grey-ey blue-y green-y threads and is an impossible-to-describe colour which somehow goes perfectly with that jacket.

This dress is made from a pattern I developed using PatternMaster Boutique or PMB.  I wrote all about it in a pattern review here.  I was thrilled to have a sheath dress that fit and that I thought looked pretty good.  I've never found a commercial pattern that did these two fairly simple things so this one is a keeper.

As soon as I bought the strangely-coloured fabric I knew it was going to be this dress.  Well, it had to be, because it was damnably expensive fabric and I only bought a small amount (I think 1.2 metres).  You see, another other great thing about this pattern is that it's a true fabric miser.

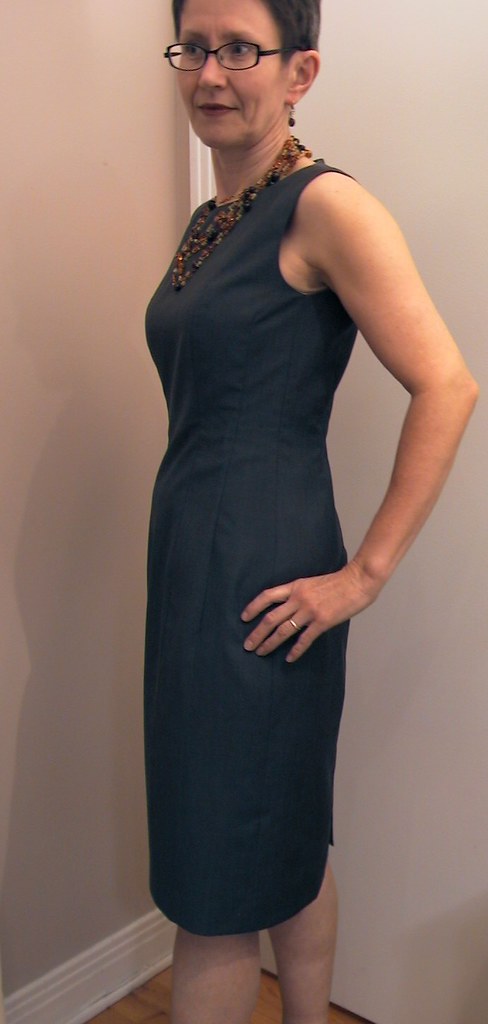
In this picture, the dress looks ripply and puckered.  I swear it does not look like that in real life.  Here's another picture, a sort of side view.  The pattern has lots of shaping seams - princess seams front and back and side seams and long shaping darts besides.


In the next pictures you can see a bit of the fabric up closer, if you click to open them.

They were taken in natural light so are somewhat truer to the actual strange colour which overall looks more green than blue.

Notice my not-perfect hand understitching at the neck edge.

To the right is the shoulder seam with princess seams meeting nicely.


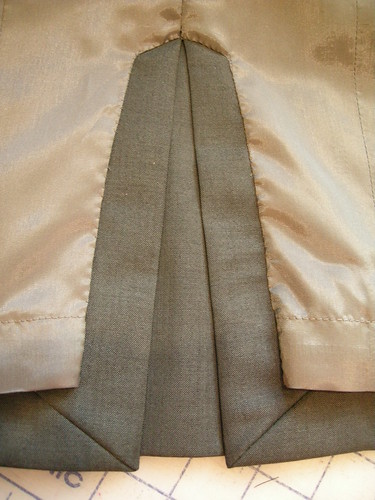
The CB sports a simple slit opening for walking.  Notice the mitred corners.  The lining (Bemberg) is hand felled to the facing.  The dress is underlined with silk organza.  I decided not to serge the raw edges at seam allowances and hem to avoid show-through in the pressing, but found some black lace at the Fabric Flea Market which I used to finish the hem edge.  


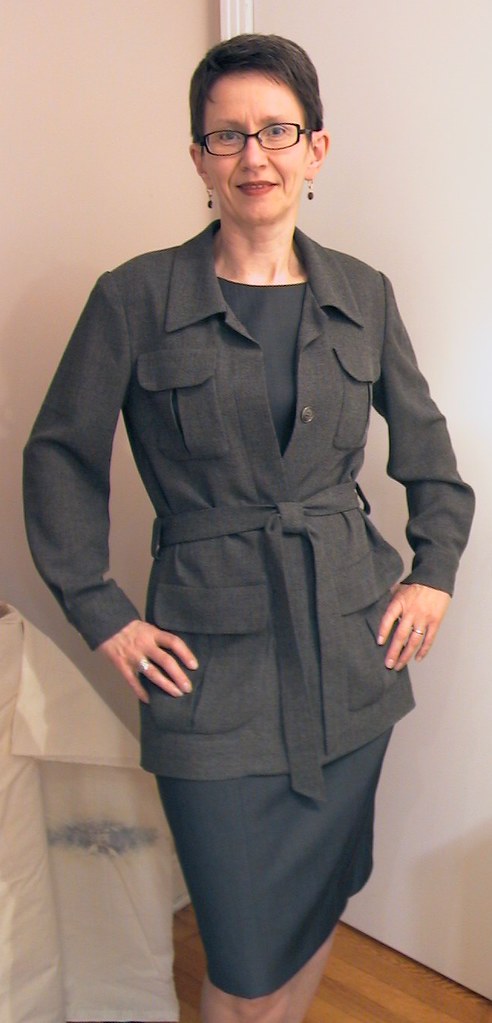
And finally, it looks good with a jacket (or two).