
However, just as with the little top that is included in the pattern, a muslin revealed some fitting problems that needed correction.
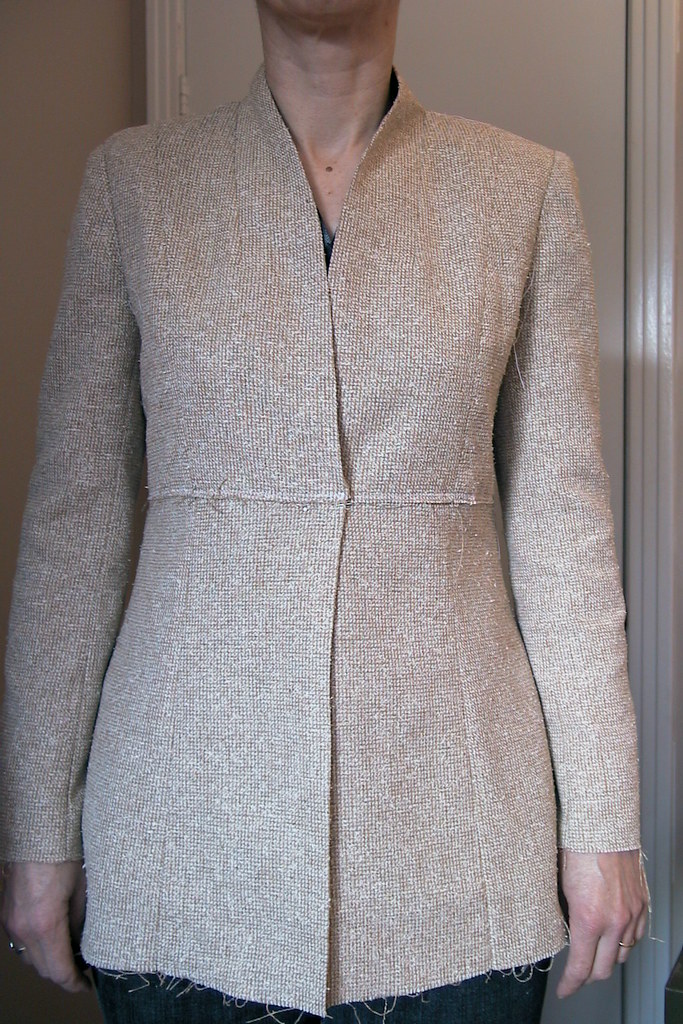
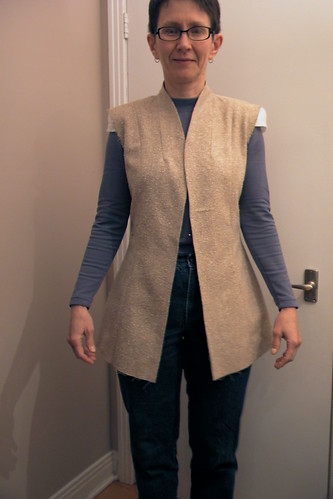 Here is the un-altered pattern without sleeves, cut out of a suitable jacket-weight "junk" fabric (and this one really is headed straight to the garbage after I'm done with it).
This muslin reveals again that the CF area is too long for my body. See how it falls away from the CF at the hem? That's the clue. If I pin it at the waist, as if buttoned, I can make the front edges vertical, but then it sags unattractively above the waist, as you can see in the next picture. I need another of those tucks in the neckline area (just like I did in altering the little top).
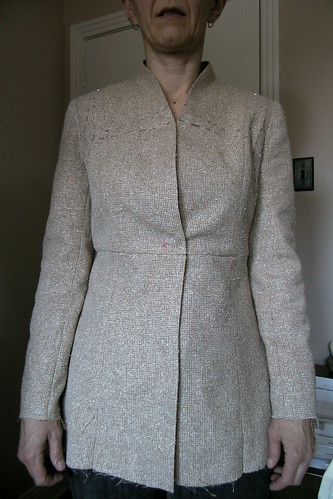 Also, it is too wide across the front at the shoulder level - see those vertical wrinkles? The shoulder pads are too big, but there's a lot of extra width and the wrinkles get worse when sleeves are added.
What appears (at left) to be a seam at waist level is actually a tuck - the hip shaping on the jacket was too low, and since the jacket itself is extremely long, I shortened it by taking it up 2cm (.75").
 To fix the sagging and excess fabric, I started pinning out tucks. To the right you can see what it looked like when I had finished doing that.
The horizontal tuck takes a whopping 3cm of length out of the CF above the bust! The vertical tucks (parallel to the armscye) take out another approximately 2cm of width on each side.
This photo also shows how long I plan to make the jacket. What do you think?
I marked these tucks directly on the muslin fabric again (as you can see in the first, saggy picture). Then I transferred them to the pattern tissue.
Here's how. (Click on any of the pictures to biggify them.)

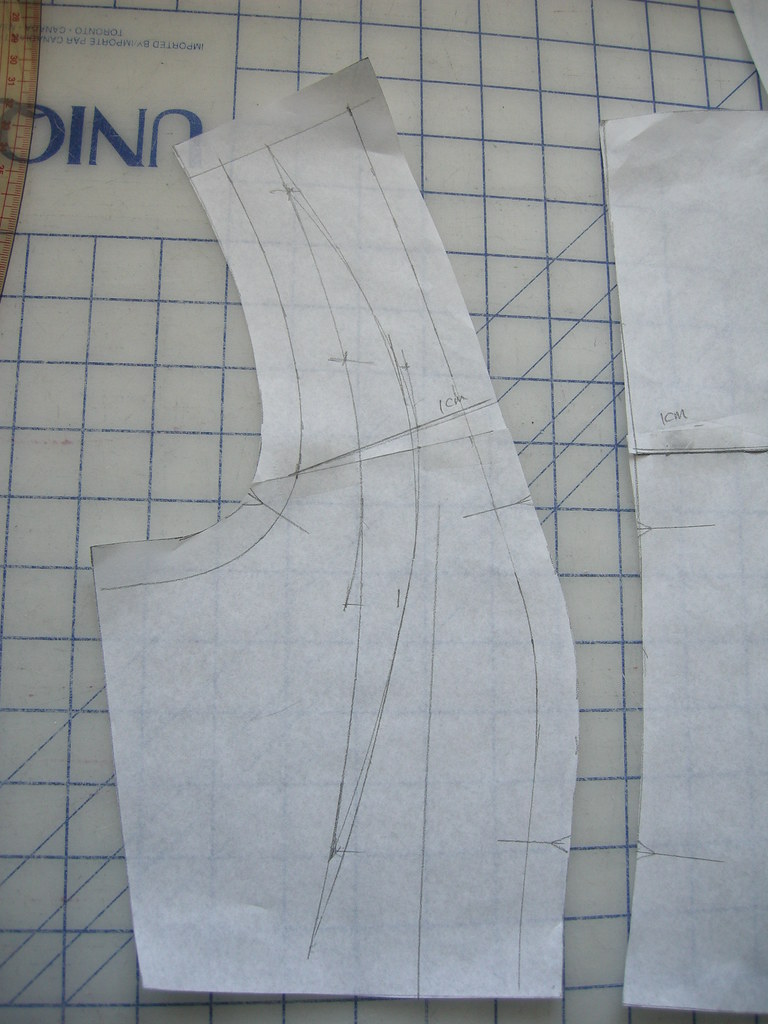
 First, I traced the upper part of the front pieces. On the CF piece, I started by folding the dart closed and marking the tuck/wedge. I then opened the dart, overlapped the tuck, and re-drew the dart so its legs were straight, as you can see in the photo to the right.
 I also had to take care of smoothing out the neckline to a pleasing curved shape, and cut off the little point at the princess seam that was created by folding out the wedge.
That was easy! The side front alteration is way more complicated.
 Again, I started by drawing the shape of the tucks I had pinned out onto the tissue. The crescent tuck is rather bizarre looking!
The next step (at right) was to cut along the marked lines.
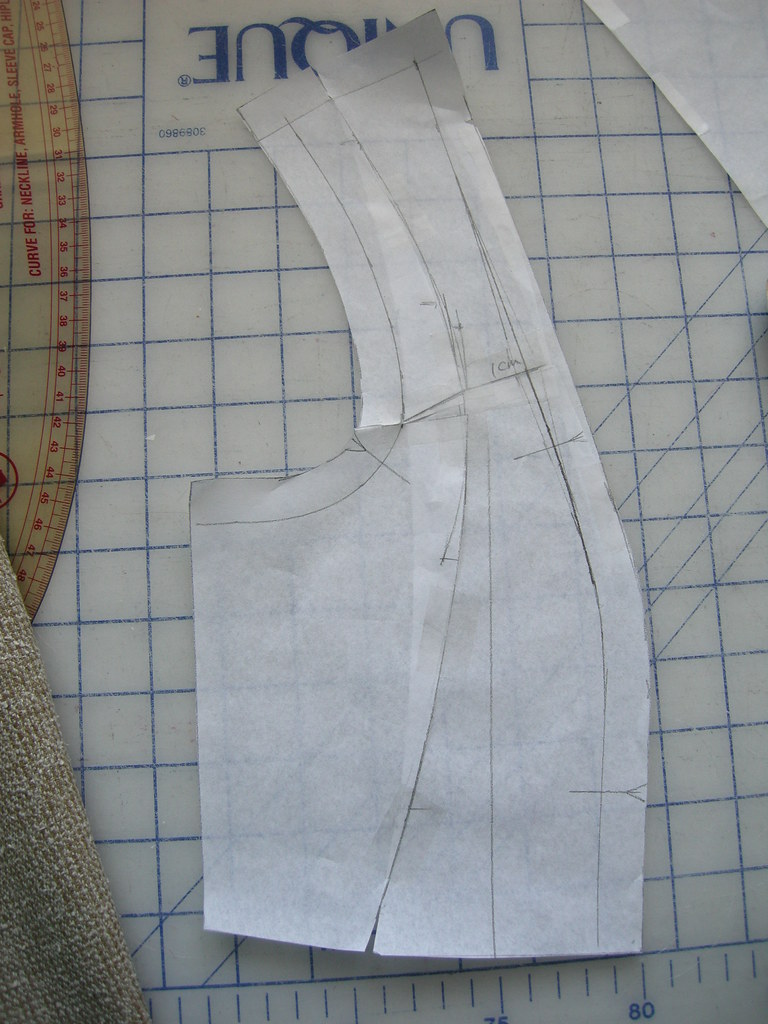
Again, I had to true up the princess line. The little bit I had to add here was about equivalent to the little V I had removed from the CF piece.
I knew this ought to work, but wanted to test it in fabric before cutting into my good fabric. So I took the muslin apart enough to sub in new upper front pieces.
No comments:
Post a Comment